| Div | ||||||
|---|---|---|---|---|---|---|
| ||||||
In This Article
|
Overview
This article covers the process to add public IP addresses (IPv4 & IPv6) to the Teams Trusted IP Address list. The trusted IP address list is used by the Teams client to determine if the user's device is on the corporate network.
| Info |
|---|
NOTE If you obfuscate your public IP addresses internally by using a proxy or other service, you cannot configure emergency calling. The Teams client uses public IP addresses to determine whether it is located on the corporate network. |
Add a Trusted IP Address
Teams Admin Center
In the Teams Admin Center, browse to: Locations > Network Topology > Trusted IPs (tab)
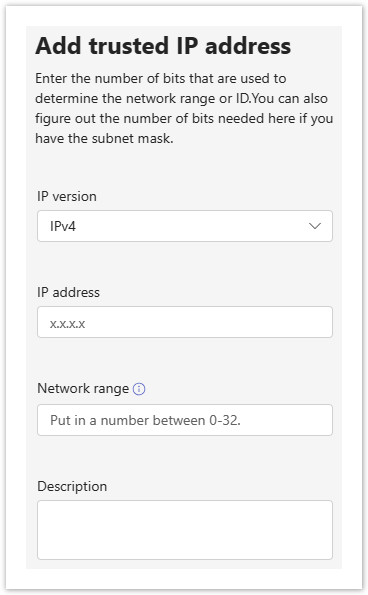
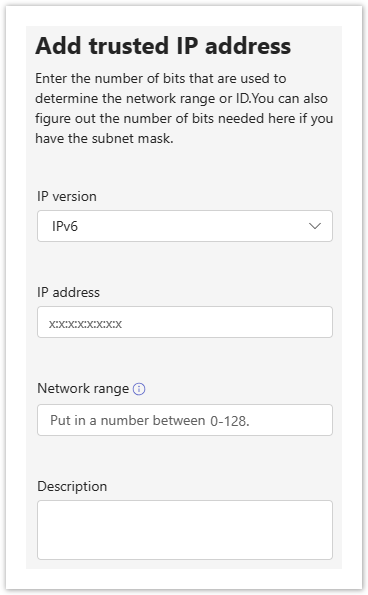
Click Add, and in the fly-out window, enter the following:
- IP Version: IPv4 or IPv6
- IP Address
- Network Range (CIDR)
- Description
PowerShell
Trusted IP Address Commands
- New-CsTenantTrustedIPAddress
- Get-CsTenantTrustedIPAddress
- Set-CsTenantTrustedIPAddress
- Remove-CsTenantTrustedIPAddress
PowerShell examples to add IPv4 & IPv6 trusted IP addresses.
| Code Block | ||||
|---|---|---|---|---|
| ||||
# Define the IPv4 Trusted IP Address Properties
$IpAddrProperties = @{

	Description = "East Coast HQ"
	IpAddress 	= "8.8.8.8"
	MaskBits	= 32
}

# Add the new Trusted IP Address
New-CsTenantTrustedIPAddress @IpAddrProperties
|
| Code Block | ||||
|---|---|---|---|---|
| ||||
# Define the IPv6 Trusted IP Address Properties
$IpAddrProperties = @{

	Description = "East Coast HQ"
	IpAddress 	= "2001:4860:4860::8888"
	MaskBits	= 128
}

# Add the new Trusted IP Address
New-CsTenantTrustedIPAddress @IpAddrProperties |