In This Article |
Overview
The Okta Identity Cloud provides secure identity management with Single Sign-On, Multi-factor Authentication, Lifecycle Management (Provisioning), and more. This article shows you how to add Okta as an identity source in Clearlogin.
Overview of the Process
- Add the Okta Identity Source to Clearlogin
- Start the Okta Configuration
- Configure the Okta Identity Source in Clearlogin
- Finish the Okta Configuration
Clearlogin: Add the Okta Identity Source
These steps will add
- Sign into the Clearlogin Admin Console: https://admin.clearlogin.com
- In the left navigation bar, browse to: Identity Sources
- Click on the New Identity Source button, and select Okta
- Display Name: Okta
- User Domain: yourdomain.com
- Access Tag: Azure AD
- Priority: 5 (default). Change this to a lower number if you wish to give Okta a higher priority.
- Timeout: 10 seconds (default)
- Click on Create Okta Identity Source
- On the Summary page, note the SSO Login & SSO Logout, and Redirect URLs. You will need these for the Okta configuration.
Okta: Configuration Part 1
Open a new browser tab and navigate to your Otka administrator dashboard (https://yourtenantid-admin.okta.com).
- From the Okta admin dashboard, browse to: Applications > Applications
- Click on Add Application
- Click on Create New App
- In the New Application Integration window
- Platform: Web
- Sign on Method: OpenID Connect
- Click on Create
- Name the application: Clearlogin
- Add the Clearlogin logo
- Add the SSO Login URL from the summary page in Clearlogin to the Login Redirect URIs field
- Add the SSO Logout URL from the summary page in Clearlogin to the Logout Redirect URIs field
- Click Save
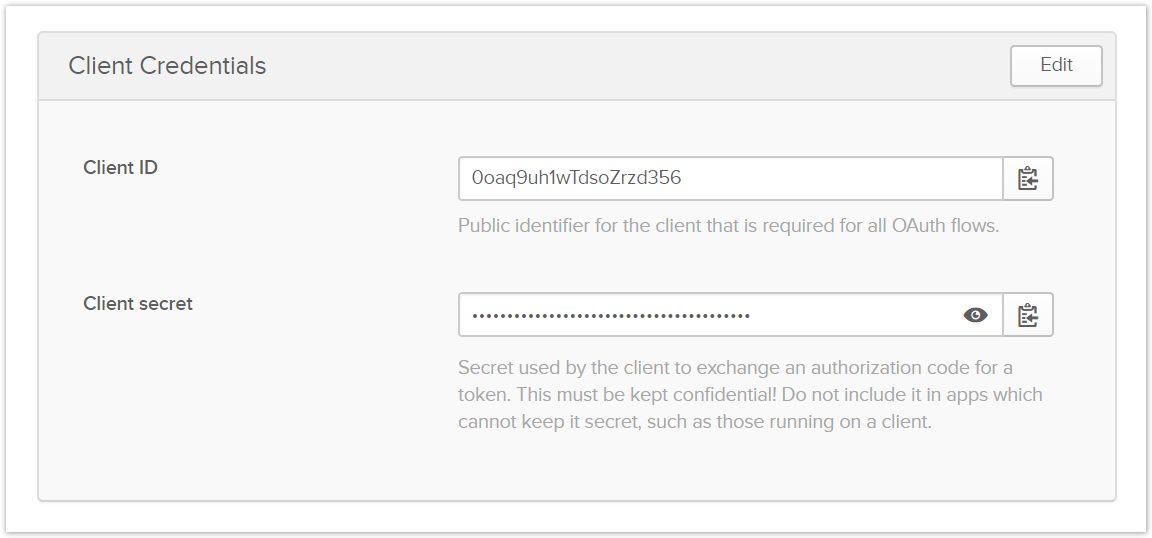
- On the General tab, scroll down and take note of the Client ID and Client Secret. You will need these in the Clearlogin configuration.

Clearlogin: Configure the Okta Identity Source
- Switch back to Clearlogin
- On the Okta summary page, click Edit
- Scroll down and select Endpoints, and then enter the following:
| Item | Value |
|---|---|
| Authorization Endpoint | https://youroktasubdomain.okta.com/oauth2/v1/authorize |
| Token Endpoint | https://youroktasubdomain.okta.com/oauth2/v1/token |
Userinfo Endpoint | https://youroktasubdomain.okta.com/oauth2/v1/userinfo |
- Enter the Client ID and Client Secret from Okta (General tab)
- Save the configuration by clicking on Update Okta Identity Source.
Okta: Configuration Part 2
Back in the Okta admin dashboard, on the General Settings (tab).
- Click the Edit button in the header bar at the top of the page.
- Allowed Grant Types
- Authorization Code: Checked
- Refresh Token: Unchecked
- Implicit (Hybrid): Checked
- Allow ID Token with implicit grant type: Checked
- Allow Access Token with implicit grant type: Unchecked
- Login Initiated By: Either Okta or App
- Application Visibility
- Display application icon to users: Checked
- Display application icon in the Okta Mobile app: Checked
- Login Flow: Redirect to app to initiate login (OIDC Compliant)
- Save the changes.

- Make sure to assign the Clearlogin app to the appropriate users/groups from the Assignments tab in order to grant access to those who need it.