In This Article |
Overview
This article will walk you through the process of creating an AWS Directory Service Simple AD server for use with Clearlogin.
Simple AD is an easy way to stand up a managed, cloud hosted Microsoft Active Directory compatible server. We recommend Simple AD when you want to be able to leverage the additional LDAP compatibility and features that Clearlogin Directory may not provide.
With Simple AD provides you get all the features of Active Directory (password policies, user management, group policies, and more) without the headache of handling backups, maintaining security patches, or worrying about downtime.
Simple AD is traditionally used for internal AWS applications, but we will show you how to provide access to your Simple AD server in a secure fashion without the hassle of setting up a VPN.
This guide assumes you are working with a blank AWS account. If you already have Simple AD running, you can skip to the IP Tables section, provided you have your AWS VPC configured with a NAT instance. |
Prerequisites
The first thing you will need to do before creating your Simple AD server is to satisfy a few prerequisite conditions.
- You must have a VPC with at least two private subnets in different availability zones.
- Your VPC also requires an Amazon NAT instance in a public subdomain.
Create a Key Pair
If you don’t already have one, you will need to create a Key Pair for SSH access to your instances.
- From the main AWS Admin Console, select EC2 under Compute.
- From the left menu select Key Pairs under NETWORK & SECURITY
- Click the blue Create Key Pair button.
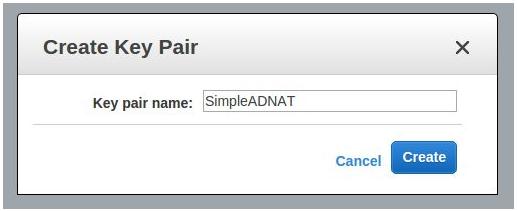
- Give your key a name and click Create.
- Your browser will automatically download the key. You cannot download it again so do not lose it.
Create the VPC
- From the main AWS Admin Console, select VPC under Networking.
- Then, from the VPC Dashboard click the Start VPC Wizard button.
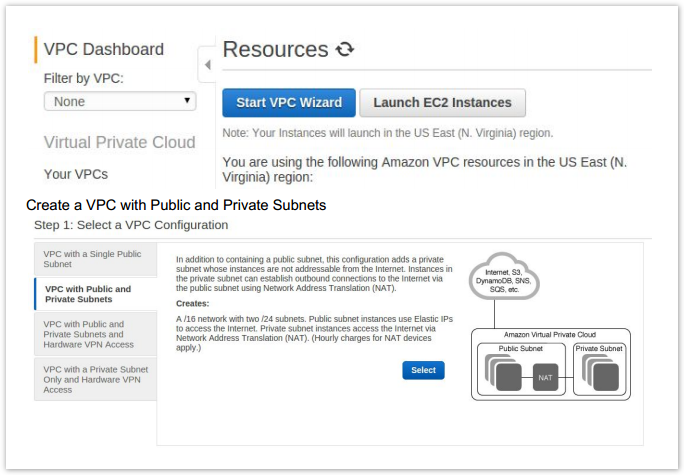
- Configure your VPC to your needs. The following is an example configuration for a relatively small address pool. (You will need to select Use a NAT instance instead.)
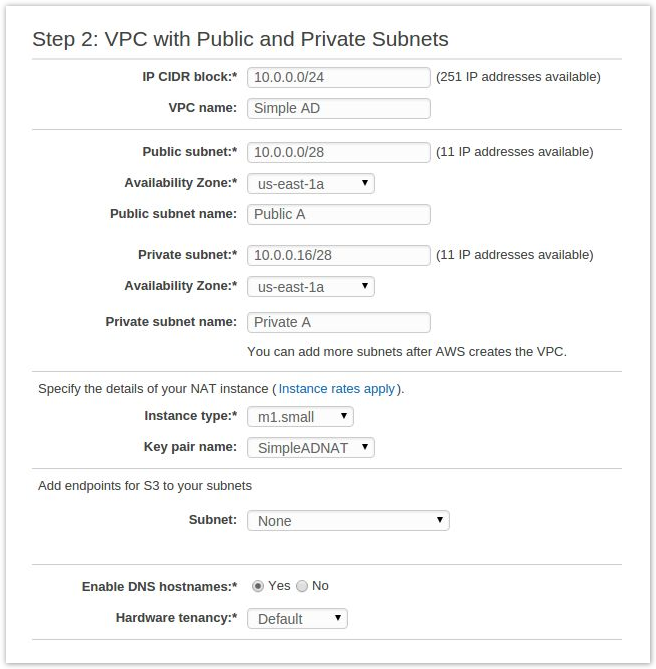
- Once you have your VPC configured, click Create VPC.
- Once your VPC has been created you will need to create an additional subnet.
- Select Subnets from the left menu and then click Create Subnet.
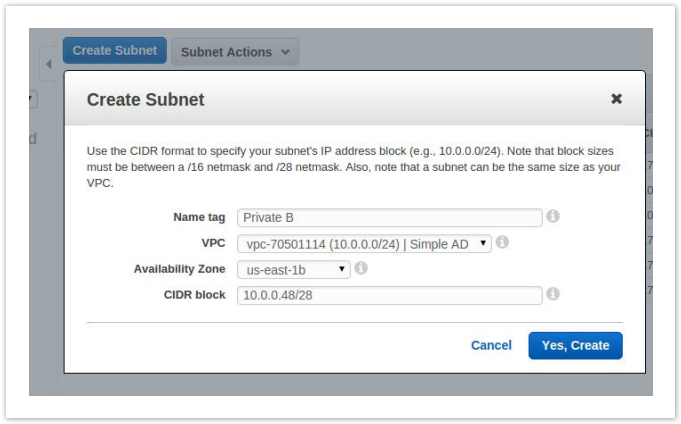
- Configure your subnet, be sure to select a different availability zone than your first private subnet and click Yes, Create.
- The subnet should be created with the default route table which is the private route table.
Create a Simple AD Server
Next you will want to create your Simple AD server.
- From the main Admin Console select Directory Service under Security & Identity.
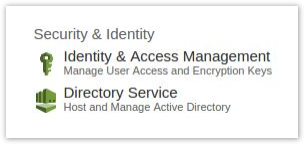
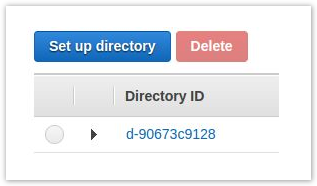
- Choose Set up directory or Get Started Now.
- Choose Create Simple AD.
- Configure your server to your needs and use the following as an example. Be sure to select your VPC and two private subnets.
- The Administrator password is very important and will be necessary later.
- Once you have the configuration complete, click Next Step and then Create Simple AD and then Done.
- Simple AD takes upwards of 10 minutes to provision completely.
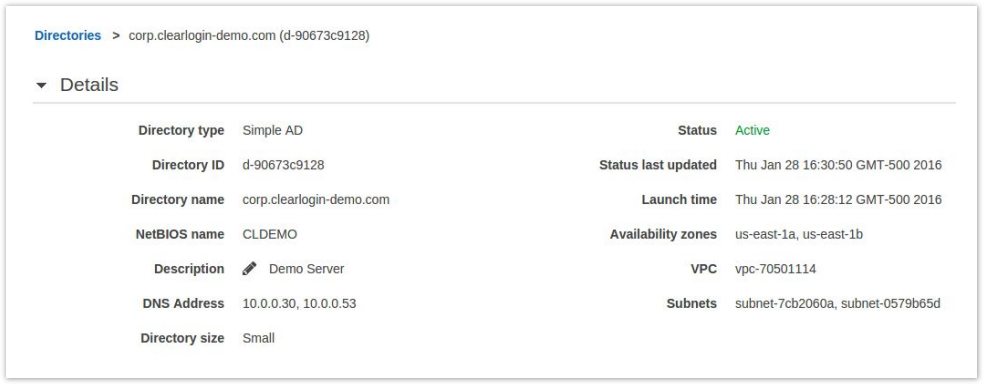
- Once it has been fully provisioned, click the Directory ID to get more information about the directory.
- On this screen you will want to note the values for DNS Address. You will need this information later.
- In this example we have 10.0.0.30 and 10.0.0.53.
Create Security Groups
Next you will want to create a security group to allow SSH access to your NAT instance and LDAPS access to your ELB.
- From the VPC Dashboard select Security Groups on the left, then click Create Security Group and be sure to select your VPC.
- Click Yes, Create to create the security group.
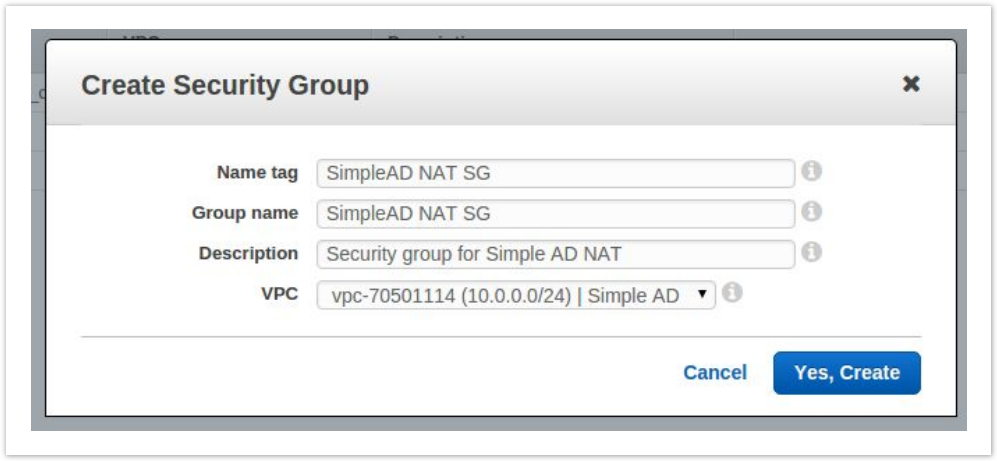
- You will then want to select the security group you just created from the list.
- In the lower panel select the Inbound Rules tab and then click Edit.
You will want to add rules for SSH for your local IP address (sources must be in CIDR format).
After adding this rule click Save.

- Next you will want to attach this security group to your NAT Instance.
- From the EC2 Management Console select Instances on the left.
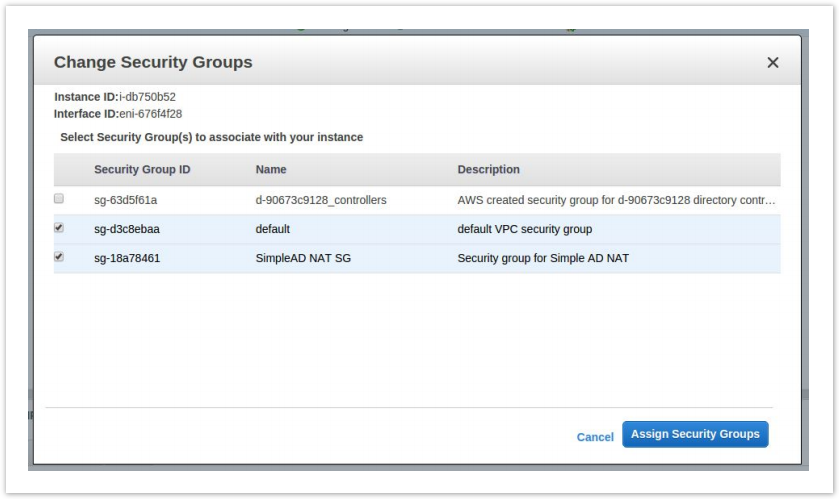
- Find your NAT Instance and right click it. Select Networking then Change Security Groups.
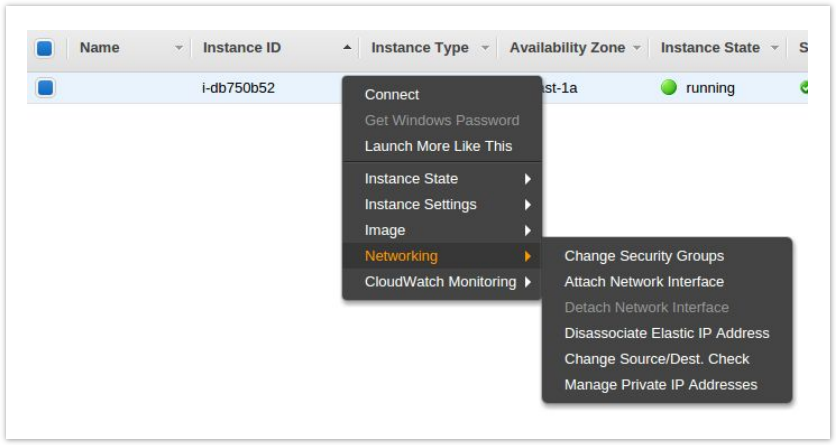
- Check the box next to the new security group you created. Be sure to leave the default security group checked as well.
- Finally, click Assign Security Groups to save your changes.
- Now we are going to add the security group for the ELB we will need to create.
- From the VPC Dashboard, select Security Groups on the left.
- Then click Create Security Group and be sure to select your VPC.
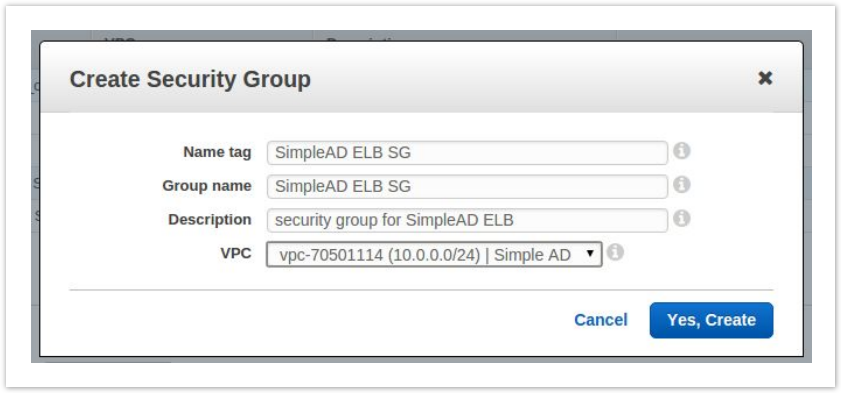
- You will then want to select the security group you just created from the list.
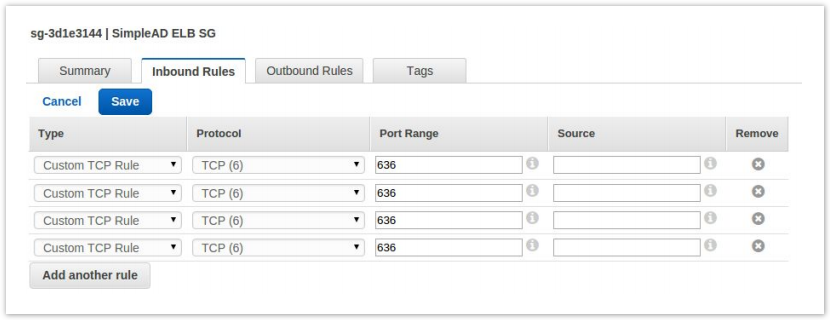
- In the lower panel select the Inbound Rules tab and then click Edit.
- You are going to want to add Custom TCP Rules for port 636.
- You will need one rule for each of Clearlogin’s public IP addresses.
- Click Save after after creating the rules.
Configure IP Tables
SSH to your NAT instance to configure additional rules to handle routing traffic to your Simple AD server. If needed, use Amazon's Connecting to your Linux instance using SSH guide.
You will need to know the public & private IP addresses of your NAT instance as well as the key you created earlier. You can get the IP address by viewing your EC2 instances and finding your NAT instance.
Once logged in, execute the following commands to add the port routing we need for Simple AD. Make sure you substitute your public & private IP addresses in the commands
sudo iptables -t nat -A PREROUTING -i eth0 --dst <NATInstancePrivateIP> -p tcp --dport 389 -j DNAT --to-destination <SimpleAdIP>:389 sudo iptables -t nat -A POSTROUTING -p tcp --dst <SimpleAdIP> --dport 389 -j SNAT --to-source <NATInstancePrivateIP> |
In our example the commands are:
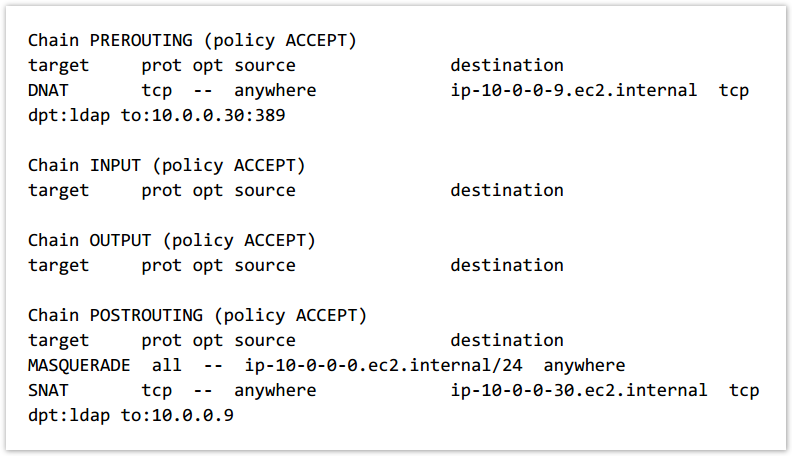
sudo iptables -t nat -A PREROUTING -i eth0 --dst 10.0.0.9 -p tcp --dport 389 -j DNAT --to-destination 10.0.0.30:389 sudo iptables -t nat -A POSTROUTING -p tcp --dst 10.0.0.30 --dport 389 -j SNAT --to-source 10.0.0.9 |
To view the new rules that you added, run the following
sudo iptables -t nat -L |
Create the Elastic Load Balancer
You create an Elastic Load Balancer (ELB) to handle incoming SSL connections that will then be routed internally to your NAT instance.
You also create a certificate in AWS and use it with a load-balanced environment for free by using AWS Certificate Manager (ACM). See Request a Certificate in the AWS Certificate Manager User Guide for instructions.
- From the main admin console, select EC2 under Compute.
- Select Load Balancers on the left under Load Balancing.
- Click Create Load Balancer.
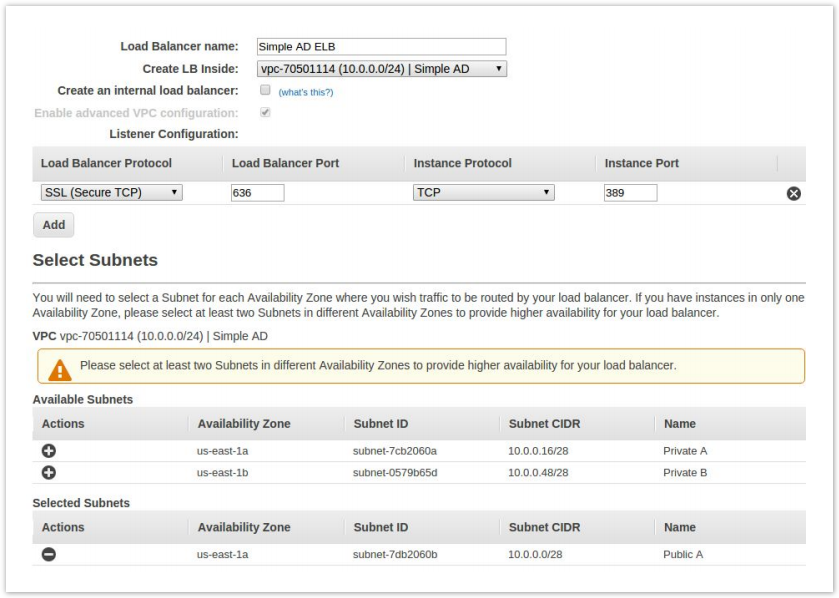
- Name your load balancer and be sure to select your VPC.
- Change the Load Balancer Protocol to SSL, and change the port to 636.
- The Instance Protocol should be TCP and port 389.
- Select your public subnet as the availability zone.
- Click Next: Assign Security Groups.
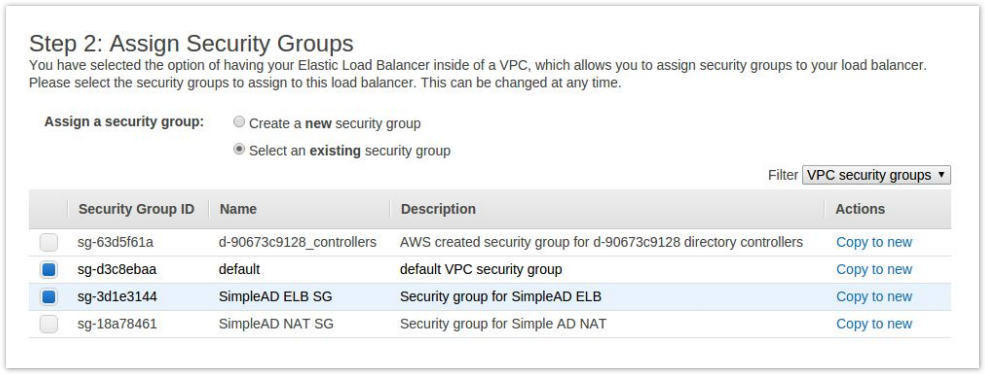
- Choose Select an existing security group and check your default vpc security group as well as the new one you created for the ELB
- Click Configure Security Settings.
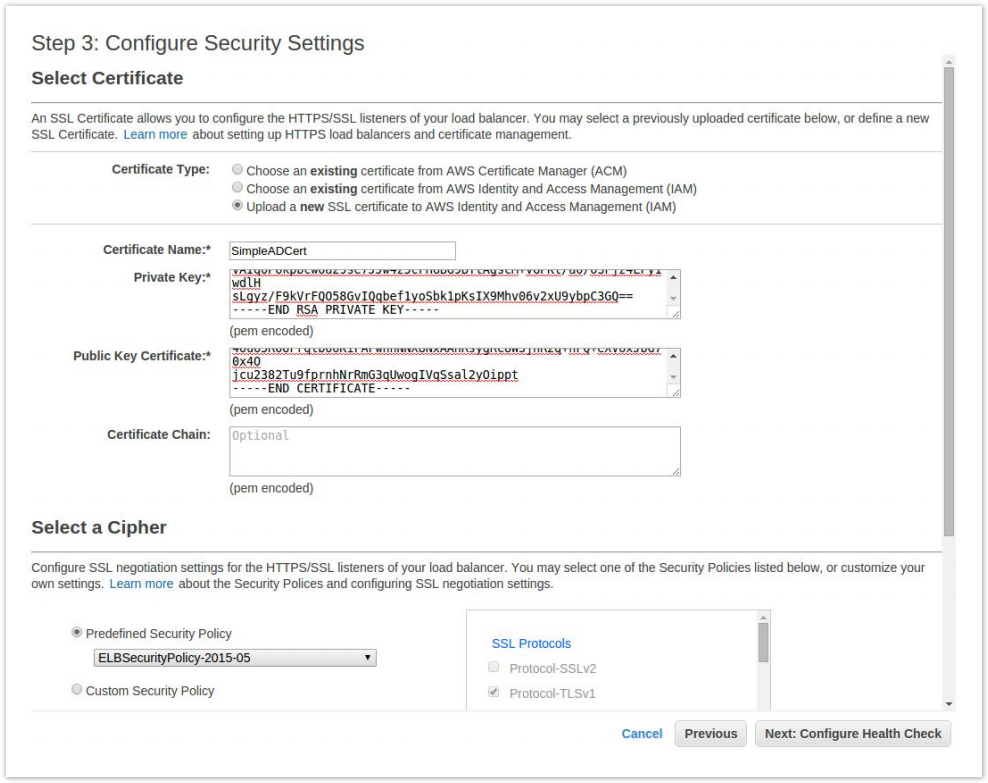
- Under Certificate Type choose Upload a new SSL certificate.
- Name your cert and paste the text contents of my-private-key.pem in the Private Key field and the contents of my-certificate. pem in the Public Key Certificate field.
- Click Next.
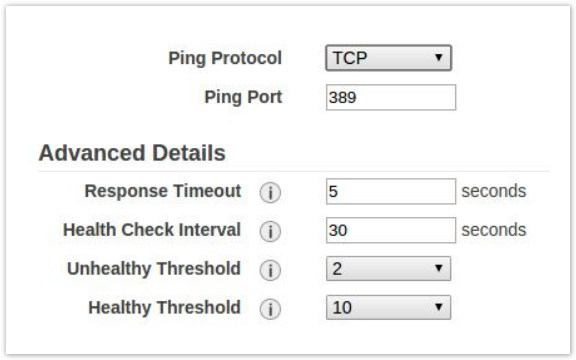
- Configure your health check to ping port 389 and click Next.
- Select your NAT instance and click Next and then Review and Create, then finally Create.
- After your ELB is created it may take a few minutes for your instance to register and become healthy.
- You will then want to select your ELB and get the DNS name from the description tab. You will need this information when configuring Clearlogin.

We only routed traffic for one Simple AD IP address. If you would like to route traffic to both, you may create a second public subnet and NAT instance to handle the second, redundant Simple AD server. It would also be possible to route the traffic using the same NAT instance using a different external port than 389. |
Configuring Clearlogin
Next you will need to configure your Simple AD server as an Identity Source in Clearlogin.
- Sign into the Clearlogin Admin Console: https://admin.clearlogin.com
- In the left navigation bar, browse to: Identity Sources
- Click on the New Identity Source button, and select AWS Directory.
- Configure your AWS Directory Identity Source’s name, user domain, and other settings as you see fit.
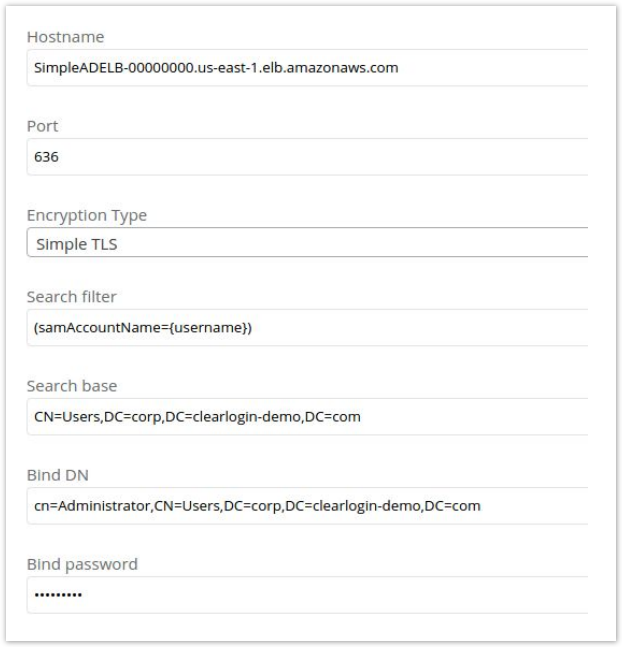
- Use the configuration below for specific settings when using Simple AD. Remember to change the DC components of the Search Base and Bind DN to the domain you used when creating the Simple AD server.
- Hostname should be the DNS Name value of the ELB you created.
- Search Filter should be (samAccountName={username})
- Search Base should be CN=Users,DC=corp,DC=clearlogindemo,DC=com
- Bind DN should be cn=Administrator,CN=Users,DC=corp,DC=clearlogindemo,DC=com
- Bind password is the Administrator password you created earlier when creating the Simple AD server.
- Port is 636
- Encryption Type is Simple TLS
- Once you have finished filling out the fields, click Save Identity Source.
- After the identity source has been saved, click Edit.
- Scroll to the bottom of the edit page to find the Connection Test.
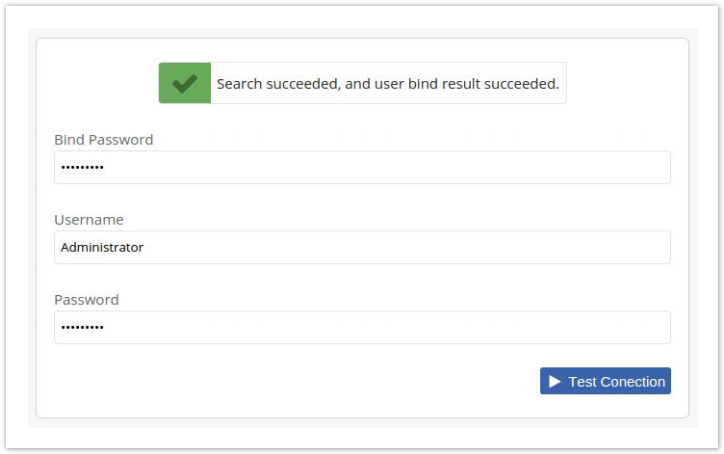
- Enter the Bind Password, Administrator for the Username and the same password again (as it is the same account) for the Password.
- Click Test Connection and you should see a successful result.
