Procedure
- Create a Catalog within your VDC
- Upload the ISO to the catalog
- Create a new VM
- Mount the ISO to the new virtual machine and power it on
- Complete the install within the console of the virtual machine
- Unmount the ISO from the virtual machine
Create a Catalog within your VDC
You can create new catalogs and associate them with a storage policy.
Check the name of the datacenter you are in and place the catalog on the associated storage policy. This allows deployment and uploads to work faster as all traffic will be contained within the same datacenter and its associated storage policies.
Prerequisites
This operation requires the rights included in the predefined Catalog Author or an equivalent set of rights.
Procedure
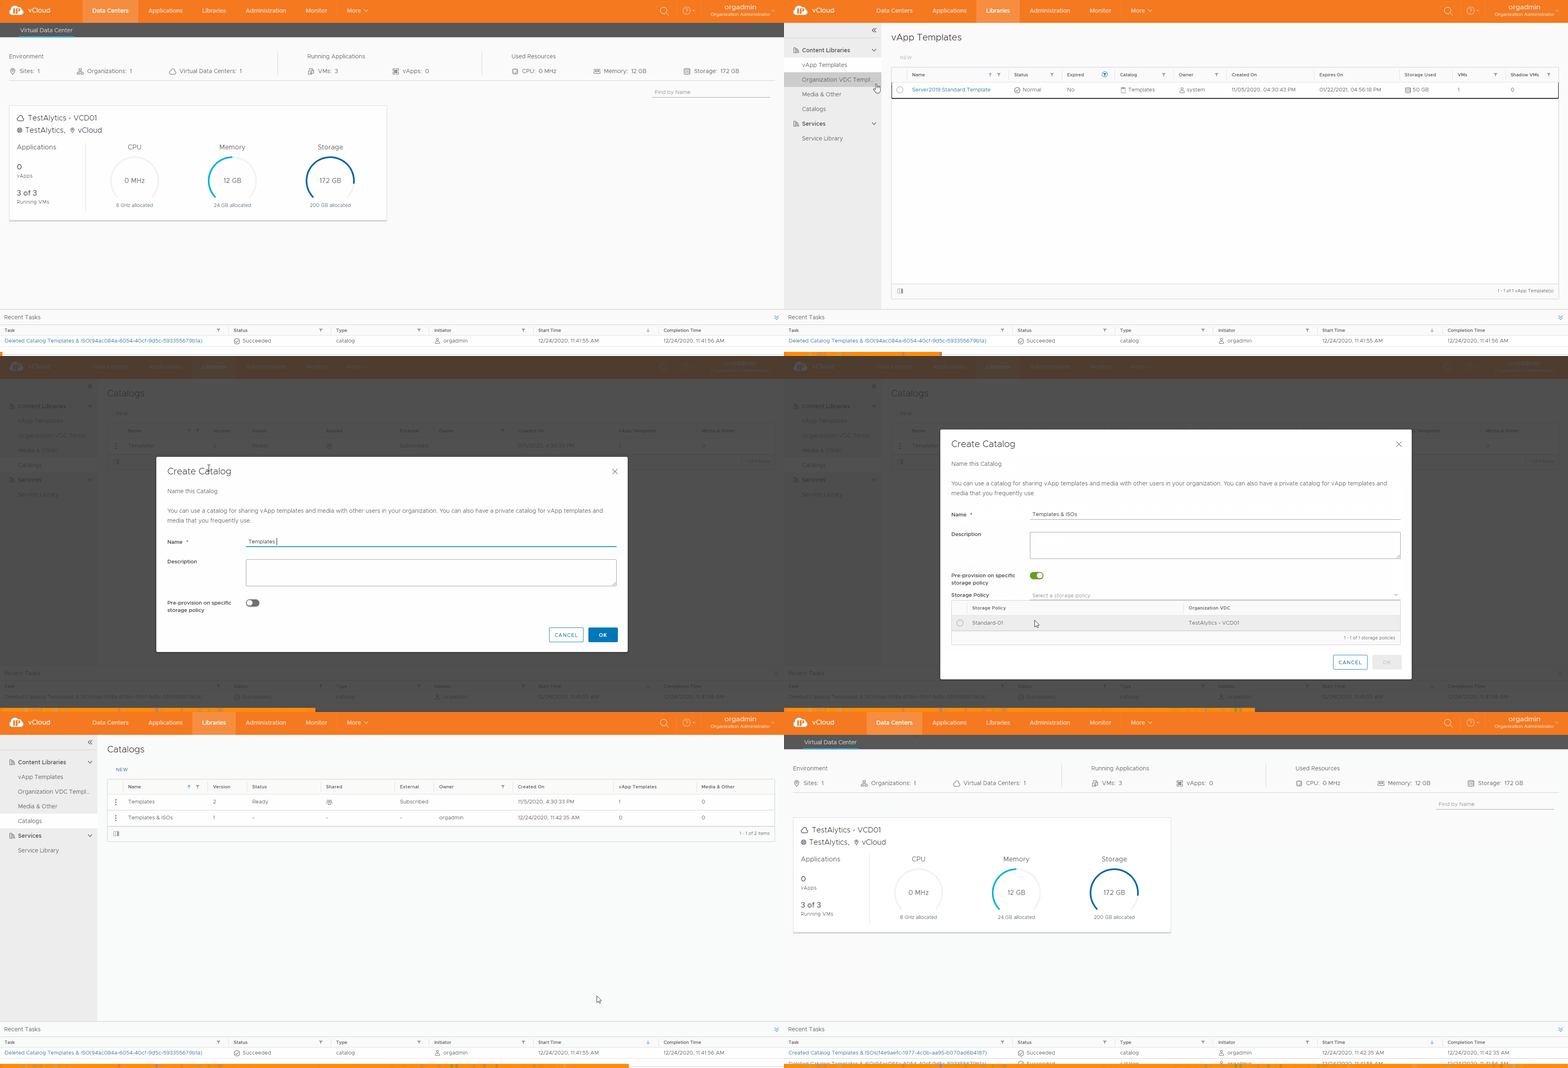
- On the Virtual Datacenters dashboard screen, click the card of the virtual data center you want to explore.
- From the main menu select Libraries and select Catalogs from the left panel.
- Click New to create a new catalog.
- Enter the name and, optionally, a meaningful description of the catalog.
- Select whether you want to assign a storage policy to the catalog, and select a storage policy.
- You can edit this at a later time if desired.
- We recommend setting a storage policy to ensure correct data placement.
- Click OK.
Upload the ISO to the Catalog
You can upload ISO and OVF / OVA to catalogs to use with virtual machine creation.
Prerequisites
This operation requires the rights included in the predefined Catalog Author or an equivalent set of rights.
Upload Media (ISO) Procedure
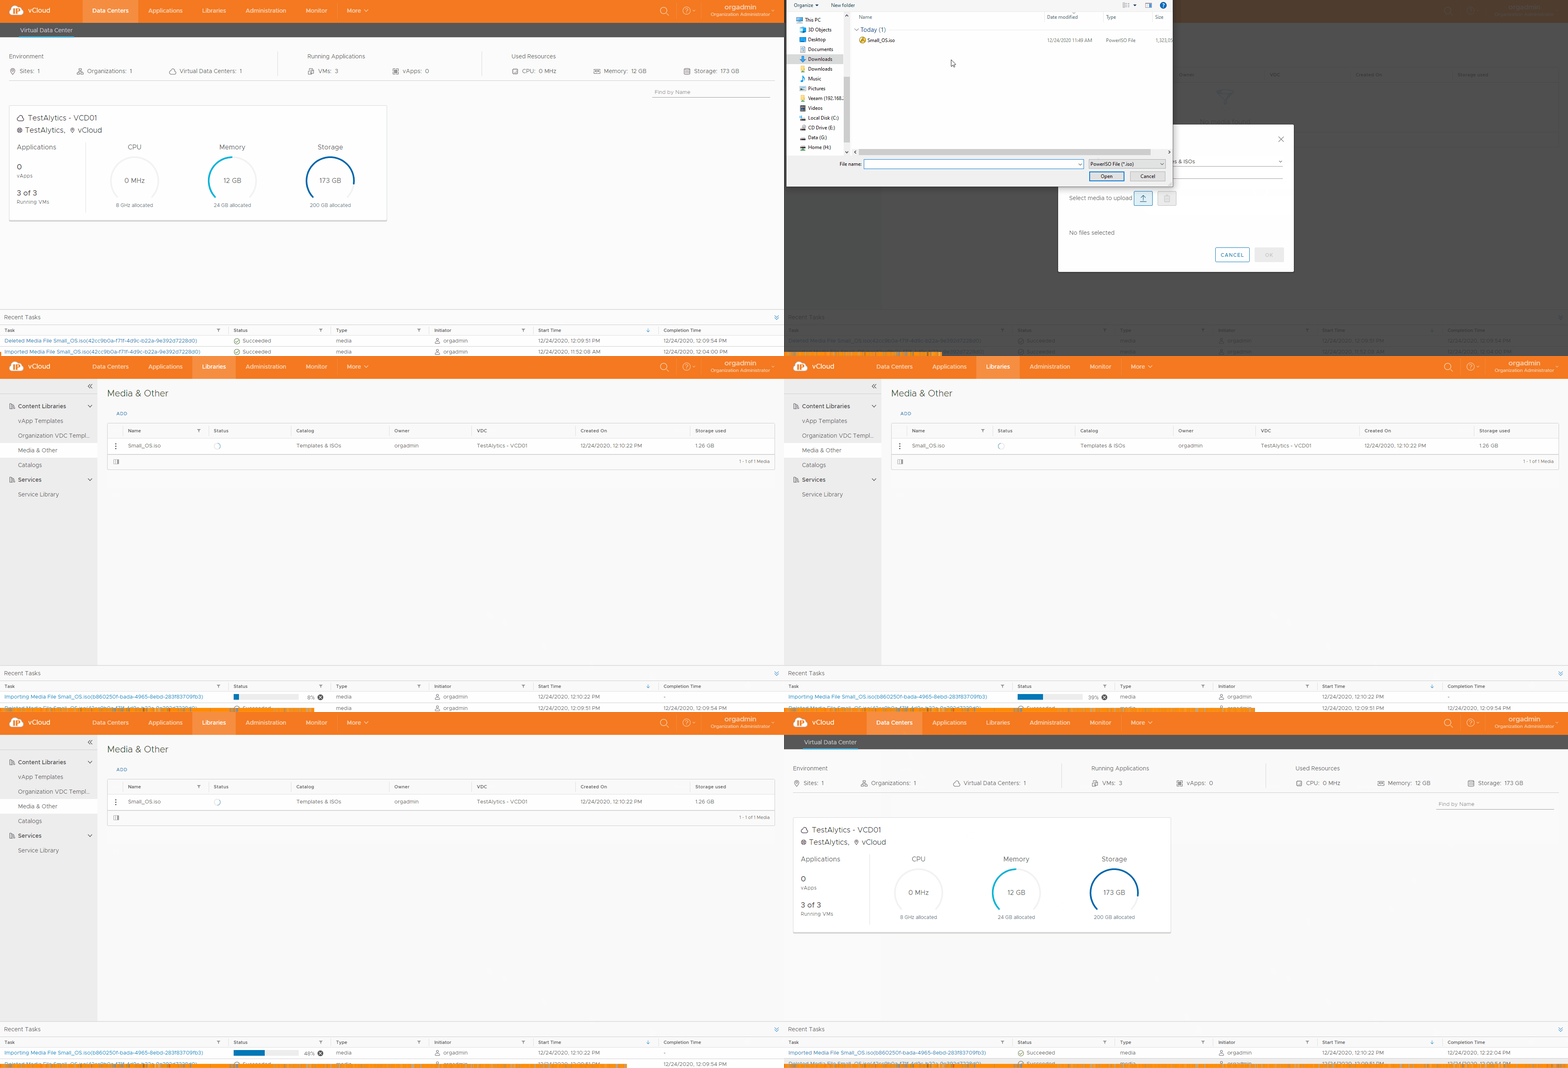
- On the Virtual Datacenters dashboard screen, click the card of the virtual data center you want to explore.
- From the main menu select Libraries and select Media & Other from the left panel.
- Click Add.
- Select a catalog
- The Name field will auto populate based on the ISO file name.
- The Name must contain the file extension otherwise it will not be recognized as an ISO.
- Click the Upload icon and select the ISO to upload
- Click OK to begin the transfer.
- You can monitor the progress in the Recent Tasks.
- You can then delete the ISO if needed by selecting it and clicking Delete.
Upload OVF / OVA Procedure
If uploading an OVA fails we highly recommend converting into an OVF as shown here.
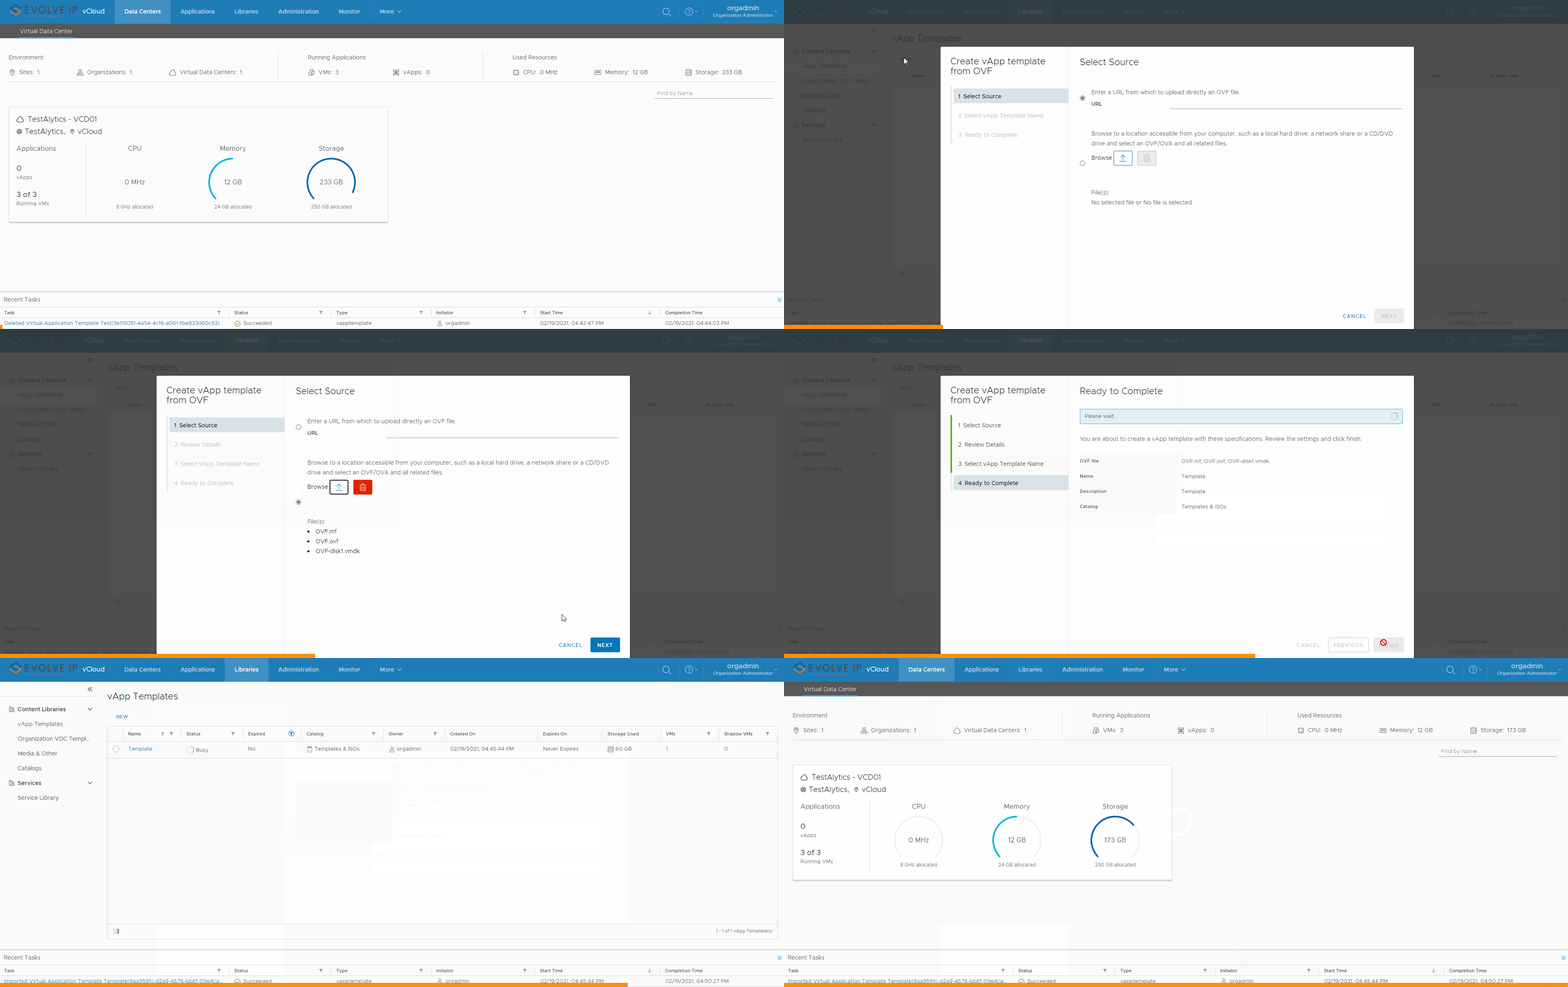
- On the Virtual Datacenters dashboard screen, click the card of the virtual data center you want to explore.
- From the main menu select Libraries and select vApp Templates from the left panel.
- Click Add to upload an OVA/OVF.
- Click the Browse icon to select an OVA/OVF and all related files to upload.
- For an OVF, select all associated files. Typically consisting of an .mf descriptor file, .vmdk virtual disk file, and .ovf file.
- For an OVA, select the single OVA file.
- Click Next.
- Review the details and click Next.
- Provide a name for the vApp Template and select a catalog if needed and click Next.
- The EvolveIP provided catalogs are unable to be written to.
- Review the Ready to Complete page and click Finish.
Note: Uploading an OVA/OVF may take a long time depending on upload speeds. During the upload the progress will sit at 1%. Once the progress moves past 1% the upload is complete and the system is importing the OVA/OVF from the staging directory into the Catalog.
Create a new VM (Not from Template)
Prerequisites
This operation requires the rights included in the predefined Organization VDC Admin, VApp Admin or an equivalent set of rights.
If deploying a VM from a template, you must already have access to a template. Or have created your own Catalog and uploaded your own template or ISO. Instructions can be found under the Working with Catalogs section.
Procedure
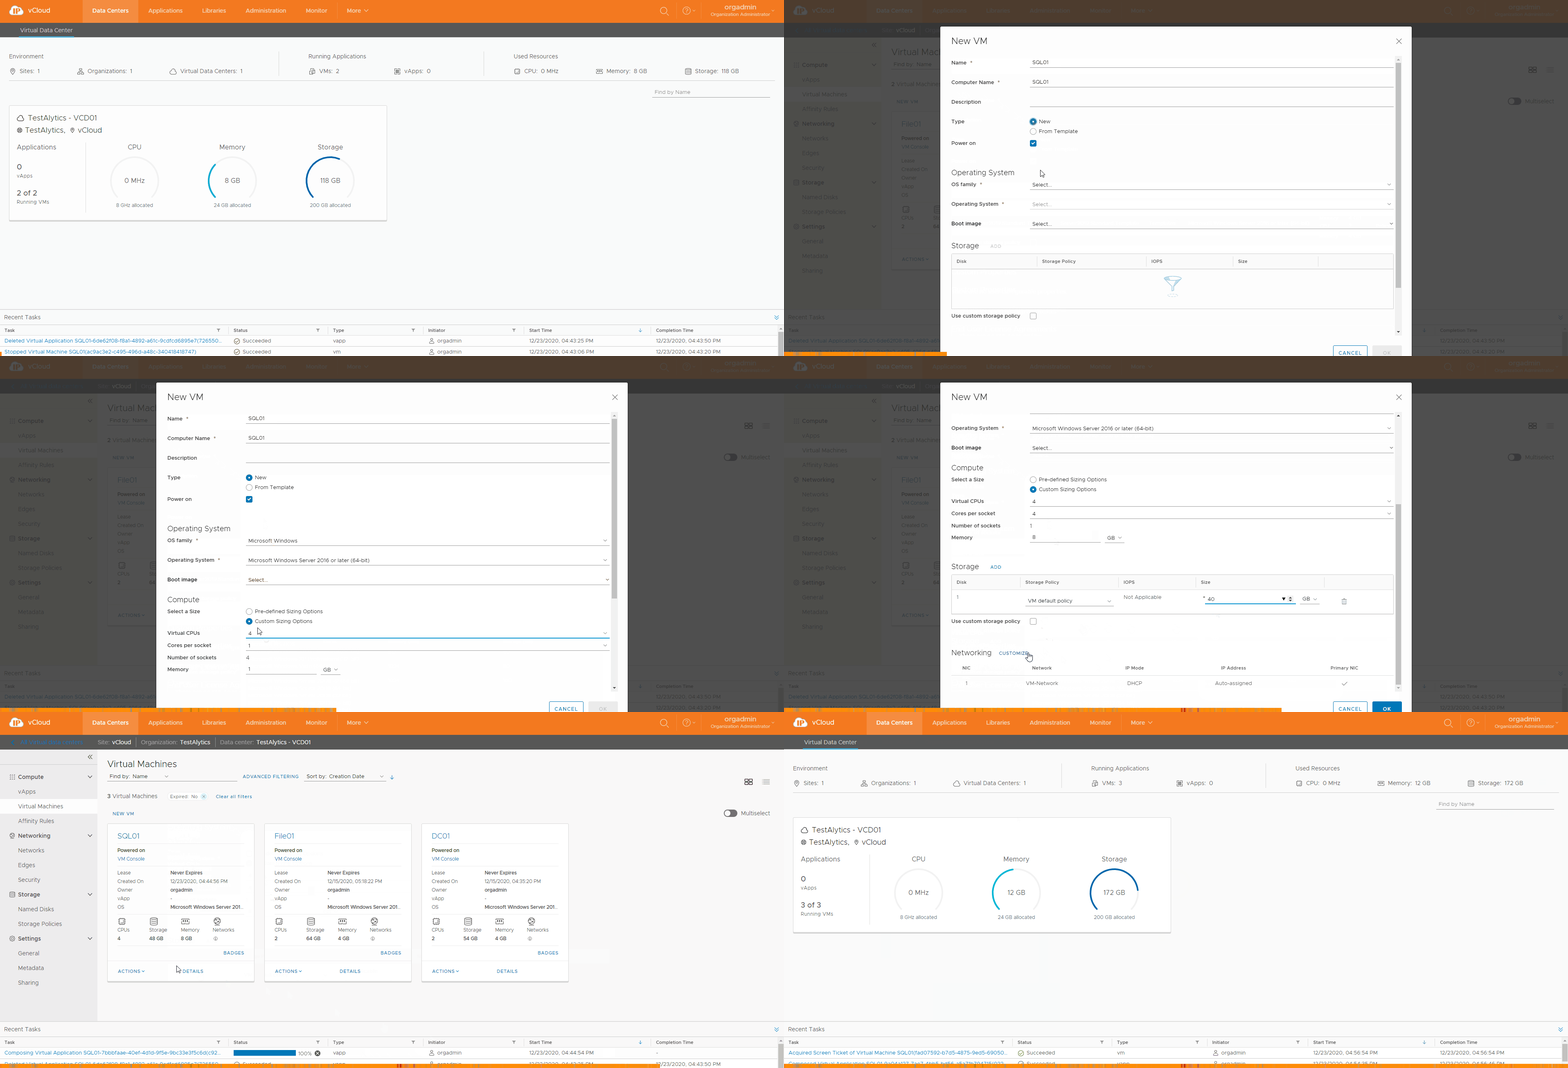
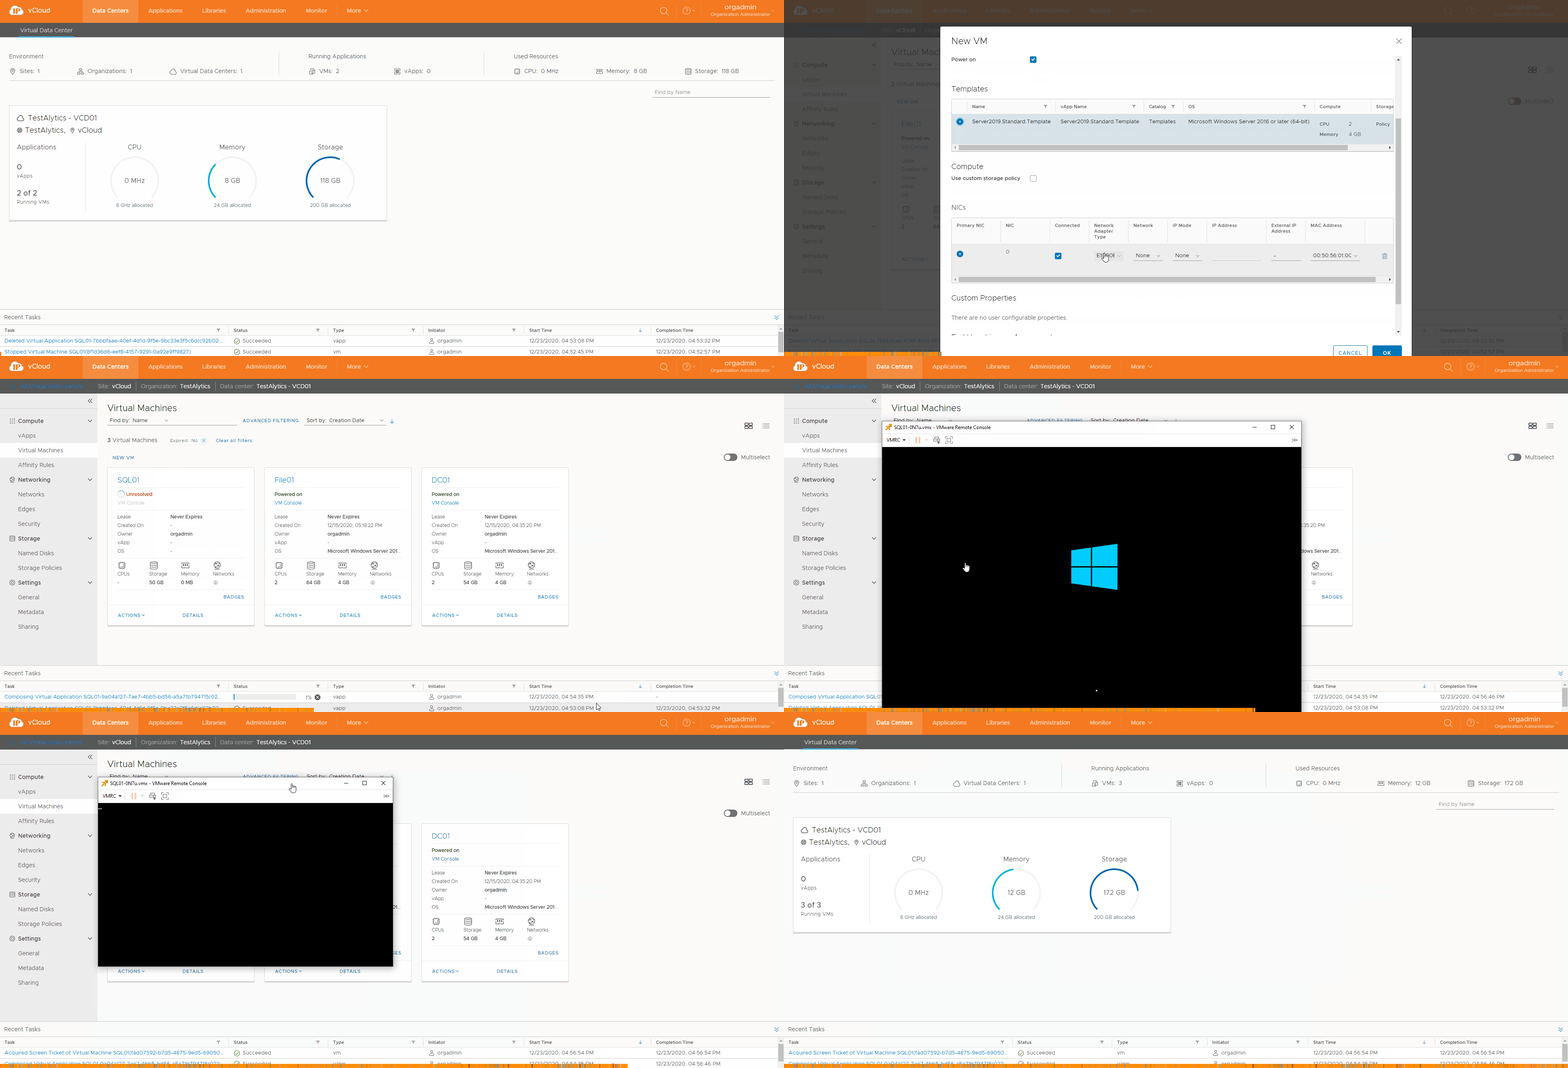
- On the Virtual Datacenters dashboard screen, click the card of the virtual data center you want to deploy a new virtual machine into and select Virtual Machines from the left menu.
- Click NEW VM.
- Enter the name and the computer name for the virtual machine.
- Important: the computer name can contain only alphanumeric characters and cannot consist of digits only.
- check the box if you want the VM to power on right after it is created.
- (Optional) Enter a meaningful description.
Create a New VM | Create a New VM from Template |
|---|---|
|
|
Mount the ISO and Install OS (Windows)
Procedure
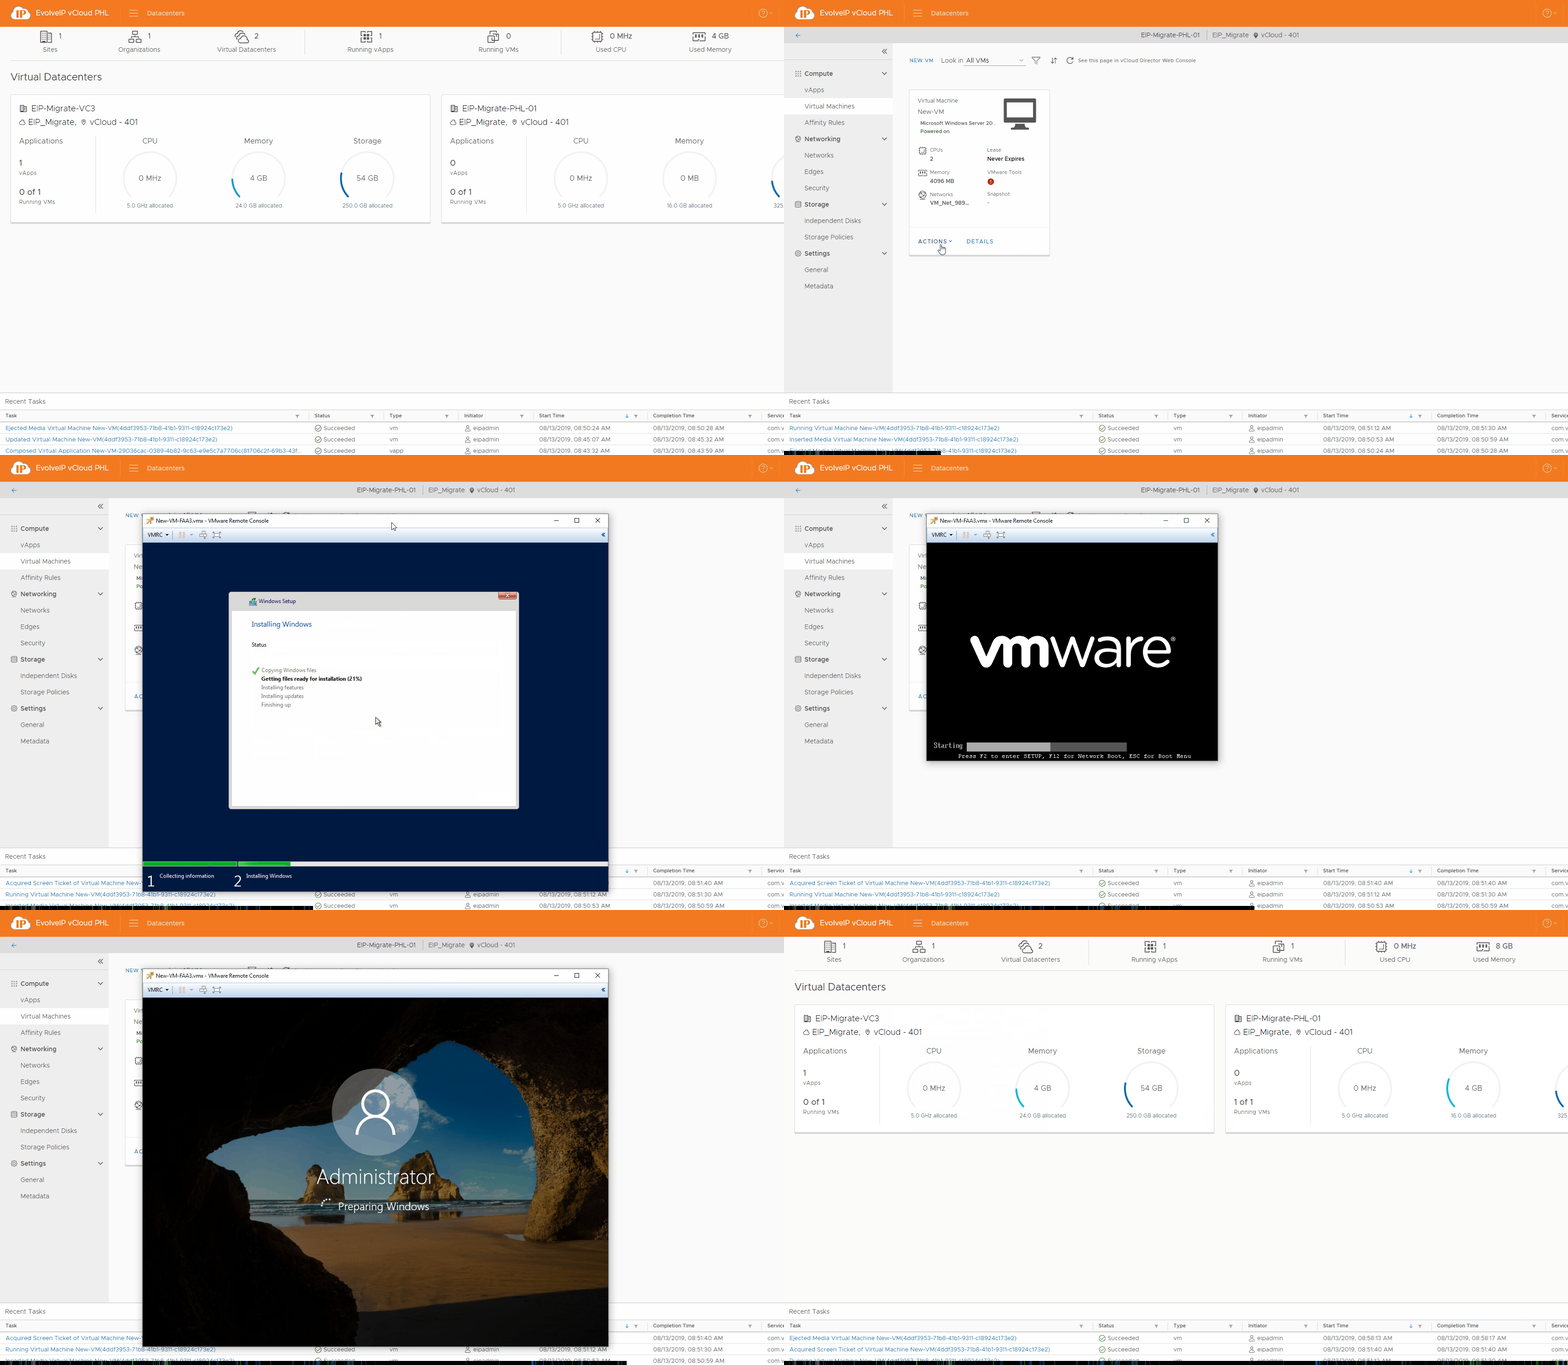
- Click Actions on the Virtual Machine
- Click Insert Media
- Select the correct mediafrom the list and click Insert
- Power on the Virtual Machine
- Follow the normal prompts to install the OS
- As VMware Tools is not yet installed, using the keyboard arrows and CTRL+'keys' will simplify the install
- To escape the VMware Remote Console (VMRC) press CTRL+ALT on your keyboard
- Once complete click Actions on the VM and select Eject Media to remove the ISO
