In This Article
Overview
This article provides steps to resolve an issue where users have random screen blackouts, and applies to the current & previous version of the VMware Horizon Client.
IMPORTANT
You must follow these instructions in the order they are provided. Do not skip any steps, or skip ahead with the intention of returning back. If you get stuck on a certain step, reach out to Evolve IP Support for assistance.
Stage the Agent Installation Files
The Agent update files are downloaded into an "Agents file share" and are used to import agent software updates and then update DaaS agents in an Assignment.
This share is created on a file server that your DaaS desktops have access to, as explained below. Those agent update files are then utilized to update your DaaS agents via the Admin Portal as explained in the Update the DaaS Agent section below.
Create Shared Folder on Local Network
Determine what server the file share will reside.
Log in to the console of the server where the file share will reside.
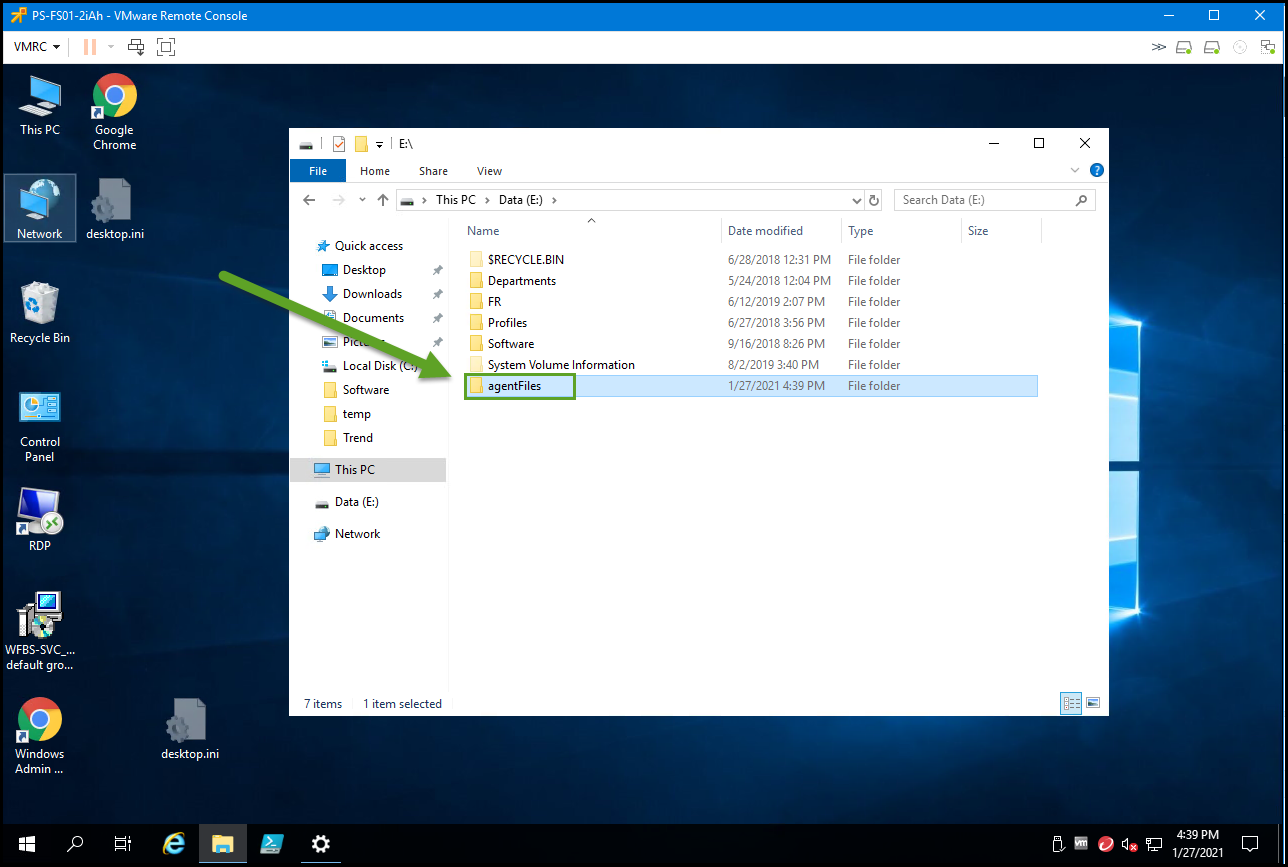
Open file explorer on the server and browse to the location where the share will be created.
Create a new folder called "agentFiles" (MUST BE CALLED "agentFiles").
IMPORTANT
The system will automatically create the necessary folders & automatically download the updated agents into the agentFiles folder.
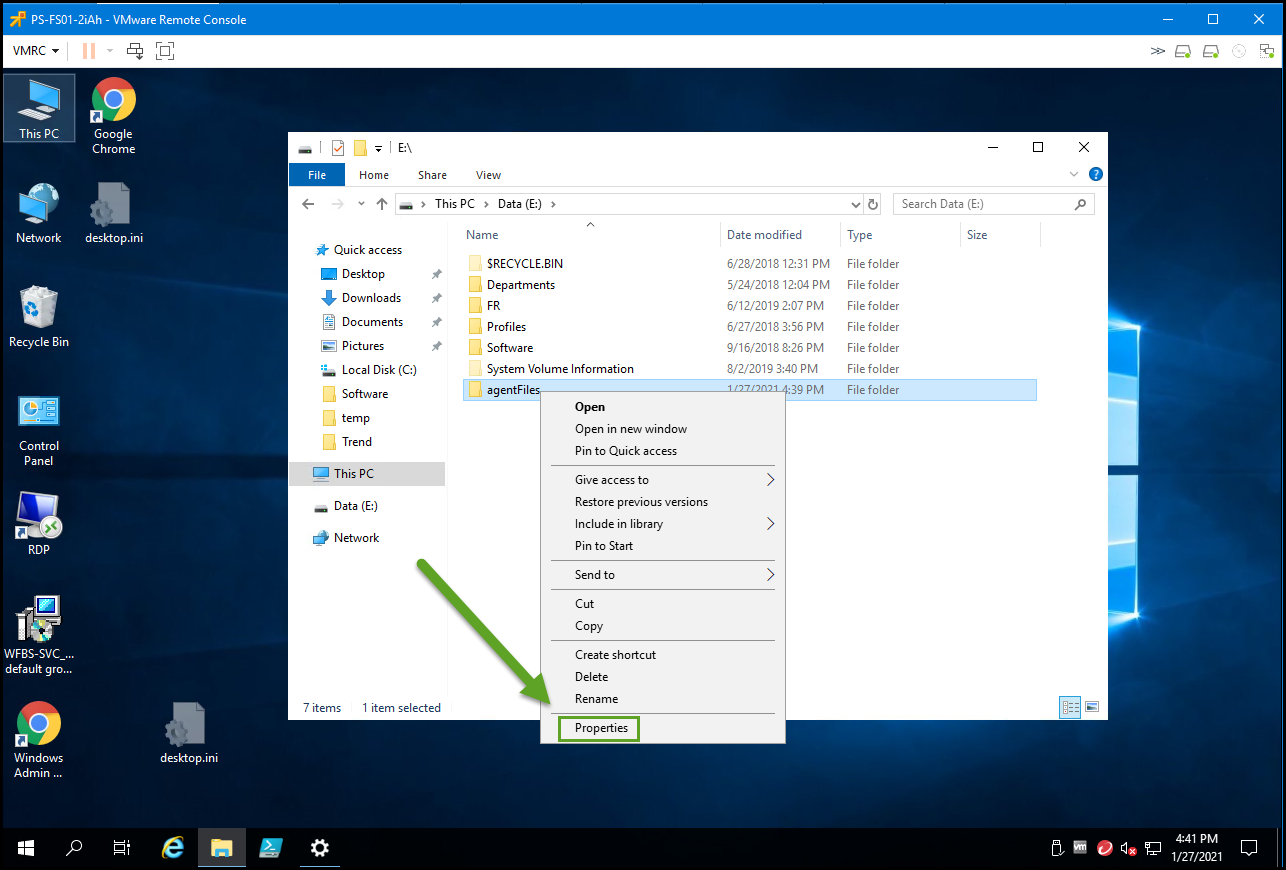
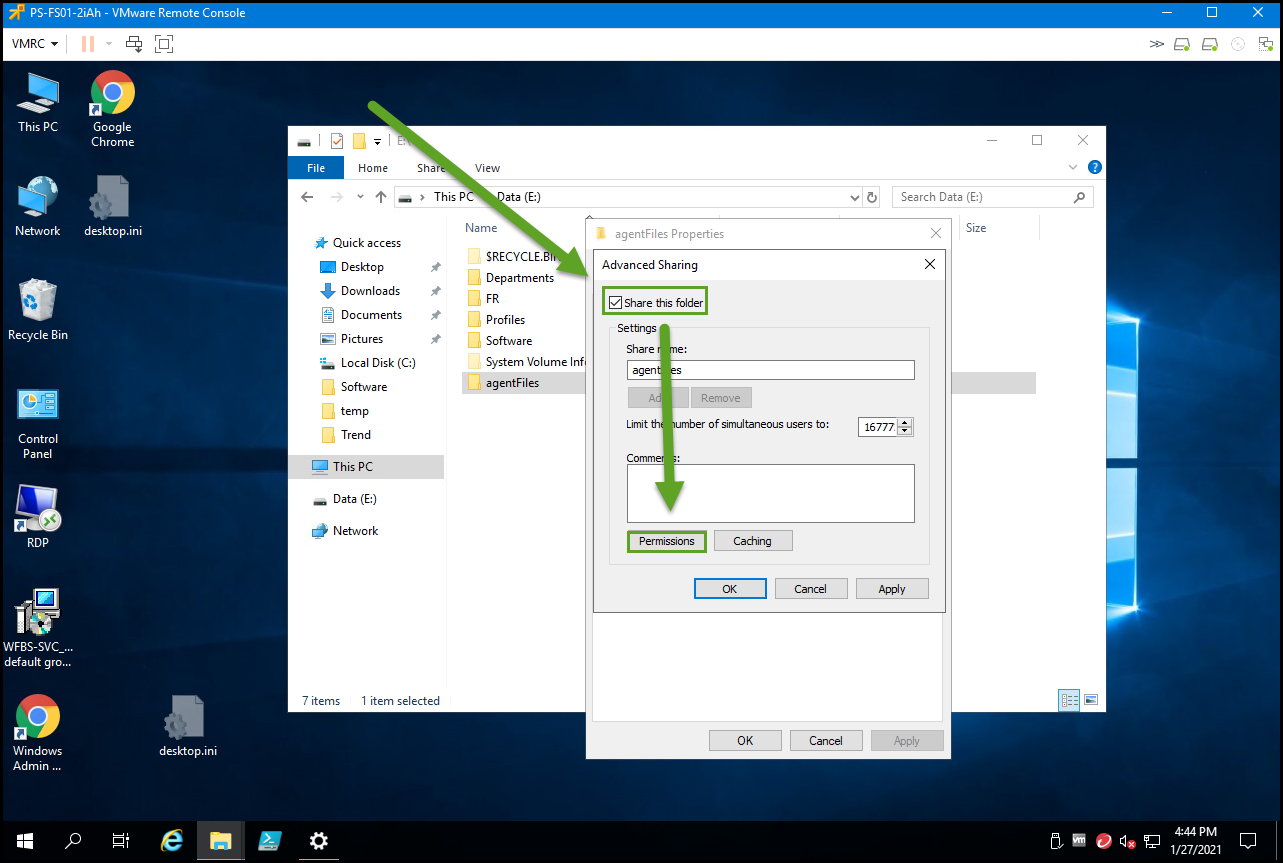
- Right-click the new folder & select properties.
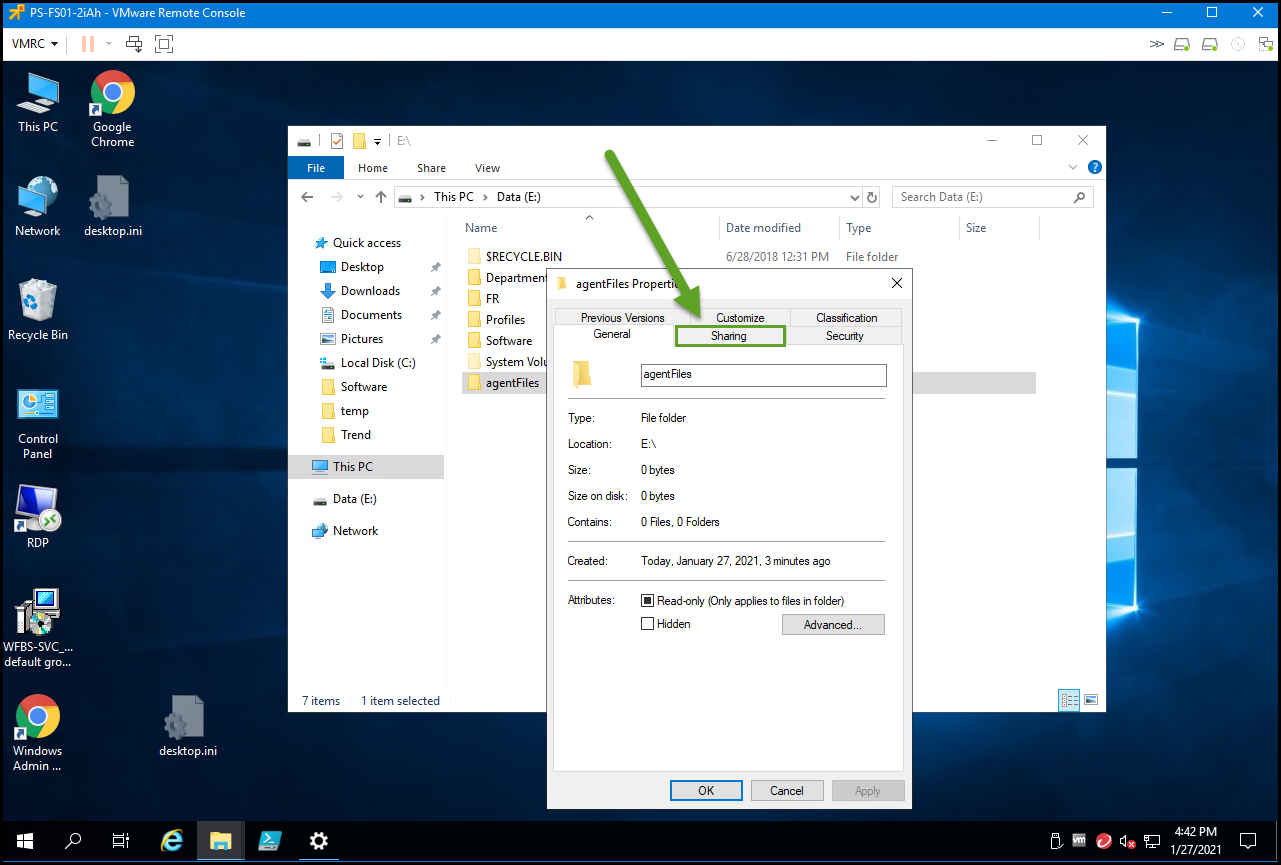
- Select the sharing tab
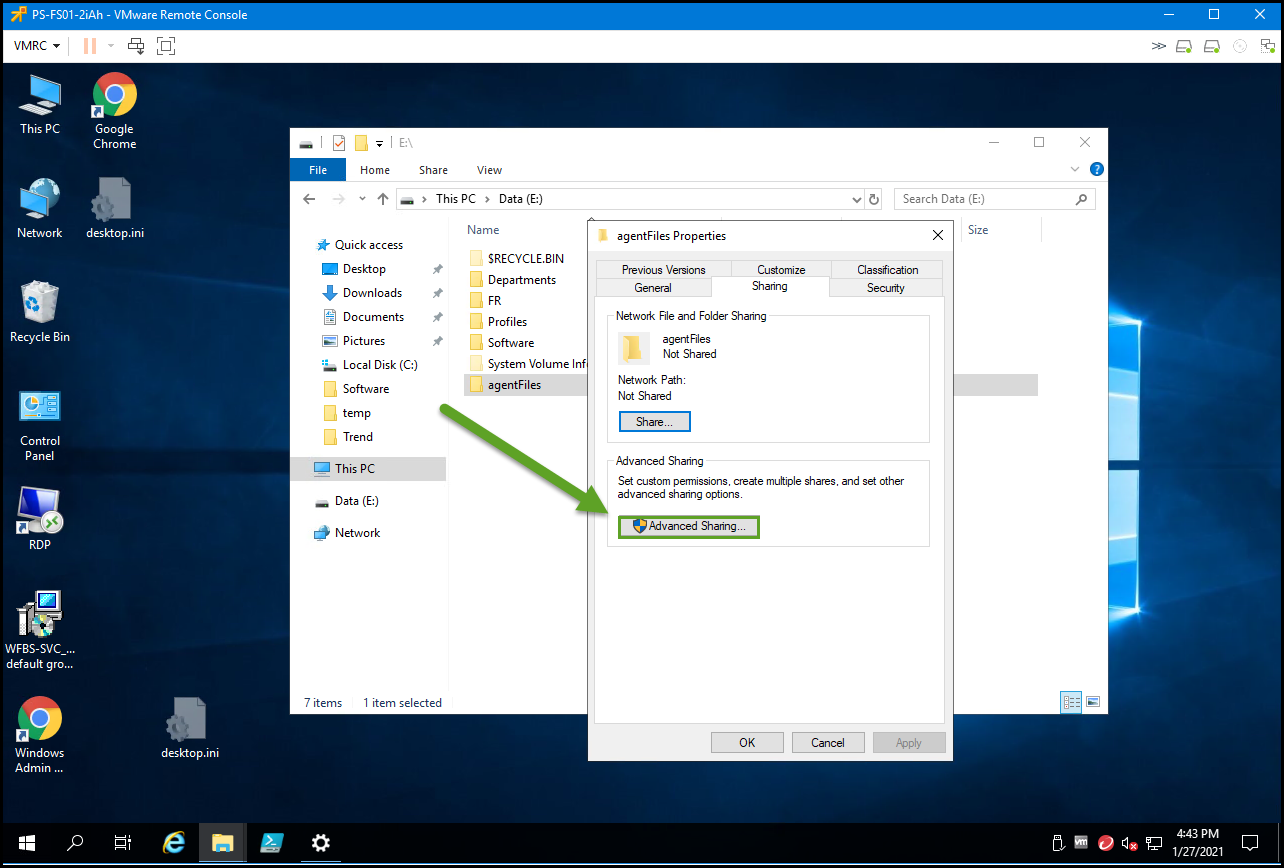
- Select Advanced Sharing
- Select Share this folder & select Permissions.
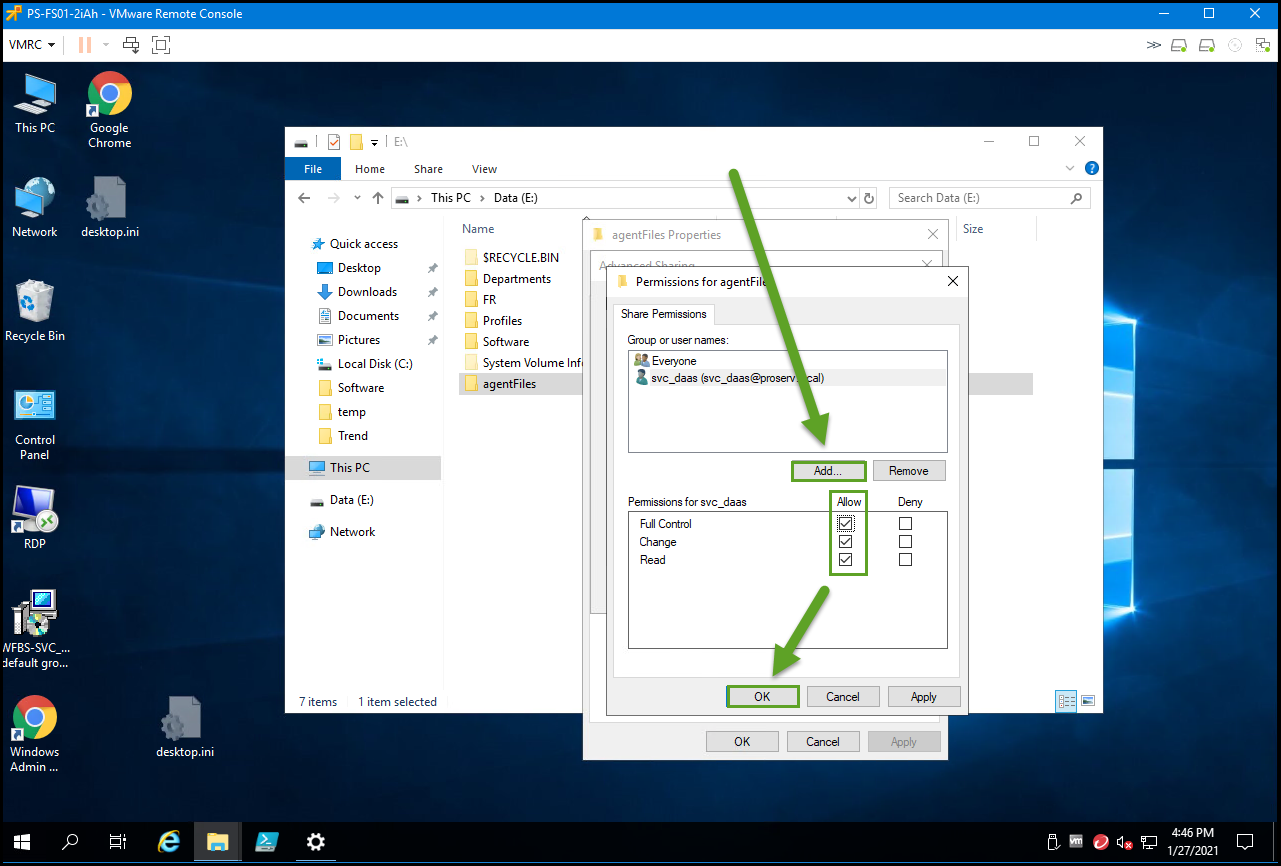
Set Permissions on the Folder
- Give the DaaS bind account full control.
- Log into the DaaS Admin Portal
- This account name is typically located in - Settings > Active Directory > DaaS Bind Account
- Record the name of the DaaS Bind Account
- Navigate back to the server with the file share you created.
- Under share permissions - search for and add that name to the permissions
- Once added - select OK (Three Times)
- Select the Security tab.

- Select Advanced
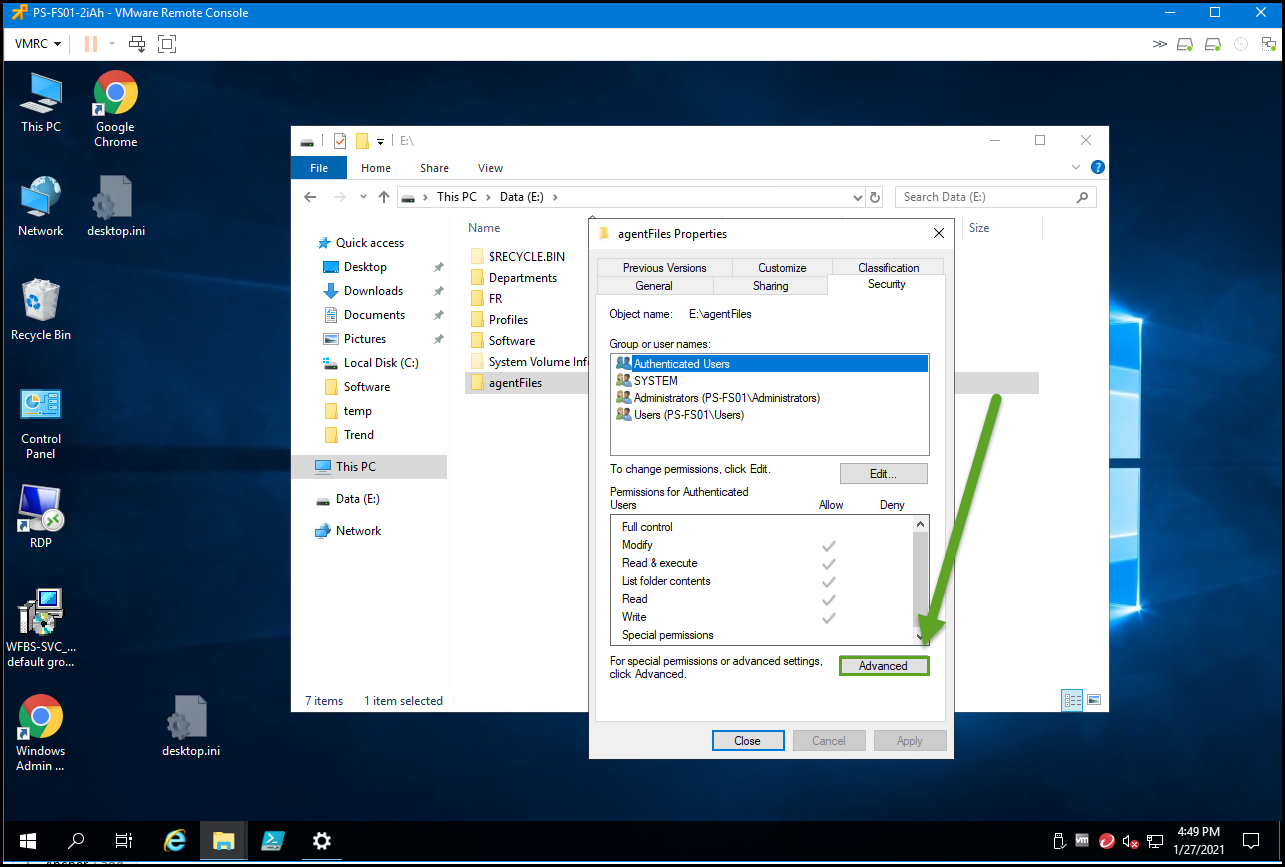
- Select Add

- Give the DaaS bind account full control.
- Use the same name for the DaaS Bind Account you used before
- Under share permissions "Select a PRINCIPAL" - search for and add that name to the permissions
- Select "Full Control" (as shown in the caption below)
- Once added - select OK (Three Times)

Adding the new File Share to the DaaS Portal
- While still logged into the DaaS portal
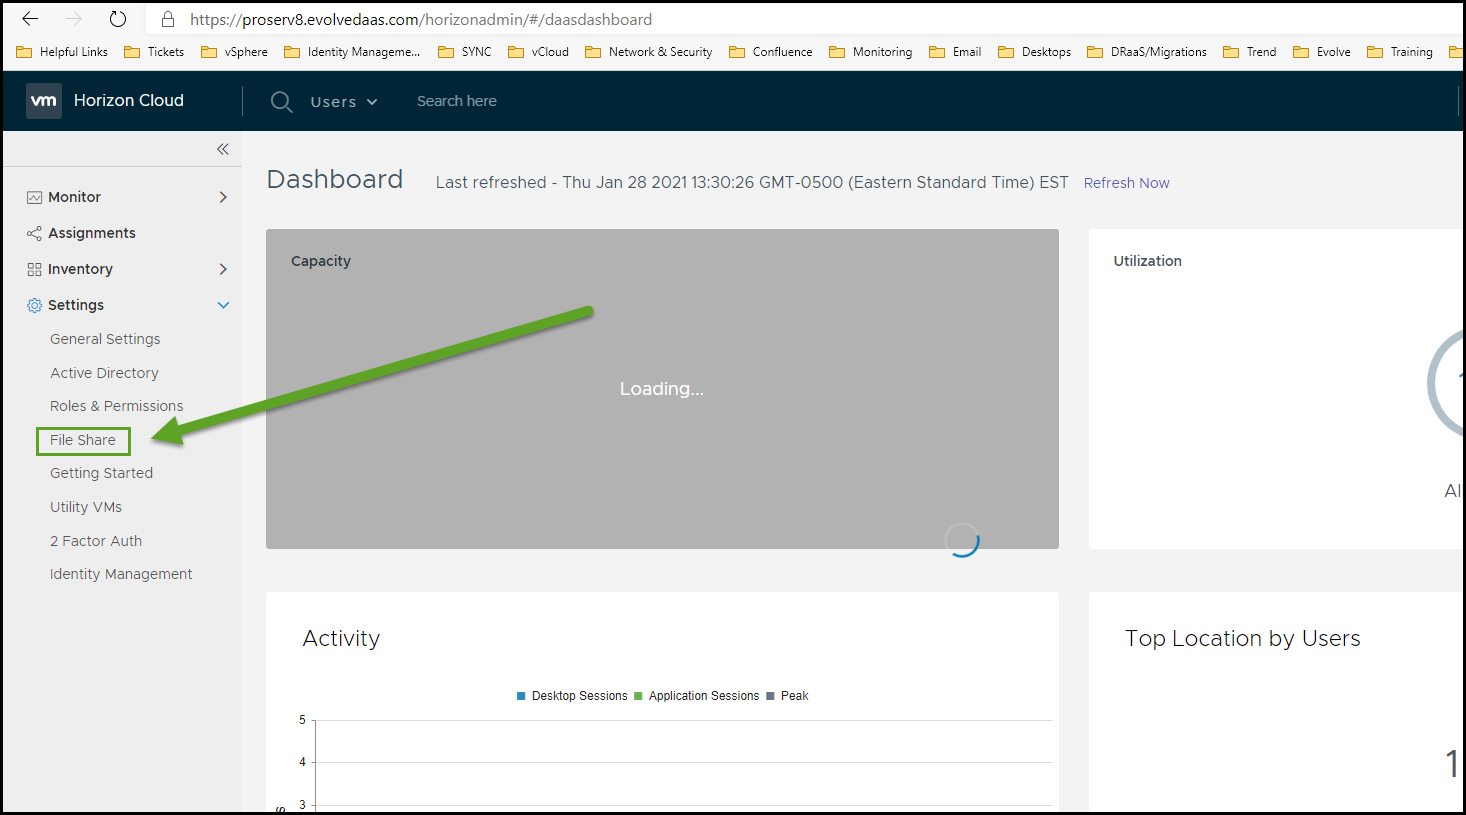
- Select Settings
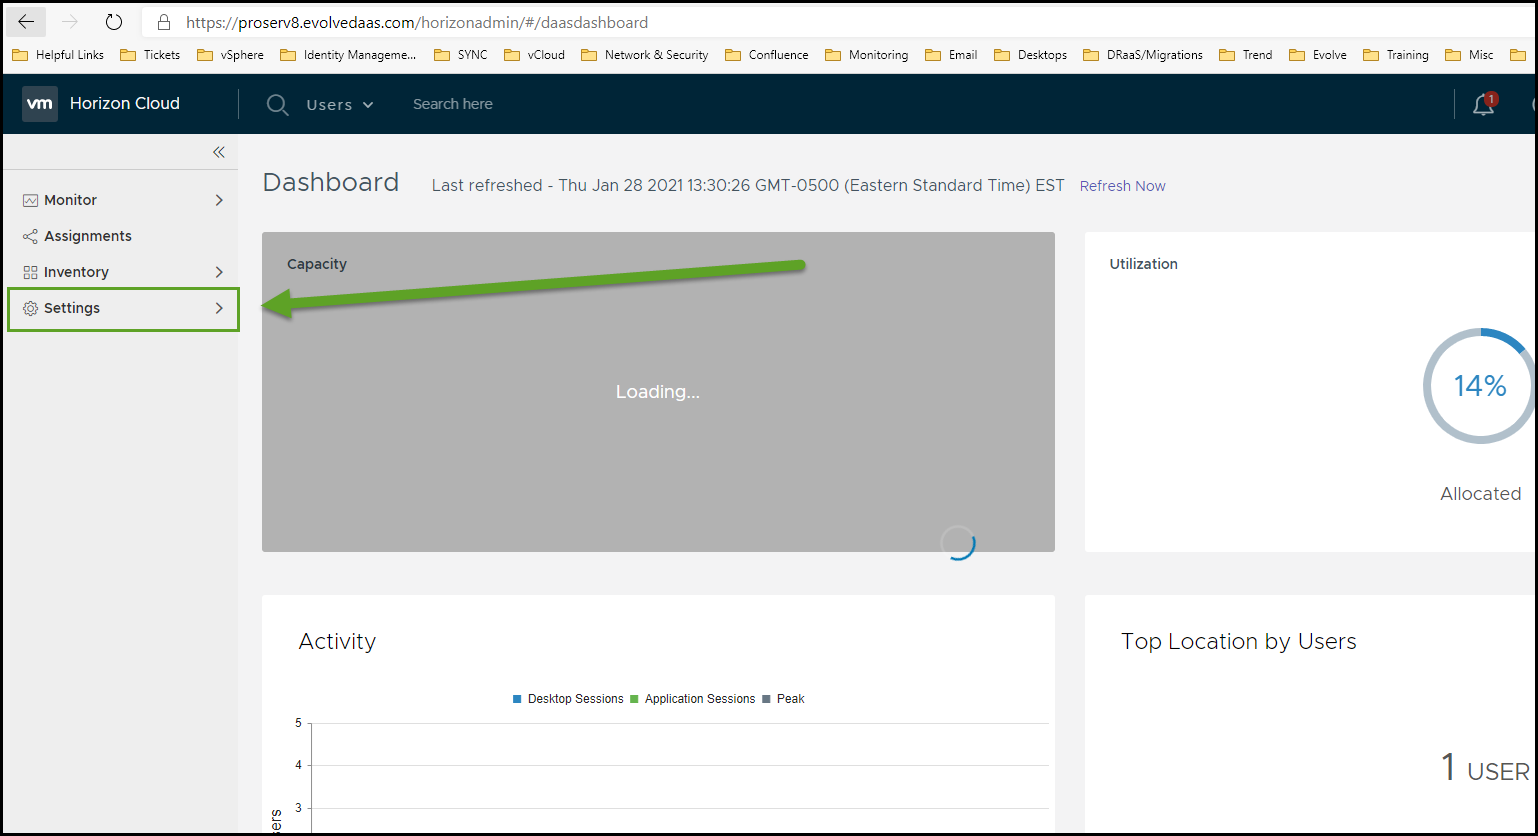
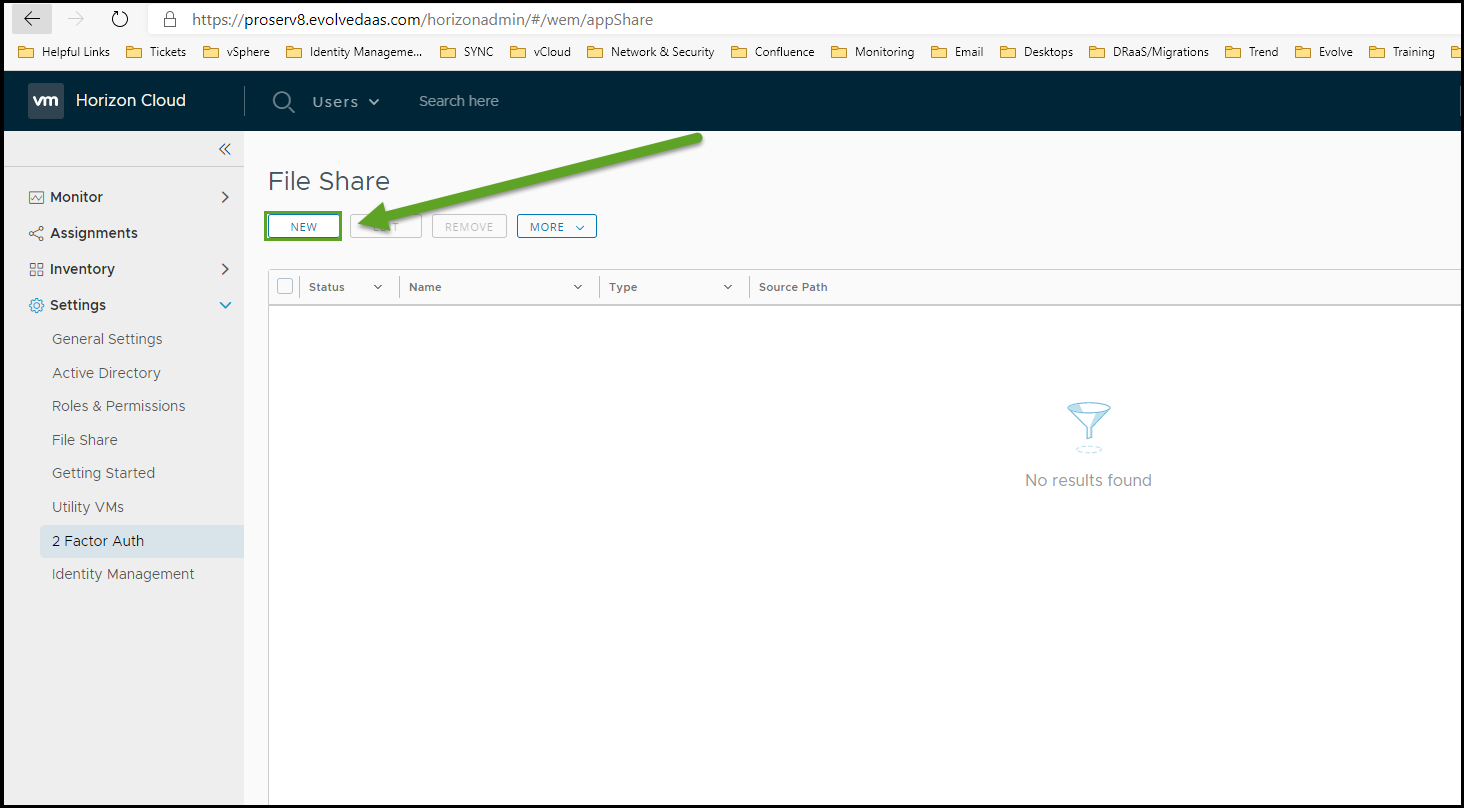
- Select File Share
- Select New
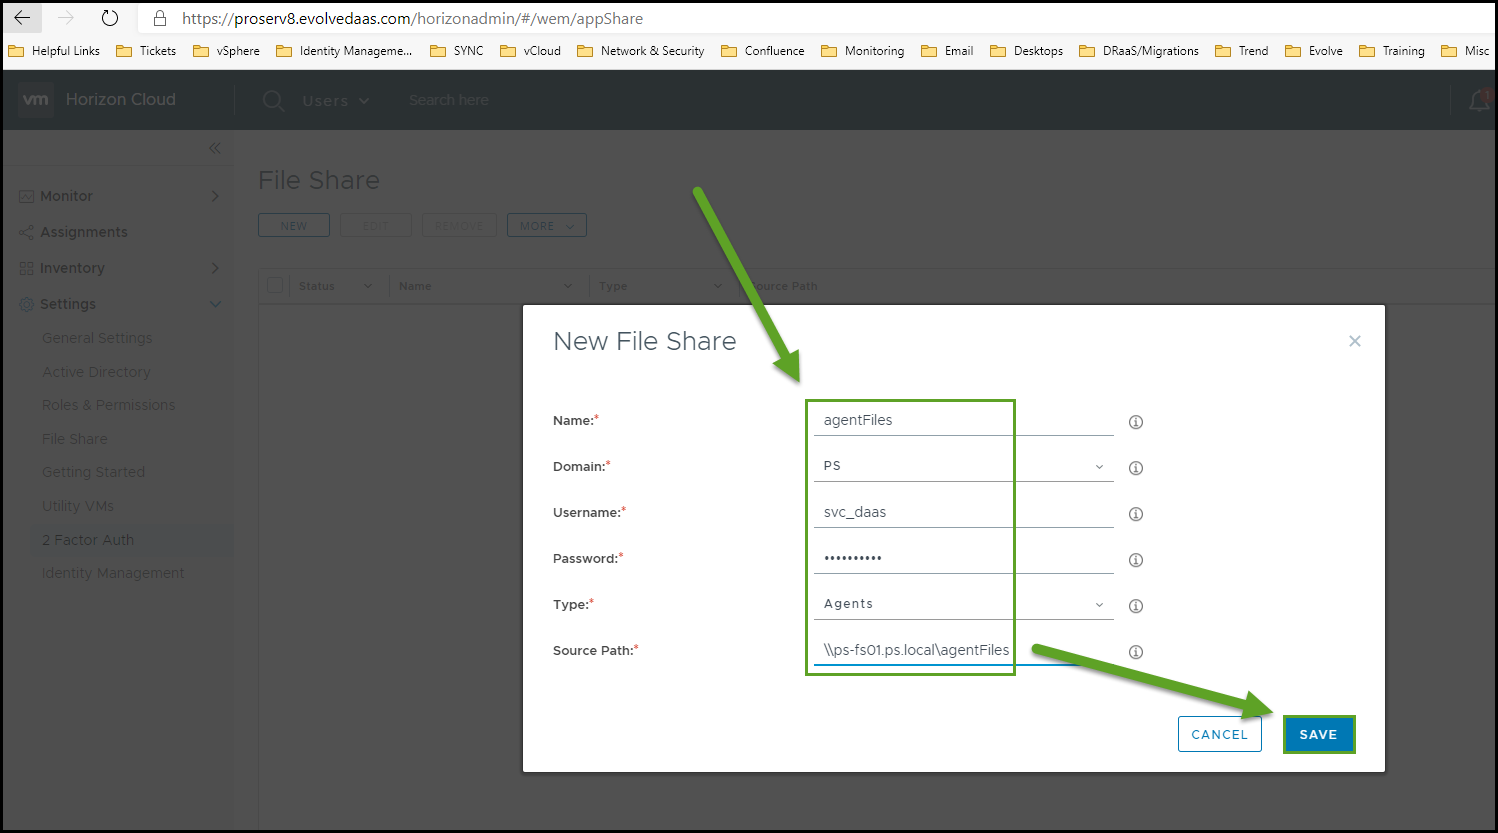
- Enter the information as follows then select Save:
- Name: agentFiles
- Domain: Select the Domain
- Username: DaaS Bind Account Name
- Password: DaaS Bind Account Password
- Type: Agents
- Source Path: FQDN of the Share
NOTE
This SMB share name needs to include the SERVER NAME with the domain added (ex. \\ps-fs01.ps.local\agentFiles)
- At this point the latest compatible Agent Versions and all needed files will automatically download into the file share.
NOTE
WAIT at least 10-15 min for the files to download to the file share - before checking.

Update the DaaS Agent
Use the the below steps to update the VMware DaaS & Horizon agents in your DaaS assignments.
IMPORTANT
- Desktops are updated in batches, and cannot be larger than 30. If the assignment has 30 or fewer desktops, all desktops in the assignment will be updated together.
- If a desktop has an active session, the user will be warned five minutes before the update occurs.
- If a user attempts to login into a desktop that is being updated, the login will be unsuccessful, and the user will receive a message that the desktop is not available.
- Individual desktops cannot be upgraded automatically, please see the section below: Manually Updating DaaS agent for a virtual desktop.
- Browse to: Assignments
- Any assignment that has out of date agents will display a blue circle indicator. When you hover over the blue circle, it will display the agent versions (see below example screenshot).

- Check the box for the desktop Assignments that you want to update
- Click Update Agent Software
- Select the Agents that you want to upgrade, and then Select the Agent Versions from the drop-down menu
- For VM Update Reservations, enter the percentage of VM desktops that must be available to your users during the agent upgrade process (10% is recommended for off-hours and maintenance periods)
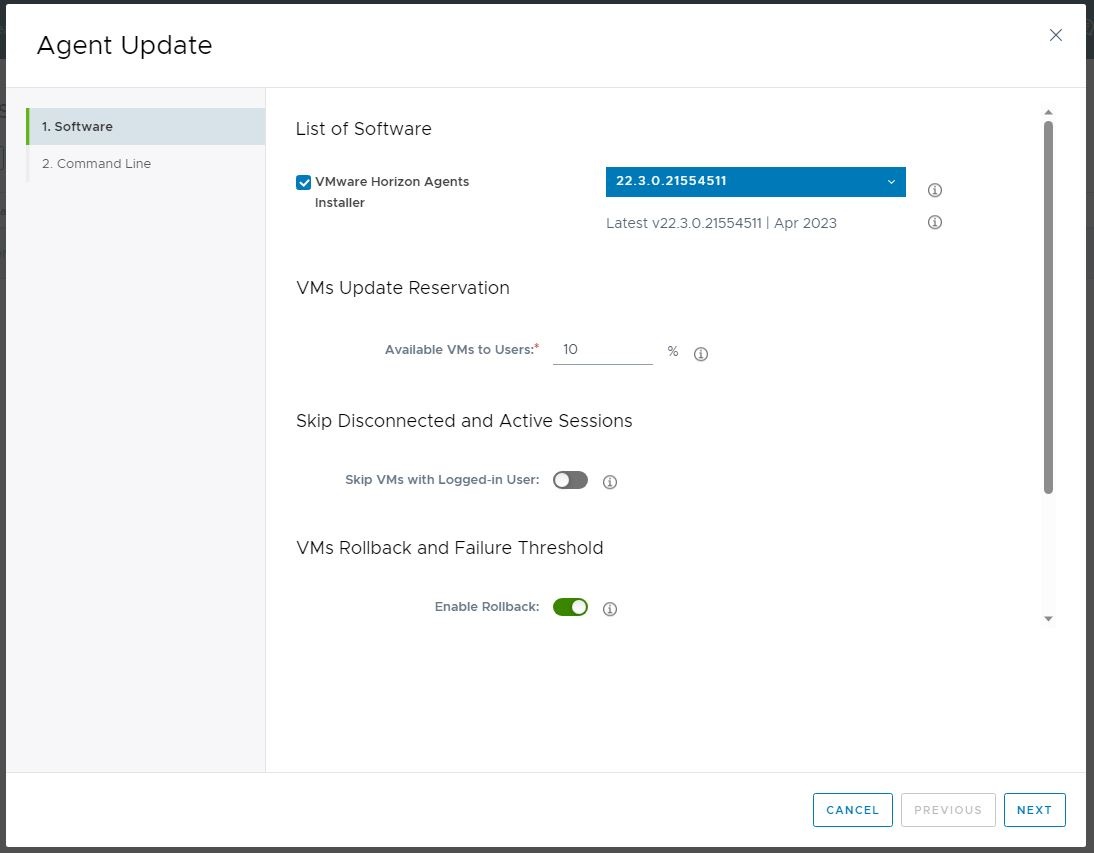
IMPORTANT
To perform agent upgrades and exclude desktops in use, which prevents end user disconnects, switch on Skip VMs with Logged-in User.

- Click Next
- Accept the Agent License Agreements listed (one for each agent being updated)
- Click Next
- Enter any command line arguments for the Horizon Agent updates (the DaaS agent update will not take any arguments)
- Click Submit
- To view the update progress, browse to the System Activity (tab) within the Assignment being updated (see example screenshot)

WMware Resources
Managing File Shares
https://docs.vmware.com/en/VMware-Horizon-DaaS/services/horizondaas.tenantadmin910/GUID-71AFADD8-05B0-4AC9-9D32-8377142C45A6.html#GUID-71AFADD8-05B0-4AC9-9D32-8377142C45A6
Update Agent Software for an Assignment
https://docs.vmware.com/en/VMware-Horizon-DaaS/services/horizondaas.tenantadmin910/GUID-A0464AE4-D028-4394-A644-F1E0C1F8AD28.html