Schedules
Schedules are used to establish when an organization is opened or closed for business or available to take calls. They can be applied to various services (Auto Attendants, Hunt Group, Call Center Queues, etc.) and eliminate the need for administrators to manually make these changes within the system.
This article will provide details on the various schedules that are available, as well as how to add/modify/delete schedules within the OSSmosis 5 Admin Portal.
Schedule Home Page
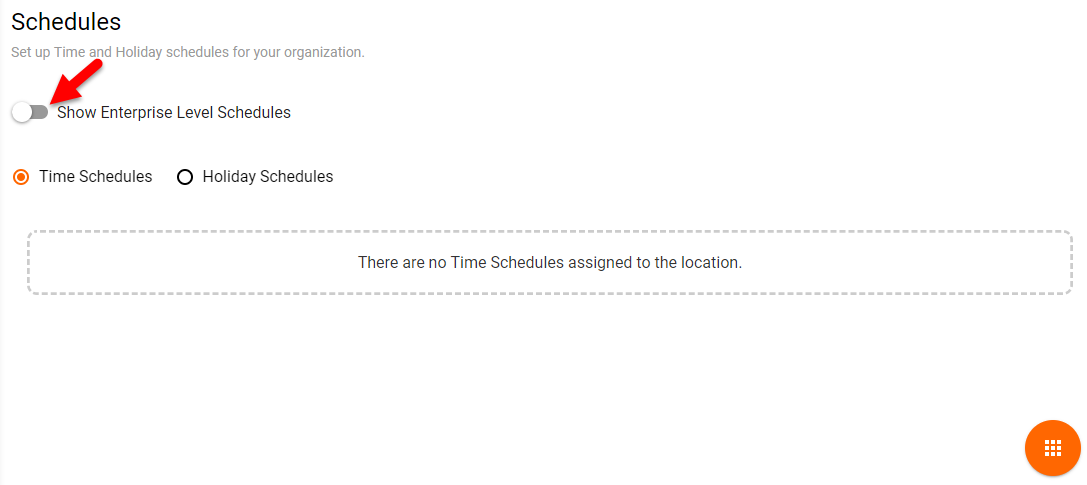
Upon selecting the Schedule option from the Telephony Setup page, admins will be taken to the following page.
The default view on this page will show the schedules that have been set up at a Group Level. You will have the ability to switch over and see all schedules for the entire Enterprise by using the toggle in the upper left-hand corner.
NOTE: If schedules were created during your initial implementation, by your project manage, they will be shown under the Time or Holiday Schedules, but if you are setting up a schedule for the first time, your screen will look the same as the one above.
Adding a New Schedule
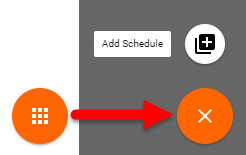
To create a new schedule for your organization, click on the Options icon in the bottom right hand corner of the page and select “Add Schedule”
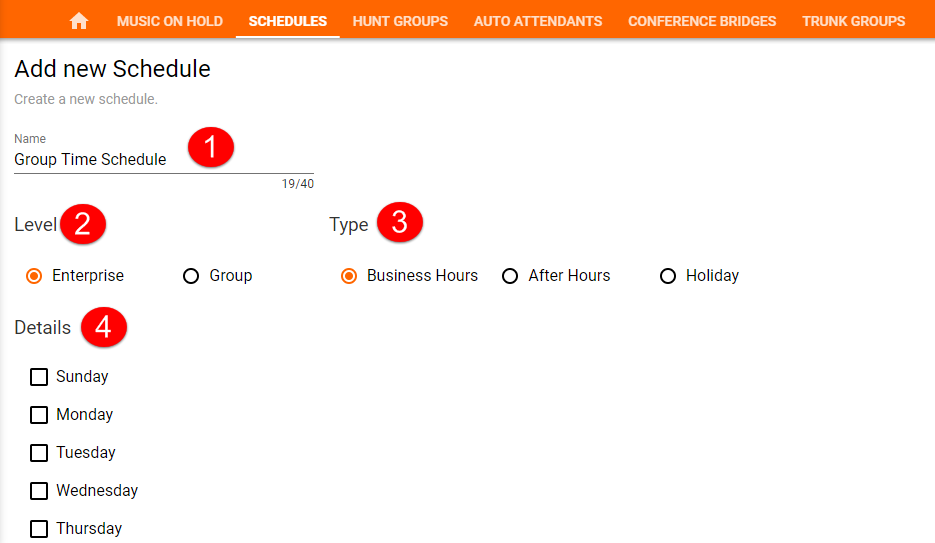
Upon selecting the Add Schedule option, you will be able to create a new schedule.
The general settings for creating a new schedule are as followed:
- Name – Choose a name that will be easily identifiable, so you can reference it on other screens
- Level – Decide whether this schedule will be available at an Enterprise or Group Level.
- Type – Will this be a Business Hour, After Hour or Holiday Schedule?
- Details – This will be where you indicate which days are included in the schedule.
Schedule Types
Business Hours
Typically, when creating a business hours schedule, it will be for the same day. When selecting days for your schedules, you will see the following default settings
You will need to update the start and end times to meet your organizations needs and click Save from the Options icon.
NOTE: There may be a situation where you want to close the office an hour for lunch. To account for this time, you can click on the plus button “+” on the top row, which will add a second line for the given day.
In the example above, the office will be closed from 12pm-1pm. Calls will be handled according to your after-hours call flow.
After Hours
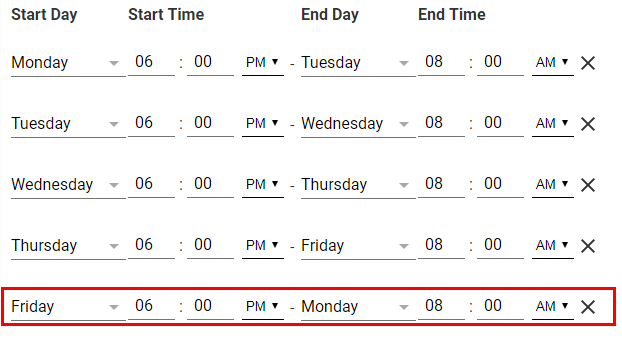
Unlike business hours, your after-hours schedules usually consist of periods of time that span multiple days, whether it’s overnight or over a weekend. When selecting this type of schedule, the default settings will look slightly different.
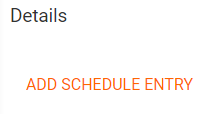
You will first need to add entries individually into the Details section.
Once your entry is visible, the default settings will look as followed…
Please make sure that all days are accounted for on the schedule.
In the example below, afters hours runs from 6pm in the evening to 8am the next morning. The office is closed over the weekend, so the final entry (Friday @ 6pm to Monday @ 8am) will cover Saturday and Sunday.
Holiday
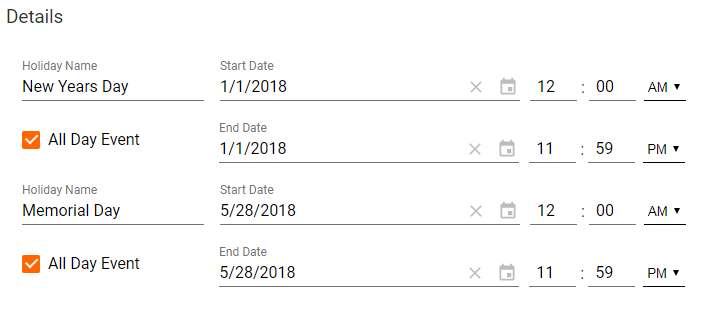
The third schedule type deals with holidays. Unlike business and after hours, this schedule will be based on specific dates. You will have the option to enter as many holidays your organization observes, while determining whether the holiday will last all-day OR over the course of several days, based on the holiday. The holiday schedule will supersede your existing business & after-hours schedules during those specific periods of time.
Edit a Schedule
Regardless of which schedule type you create, you will have the ability to edit. Click on the options icon across from the desired schedule and select the “Edit Schedule” option.
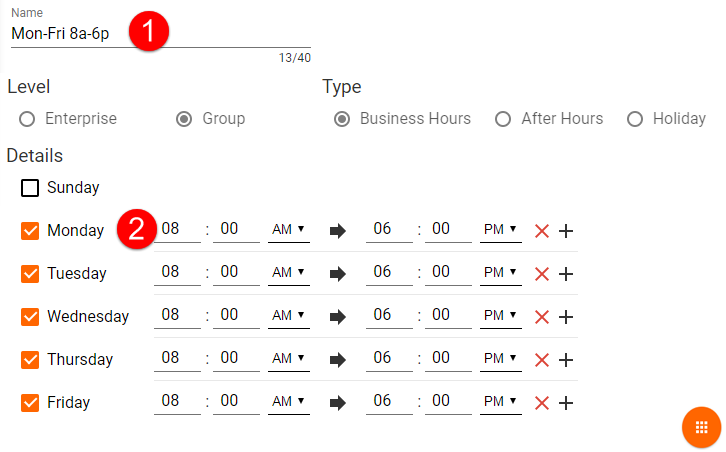
Your edit may involve simply changing the name of the schedule (1), so it is easier to select from a drop-down list, or adjusting the start or end time on a day of the week (2).
After all edits are made, click on the Actions button to save your updates.
Deleting a Schedule
Just as with edits, you will be able to delete a schedule from your account by clicking on the options icon across from the desired schedule and select the “Delete” option.
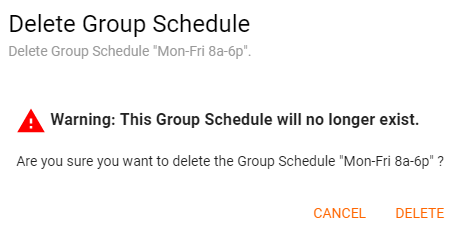
After selecting Delete, you will receive a pop up box, asking you to confirm the selected schedule. Click Delete again and the Schedule will be removed.
