...
Select the location you wish to view and edit. Select Telephony Setup and Hunt Groups to bring up Hunt Groups for that specific location.
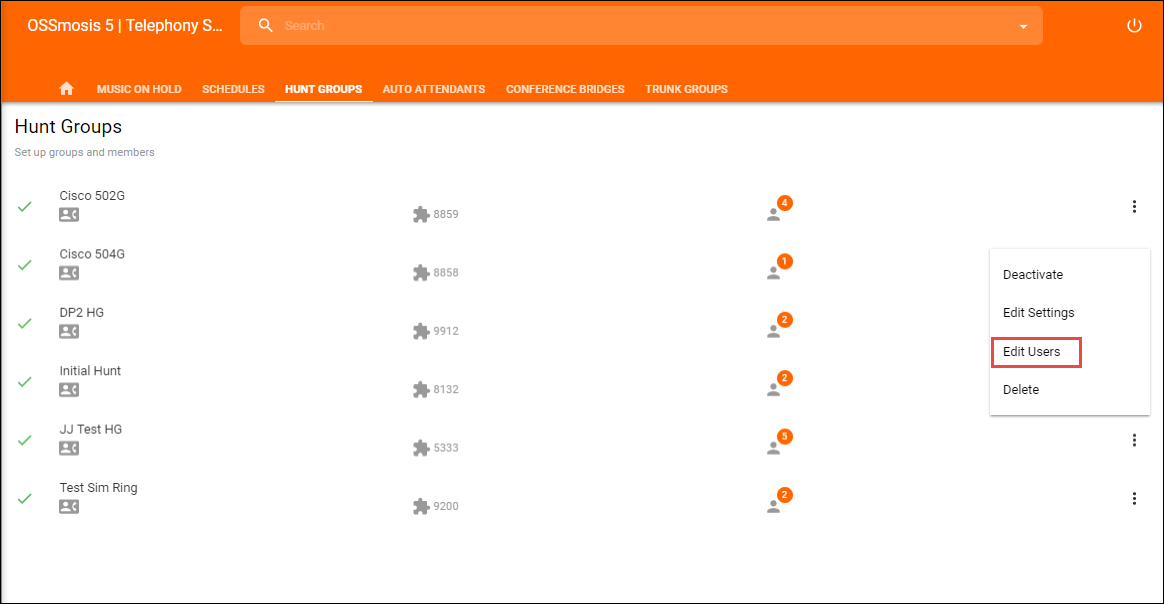
The following information can be found on the Hunt Group landing page:
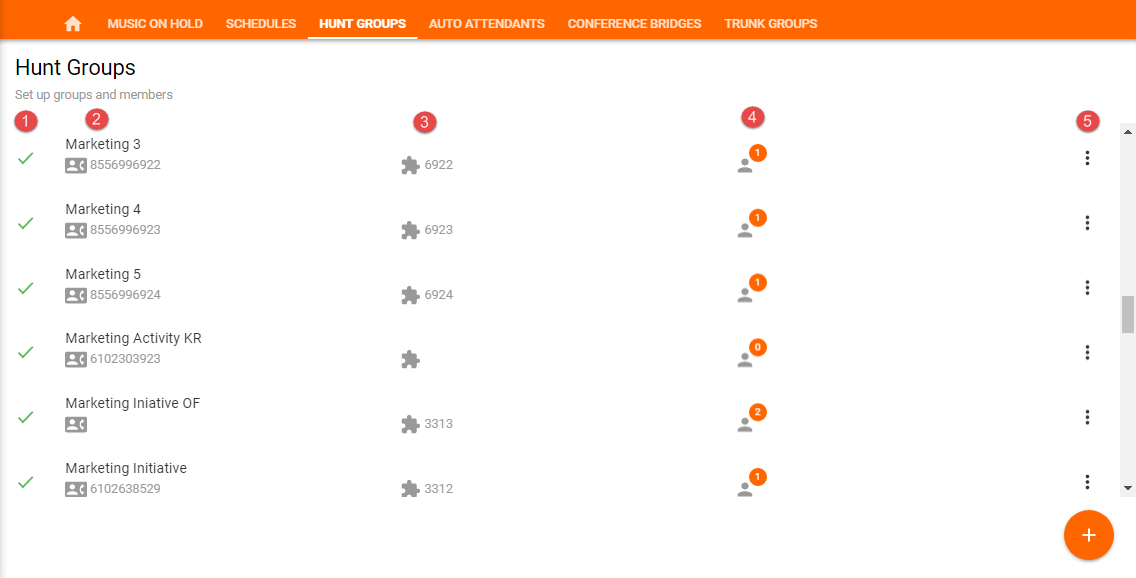
- Active/Inactive – A green check mark indicates the hunt group is currently active. A red X indicates the hunt group is currently inactive.
- Name and DID Assigned to the Hunt Group – A hunt group may not have a DID assigned if it is extension only.
- Extension Assigned to the Hunt Group – An extension is not mandatory if a DID has been assigned to the hunt group.
- Total Number of Users Assigned to the Hunt Group
- Additional Options – Selecting the options icon allows Admins to manage the hunt group settings and users and deactivate the hunt group.
Edit Hunt Group Settings
Edit settings allows Admins to manage the routing and general settings of the hunt group. The following settings can be edited within this page:
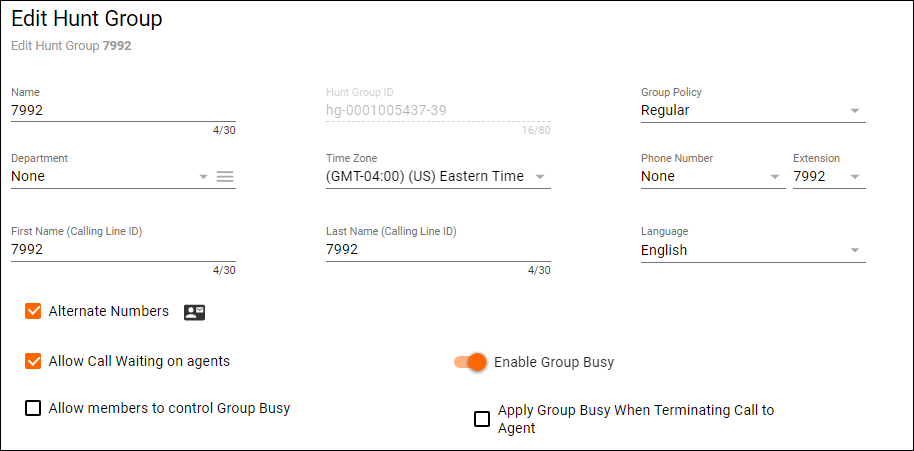
Basic Settings:
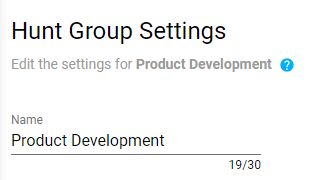
- Hunt Group Name
- Group Policy – the group policy establishes how calls will be routed to the users assigned to the hunt group. Admins can choose from the follow Group Policies:
- Circular – Calls are distributed to hunt group users in a round robin fashion, starting with the user where the last hunt ended.
- Regular – Calls are distributed to users in specific order, always starting with the same user.
- Uniform – Calls are evenly distributed to users within the hunt group starting with the most idle user.
- Simultaneous – Calls are distributed to all users within the hunt group at the same time
- Weighted – Calls are randomly distributed to users according to a configurable weight.
- Department – Determine if the hunt group will apply to a specific department within the company. A Department is not a mandatory setting when creating a hunt group.
- Time Zone
- Phone Number/Extension – The phone number and/or extension that has been applied to the hunt group
- First and Last Name Calling Line ID – The calling line ID is what will be presented to the users when receiving a call from the hunt group.
- Language
- Apply Alternate Numbers – Allows customers to dial alternate numbers and still reach the hunt group
- Allow Call Waiting to Agents – Allow users to receive more than one hunt group call at a time
- Allow Member to control Group Busy
- Enable/Disable Group Busy -When the policy is enabled, any incoming call to the hunt group triggers a busy treatment.
- Apply Group Busy When Terminating Call to Agent – calls made through a directory hunting number are not affected by Hunt Group Call Busy if enabled
No Answer Settings
...
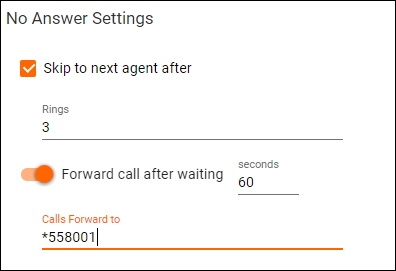
- Skip next agent after (x) rings – When applied, if the user does not pick up after the designated number of rings it will skip to the next user.
- Forward Calls after waiting (x) seconds/Forward To – If a call is not answered within the designated time, the call will be forwarded to the DID, extension or voicemail entered. A voicemail is designated by putting *55 before the extension – example: *558001
Not Reachable Settings
...
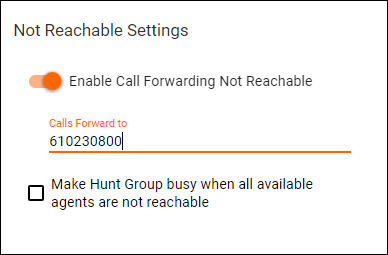
- Enable/Disable – Call Forwarding Not Reachable/Forward To – If the Hunt Group becomes not reachable, the caller will be forwarded to the DID, extension or voicemail entered. A voicemail is designated by putting *55 before the extension – example: *558001
- Make Hunt Group busy when all available agents are not reachable
Calling Line ID Settings
...

- Use the system default CLID configuration (currently including the Hunt Group Name in the CLID)
- For ex. If the NAME of the Hunt Group is set to Product Development:
- The system defaults the CLID Configuration in the following format:

Manage Hunt Group Users
- From the Hunt Group landing page, select the Additional Options icon and Edit Users
Adding a User to a Hunt Group
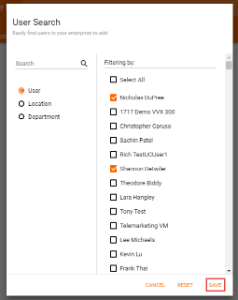
- To add a user to the hunt group select the Add Users icon
- Locate and select users in the advanced search by User, Location or Department. Save.
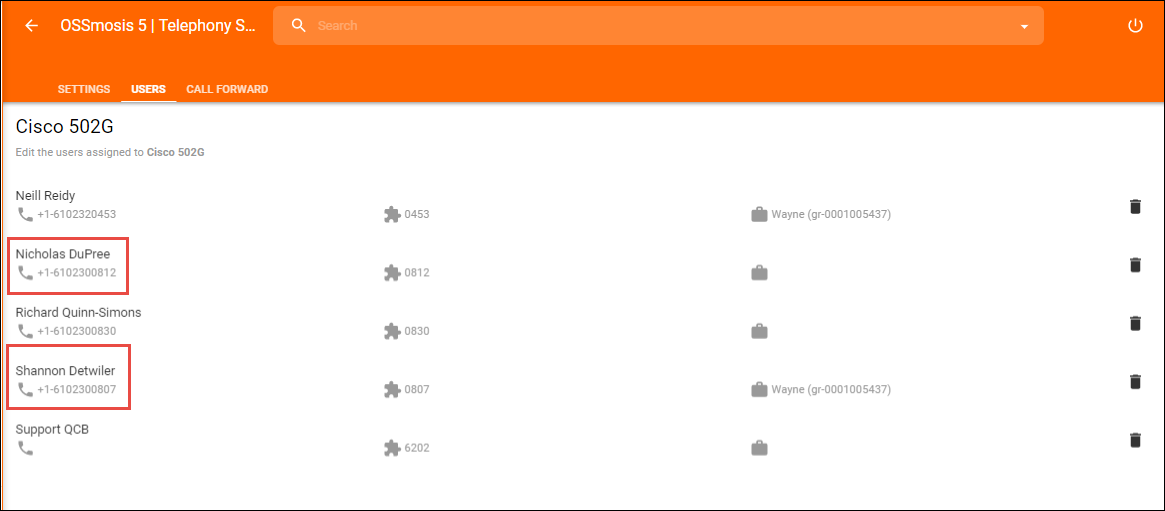
- The new users will be added to the Hunt Group users landing page.
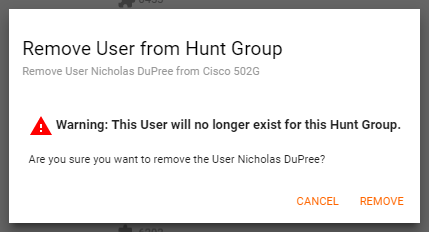
Removing a User from a Hunt Group
- To remove a user from a hunt group, select the Delete Icon next to the users name.

- A confirmation popup window will open to confirm the removal of the user. Select remove if you would like to remove the user from the hunt group or cancel if you would like to keep the user in the hunt group
Updating a Users Priority within a Hunt Group
A users priority can be updated when the Group Policy is set to Circular or Regular.
- Circular – Calls are distributed to hunt group users in a round robin fashion, starting with the user where the last hunt ended.
- Regular – Calls are distributed to users in specific order, always starting with the same user.
- Select a user and drag and drop them where they should fall in priority among the list of users within the hunt group
