...
The Text Template Repository is the first step and foundation for adding this capability into your call flow to deliver to an agent.
- Adding a Text Template
- How to Apply a Text Template
| Table of Contents |
|---|
Adding a Text Template
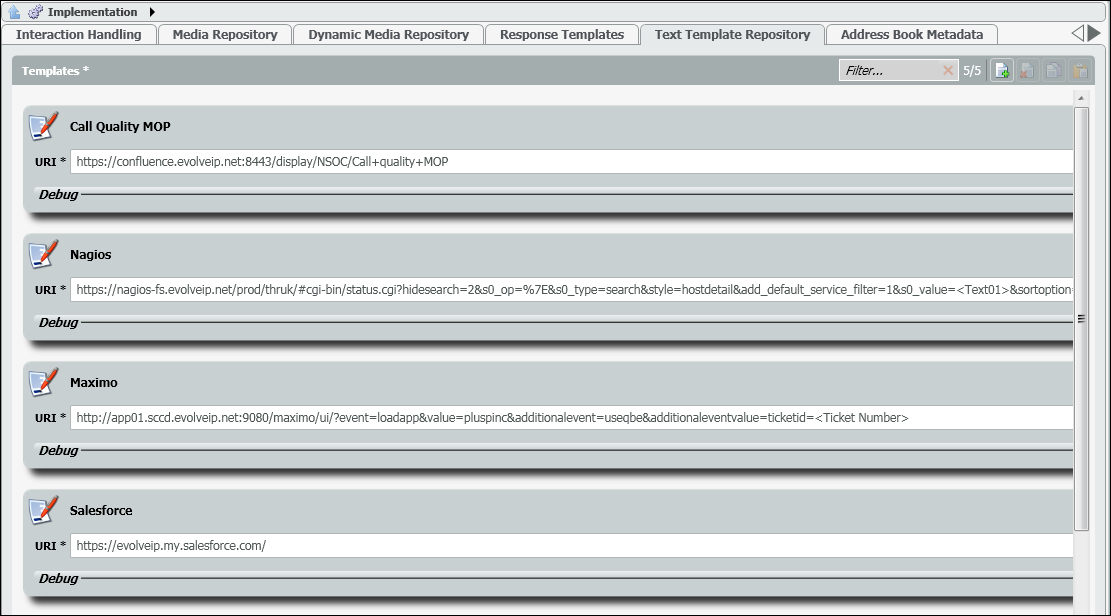
- Select Add under the Text Template Repository tab to add a new text
 template.
 - A new template will open. Enter in the name of the template. The name of the template is what will appear as the dynamic link in the agents client.

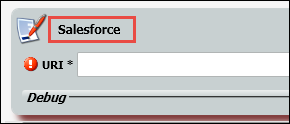
3. Enter in the URI. The URI is where the agent will be redirected when they click on the link within the agent client.
In this example, our URI is going to do a lookup in Salesforce based on the callerID. When the callerID is captured it will input it into the link, so when the agent clicks on the Salesforce link in their agent client, it will take them directly to the callers contact page found within Salesforce.

4. Debug allows you to see an example of what the URI will look like if additional information is needed outside of the link.
In the example below, a DID as been entered within the token text box and the URI has been updated to include the DID. Copy and paste the updated URI into a web browser will help verify the correct information will populate for the agent.


How to Apply a Text Template
Once you have created a text template there are a few extra steps that must be taken in order for it to appear within the agent client.
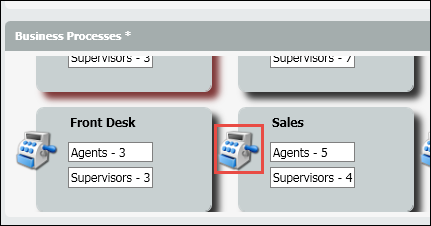
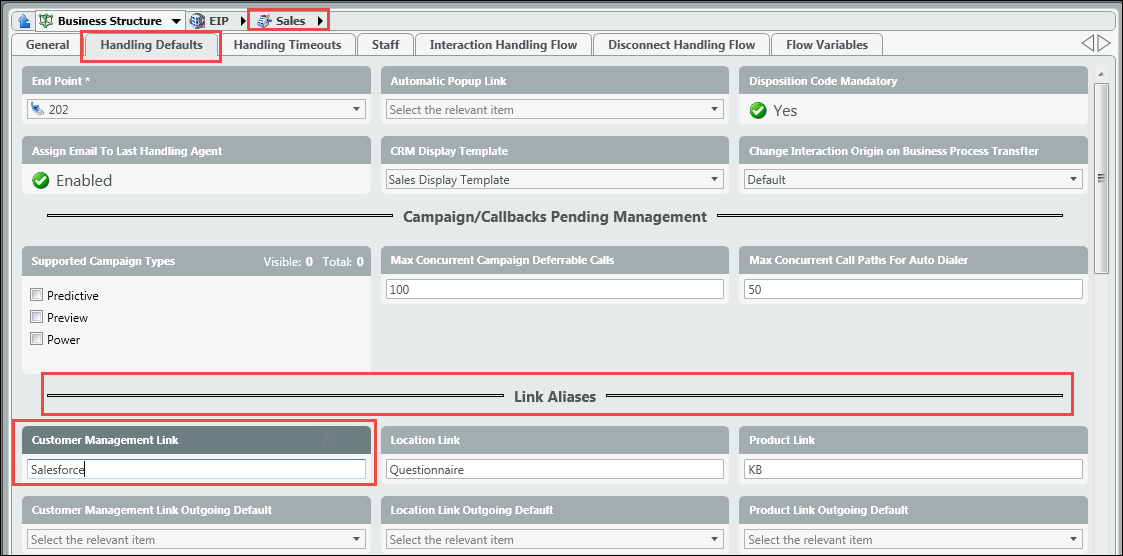
- First you will need to drill into the specific business process you wish to apply the template to within the business processes handling defaults tab.
2. From the handling default tab, you will see Link Aliases. Link Aliases is where you will manually enter in the name of the text template you wish to apply. You will want to enter in the same name you applied within the text template repository.
...
You will also notice that you can choose three links for any outgoing interactions to show up in the agent client. But for this example we’ve chosen to only demonstrate links to agents for incoming interactions.
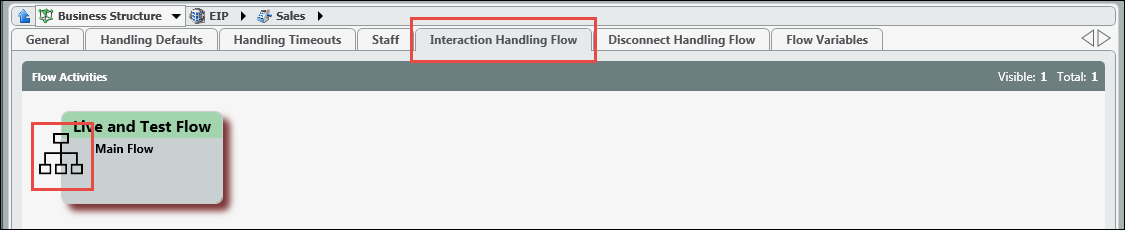
3. Once you have added in the names of the templates. Click on the Interaction Handling Flow tab within the same business process and drill into the flow.
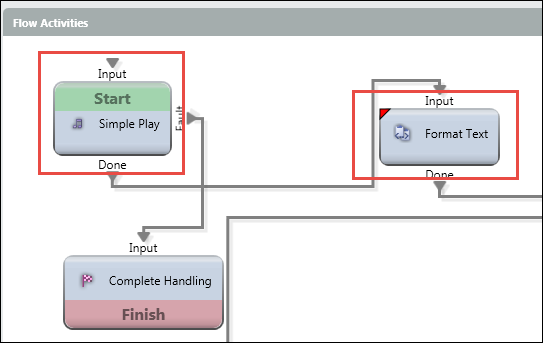
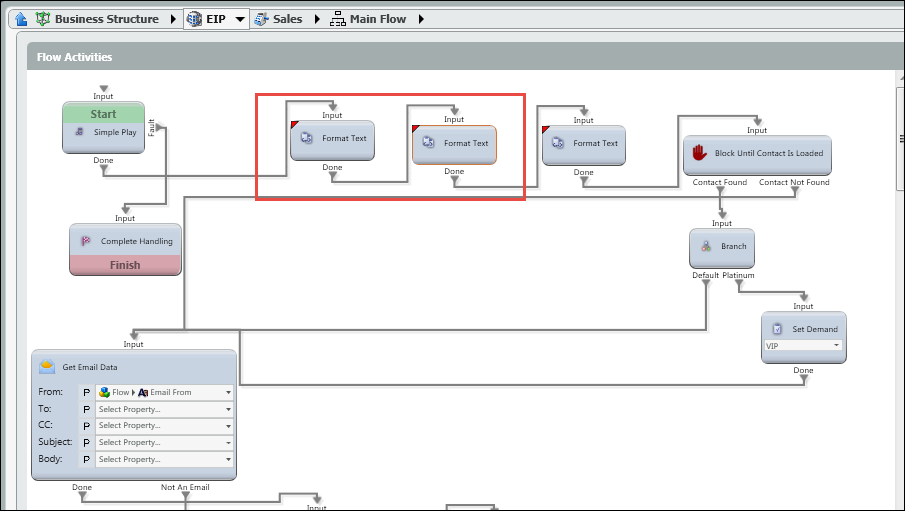
4. To add the template to the agents client, you will need to add a Format Text handling node found under the Data Set & Get nodes at the beginning of the call flow. You will drag the node onto the flow and attach the node to the first start node.

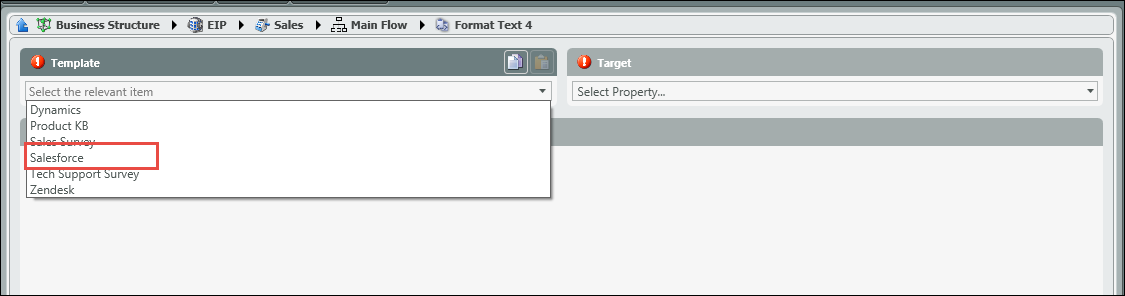
5. Drill into the Format Text node by click on the icon.
6. From the template drop down, select the template you wish to pass to the agent.
7. From the Select Property drop down, select Interaction and then select whichever Alias Link you input the template. For our example, we put our Salesforce template under the Customer Management Alias Link (within the handling defaults tab), so we will select Customer Management Link.
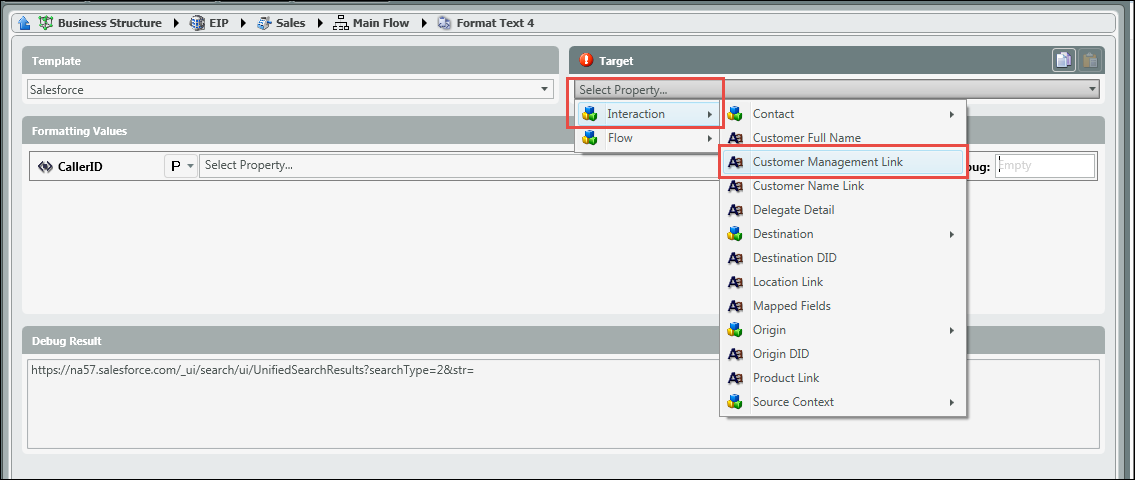
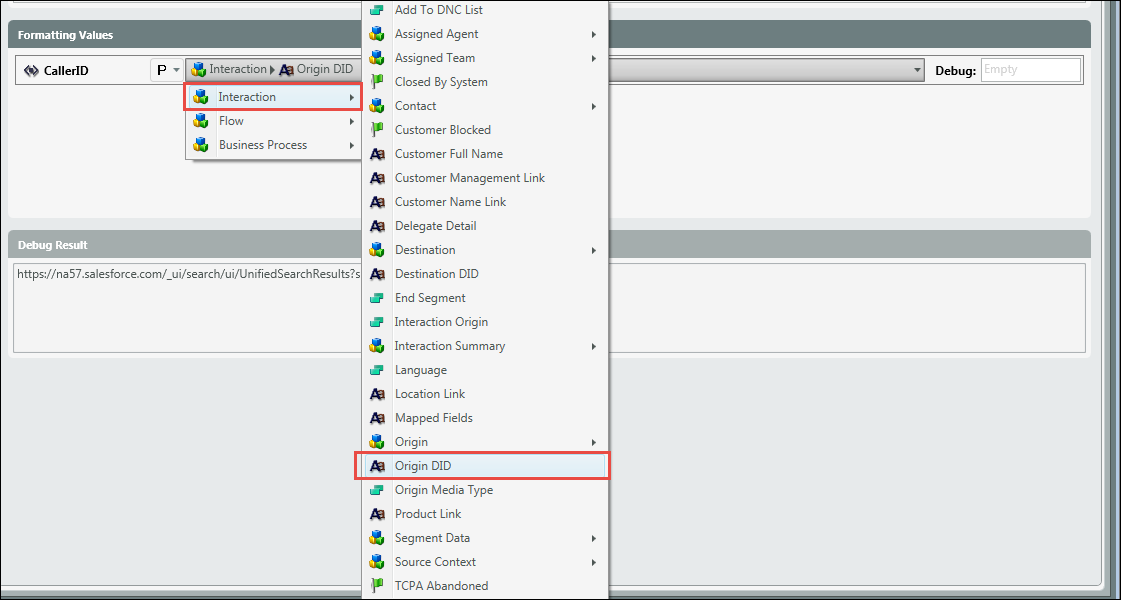
8. Under Formatting Values, it may require you to add an additional parameter. This will all depend on the URI that you are using within the template. For our example, we are using Salesforce with a callerID lookup. Within the Formatting Values, we need to search under property for Interaction > Origin ID because we are looking to capture the originating callerID of the customer.
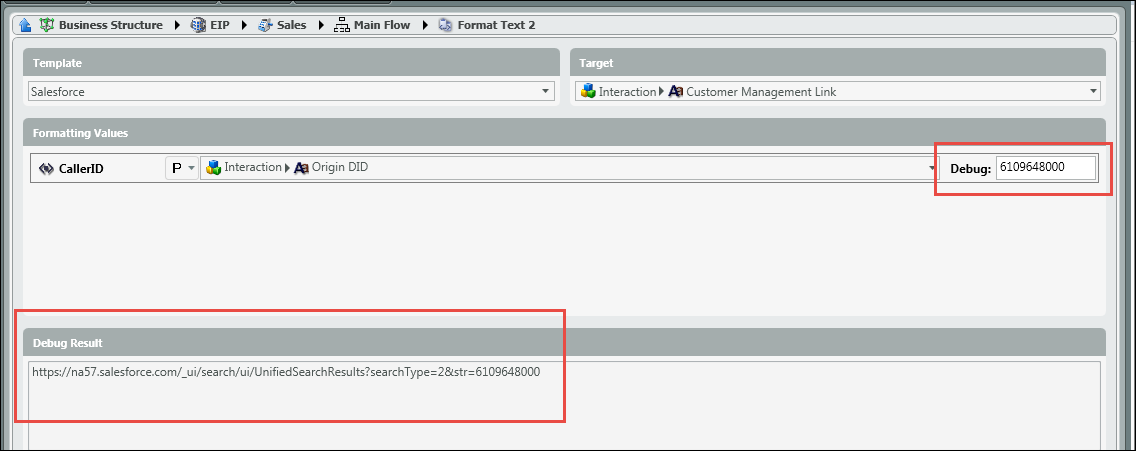
9. Debug under Formatting Values, similar to the Text Template Repository, will give you a sample of what the URI link will look like and present to the agent if a DID is entered in the debug text box.
10. Once you have finished editing the Format Text node, you will want to connect it to the next handling node in the flow. In this example we are connecting it to another Format Text node because will will be presenting the agent with more then one text template (dynamic link) in the agent client.
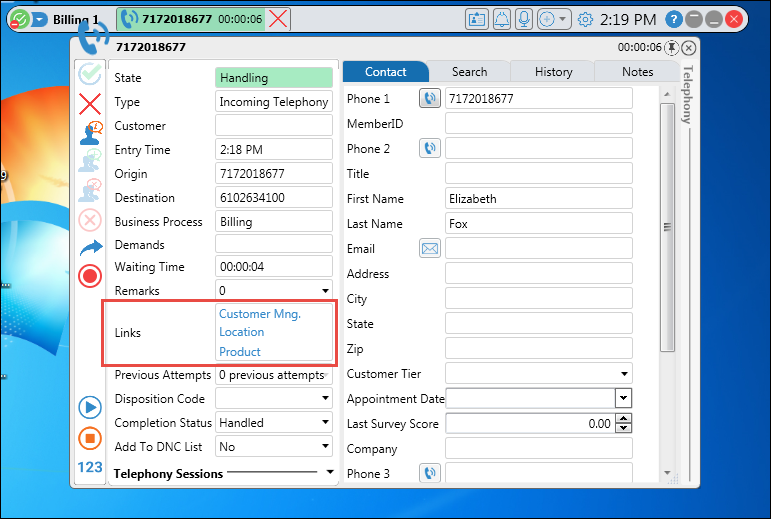
11. When an agent gets an incoming interaction they will see the text template links located under ‘Links’ within the agent client.