You can upload OVF or OVA virtual machine templates to deploy in vCloud Director.

OVA / OVF uploads can be completed in two ways

  1. Add a new VApp from OVF
    1. This is the typical method of deployment.
    2. It is good for one time use virtual machines.
  2. Uploading as a Template into a Catalog
    1. This is a good method 

If an OVA/OVF template requires additional information during deployment, such as advanced network or storage options, it may fail to upload to vCloud.
If this is the case, try either method described below. If it still fails to upload, please open a case with support@evolveip.net and provide the details of
the error and how large the OVA/OVF is. The OVA/OVF may need to be import by EvolveIP Support and then imported into your Organization VDC.
If that is the case, we will require additional deployment information such as IP addresses, storage, and networking requirements.

Procedure

Add a new VApp from OVFUploading as a Template into a Catalog
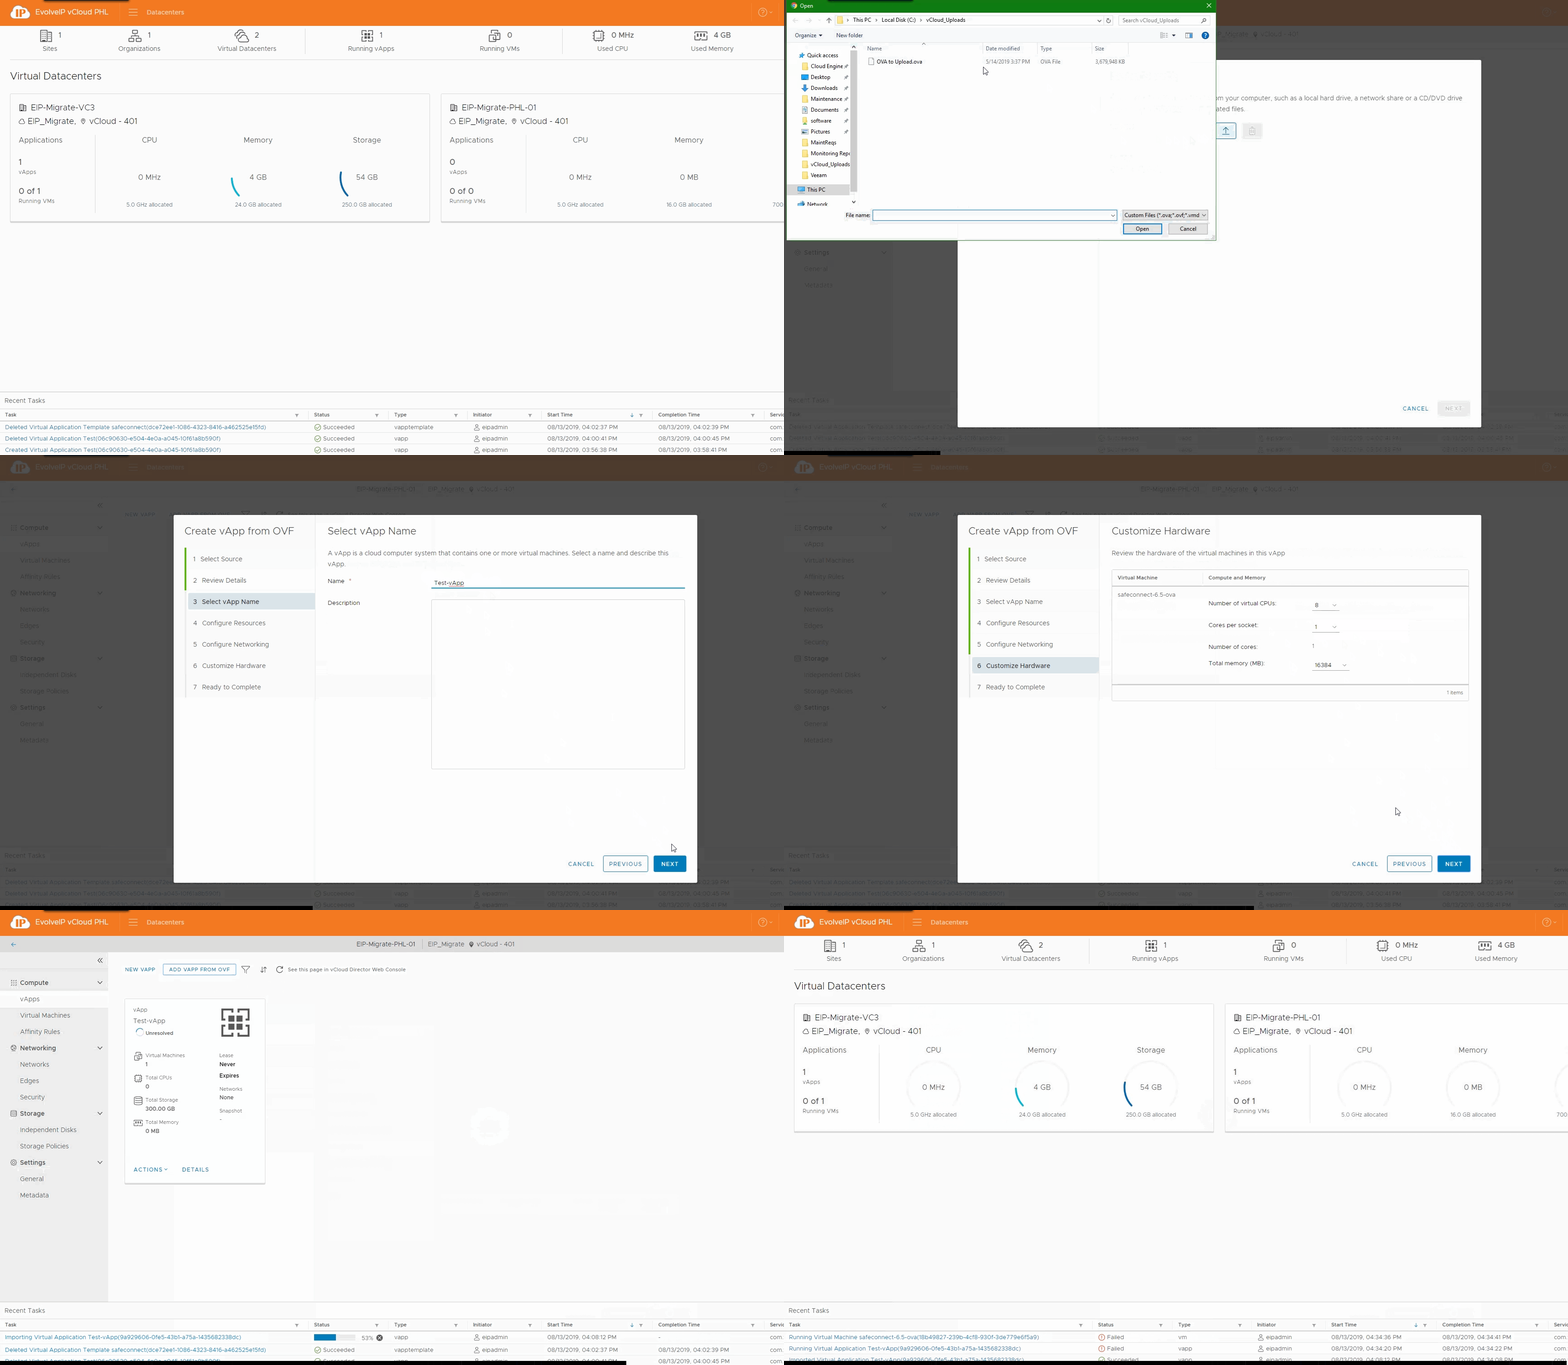
  1. On the Virtual Datacenters dashboard screen, click the card of the virtual data center you want to explore.
  2. From the Compute menu on the left click vApps.
  3. Click Add vApp from OVF.
    1. Click Browse  to select the OVF to import and click Next.
  4. Review the details of the template and click Next.
  5. Edit the vApp Name and Description if desired and click Next.
  6. Edit the Computer Name and Storage Policy and click Next.
  7. Configure the networking and click Next.
    1. Select the Network and IP Assignment Policy to connect to the vApp. 
    2. You can check the box to enable Advanced Networking options.
  8. You can customize the CPU and memory for the template and click Next.
  9. Review the specifications and click Finish to begin the import.
    1. The import process is done in two stages.
      1. The template is uploaded into temporary storage.
      2. The template is imported and deployed into the storage policy.
    2. The import process may take a long time depending on upload speeds and the size of the OVF.
  10. You can watch the process on the Recent Tasks bar at the bottom of the page.
  11. Once deployment is complete you can power on the VM and interact with it.
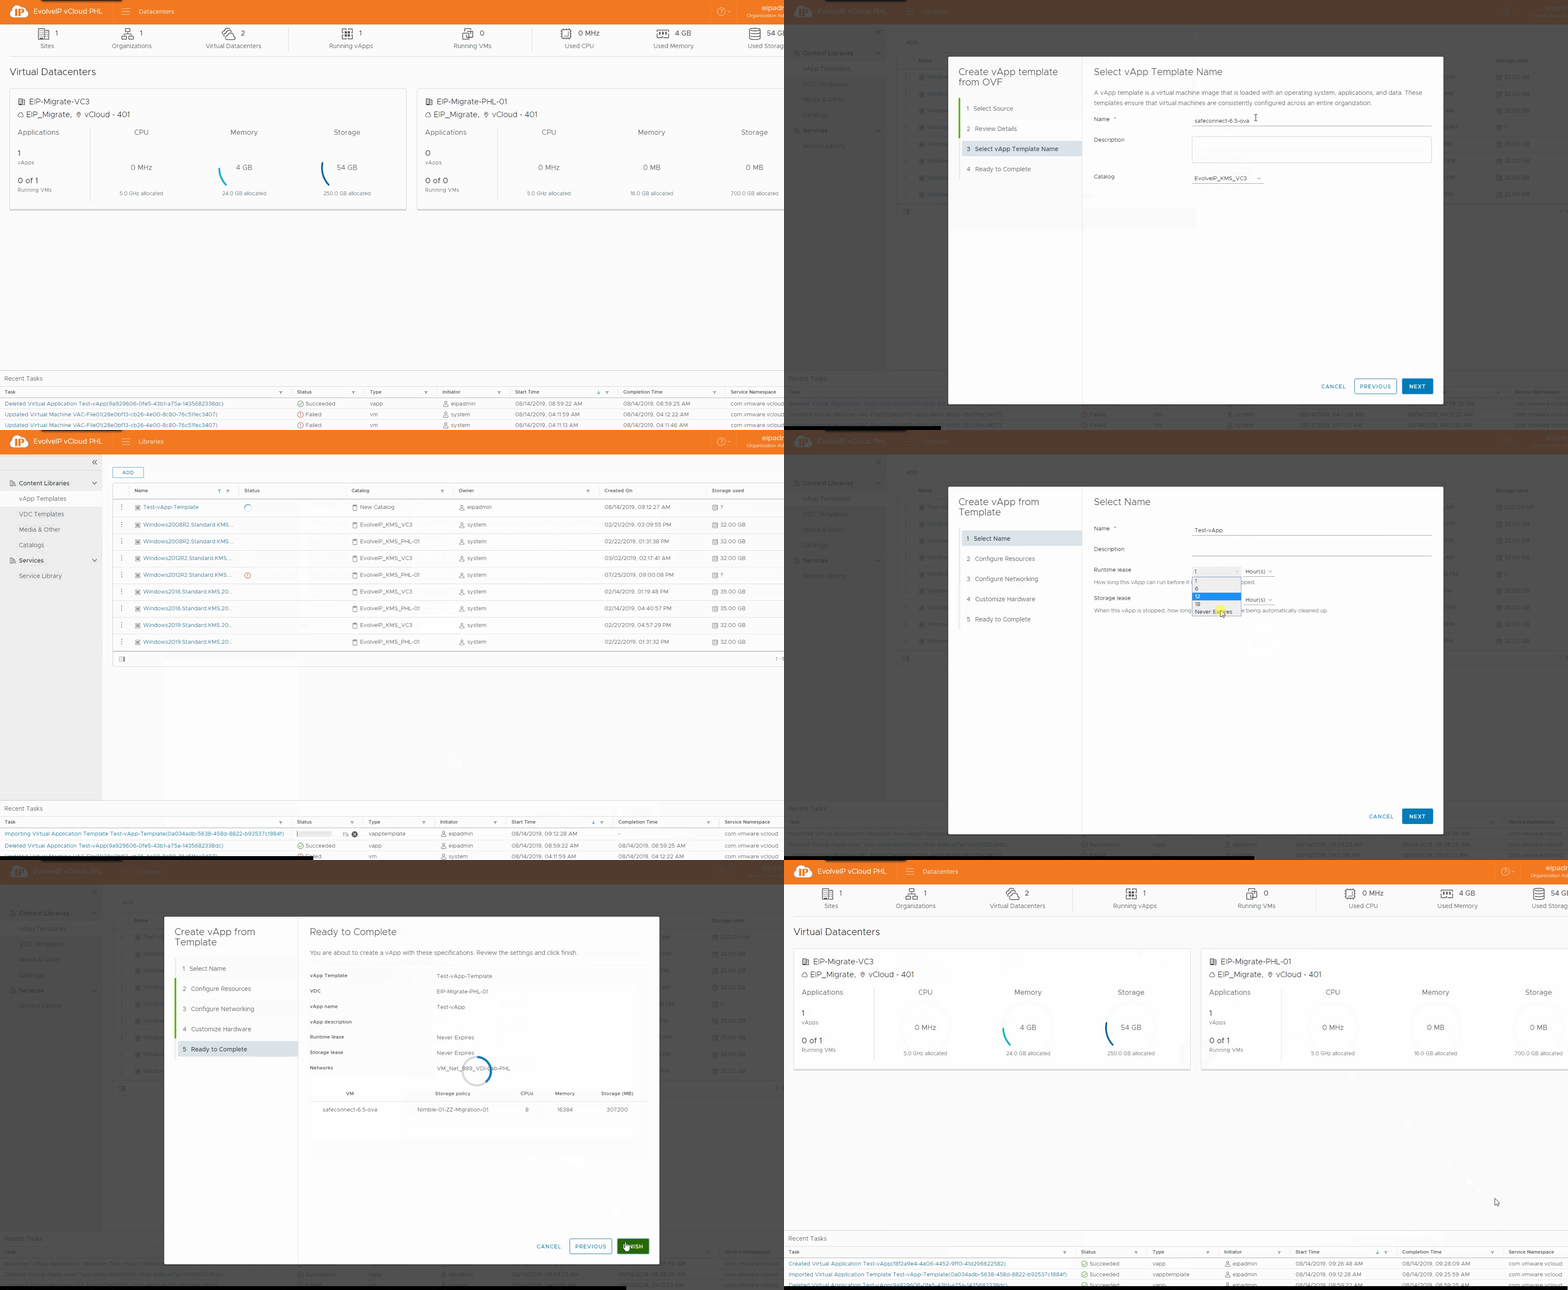
  1. On the Virtual Datacenters dashboard screen, click the card of the virtual data center you want to explore.
  2. From the main menu select Libraries.
    1. If needed, create a new Catalog
  3. Click Add under vApp Templates on the left.
  4. Click Browse  to select the OVF to import and click Next.
  5. Review the details of the template and click Next.
  6. Edit the vApp Name and Description select a Catalog with enough space and click Next.
    1. The EvolveIP catalogs are unable to be saved to as they are shared from EvolveIP.
  7. Review the template info and click Finish.
    1. The import process is done in two stages.
      1. The template is uploaded into temporary storage.
      2. The template is imported and deployed into the storage policy.
    2. The import process may take a long time depending on upload speeds and the size of the OVF.
  8. You can watch the process on the Recent Tasks bar at the bottom of the page.
  9. Once the vApp Template is complete you can deploy new vApps from the template.
  10. Click the  icon next to the vApp template and select Create vApp.
  11. Enter a Name and Description for the new vApp, set the leases to Never Expires and click Next.
  12. On the Configure Resources page select the VDC in which you want the vApp deployed in as well as the Storage Policy.
    1. Depending on the vApp Template location, deploying to another VDC may take a while.
  13. Configure the Network settings for the vApp, they can be adjusted after deployment by editing the vApp and VM.
  14. You can customize the hardware of the vApp before deployment.
    1. However, EvolveIP does not recommend altering the hardware until after deployment.
  15. Review the configuration and click Finish.
    1. During deployment the vApp Template is being cloned to a new vApp and VM.
    2. If the template and destination vApp are in different Virtual Data Centers the clone process can take some time.
  16. You can watch the process on the Recent Tasks bar at the bottom of the page.
  17. Once deployment is complete you can power on the VM and interact with it.
During the upload process the progress bar will sit at 1% for a while. This is the upload phase, when the OVA/OVF is being uploaded to vCloud Director.
Once the progress gets past 1% it means that the OVA/OVF is being imported into vSphere and vCloud as a vApp and VM.