Introduction:
The Call Recorder Portal is a tool that simplifies the management of call recordings into view which allows for call search by filters.
System Requirements:
The Call Recorder Portal is a web-based application with a secure/unique logon and user password. The tool can be accessed from any web browser by typing the URL into the browser then entering your logon credentials.
Initial Log On/Out:
The Call Recorder Portal can be accessed through the OSSmosis portal’s Call Recording tab.
Accessing through OSSmosis Portal
- Enter the URL for the OSSmosis Portal
- Type in the logon credentials given to you by your group administrator for OSSmosis.
- Click on the Call Recording Tab on the top of your OSSmosis application.
- Type in the logon credentials given to you by your group administrator for the Call Recording Portal.
Log In Screen:
Settings:
- Sound must be enabled on your PC in order to listen to recordings.
- See system requirements/troubleshooting guide for further settings requirements.
Browse – Recordings:
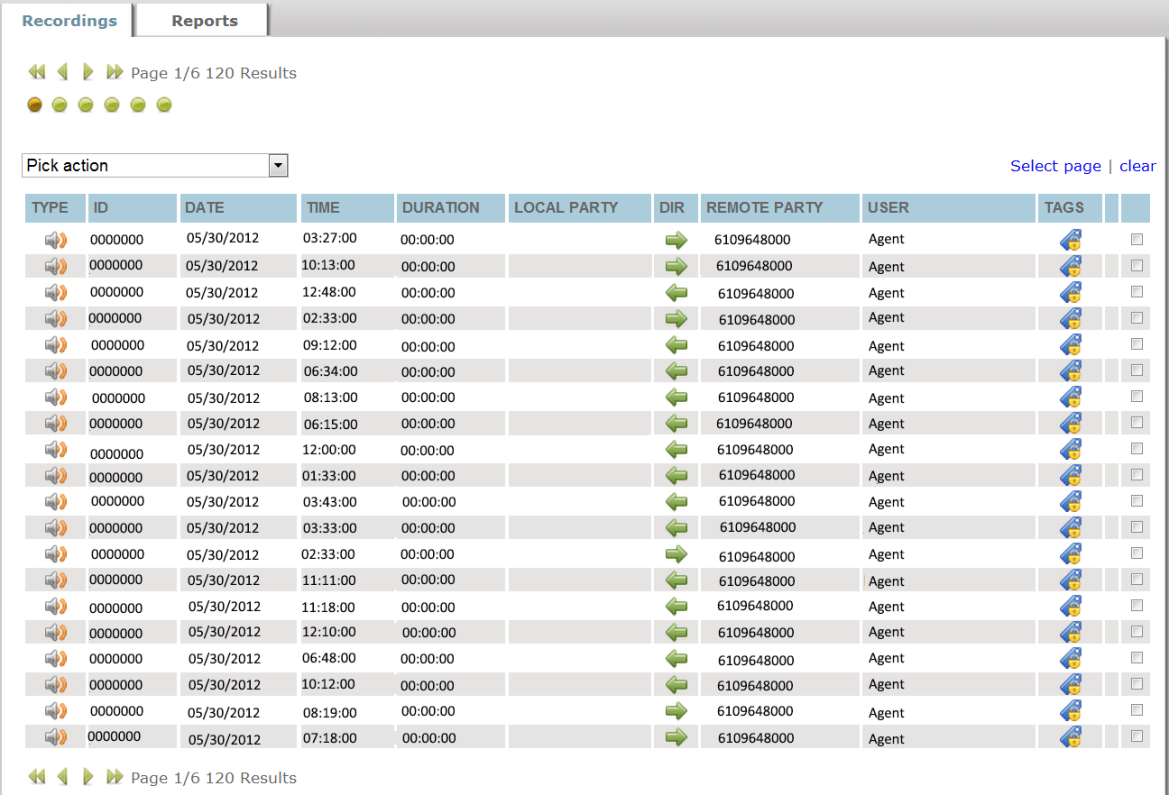
The browse recording screen is the default view once you logon to The Call Recording Portal. This will give you all completed recordings for the present day. Recordings are sorted by the most recent recording at the top. You can sort the recordings by column title by clicking on the title name.
Listening to Recordings:
- To listen to present day recordings select the speaker icon under type. Mouse-over the speaker icon and click on the Play Audio Recording.
- On the top right hand corner near the page results the audio controls will appear.
- Once you click play audio recording it will automatically start playing the selected recording.
- You can pause, stop, or fast forward a recording within the controls as well as control the volume.
- To pause click the Double Line icon on the far left.
- To stop click the square icon next to the play & pause button.
- To fast forward click the double arrows pointing to the right once to begin the fast forward and once again to stop the fast forward.
- To control the volume you can move the circular icon to the left for lower volume and to the right for louder volume.
Filtering Data:
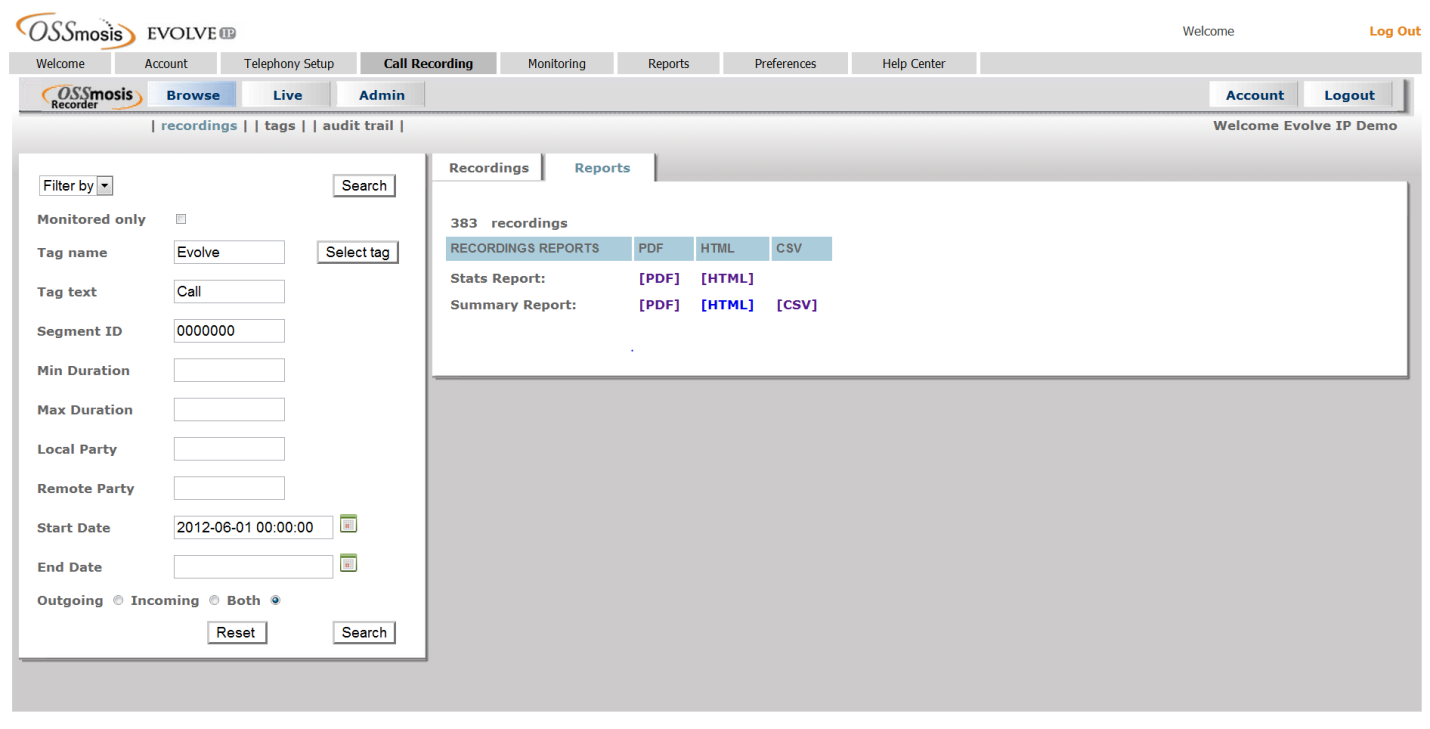
- You can select certain filters to search for specific call recordings.
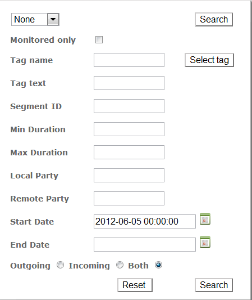
- In the drop down you can select by user, group, or none.
Filtering by None:
- By checking Monitored only this will bring you all the calls that were already reviewed/listened to in the system.
- By entering the tag name or selecting a tag in the drop down menu this will pull all calls with that specific tag.
- By entering tag text this will bring up all calls with that specific tag text assigned to a particular tag.
- By entering segment ID this is the ID of the call recording session. This would be specific call recording number to be able to pull up that particular call.
- By entering the minimum duration, this will give you all calls with a minimum duration in seconds of your choosing.
- By entering the maximum duration, this will give you all calls with a maximum duration in seconds of your choosing.
- By entering the local party, this is the agent’s user ID associated to them in the system. Normally this would be the phone number (and/or .extension) @voip.evolveip.net, @eip.local, or @<company’s name>.com. If you’re unsure of the agent’s user ID, you can enter their phone number and add an * to the end to do a blanket search for the ID.
- By entering the remote party, this is the caller ID of the person that called or the person that the local party dialed.
- By selecting a start date, this will filter the data based on all calls starting on that selected date.
- By selecting an end date, this will filter the data based on all calls ending on that selected date.
- The system also gives you the option to select all calls for an agent, or all incoming, or all outgoing calls.
- By selecting outgoing, this will give you all the calls that the agent dialed.
- By selecting incoming, this will give you all the calls that were presented and answered by the agent.
- By selecting both, this will give you all calls that the agent dialed out and all calls that were presented and answered by the agent.
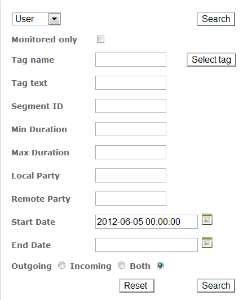
Filtering by User:
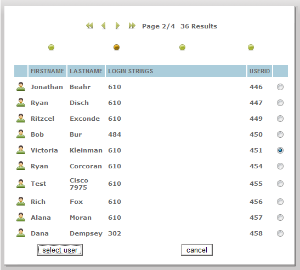
- If you select user another screen will pop up allowing you to search on a particular user that’s being recorded.
- Select the user by clicking on the circle next to the user’s information and click select user.
- This will bring you back to the filtering screen showing you that you’re filtering by user: User First Name User Last Name
- By checking Monitored only this will bring you all the calls that were already reviewed/listened to in the system.
- By entering the tag name or selecting a tag in the drop down menu this will pull all calls with that specific tag.
- By entering tag text this will bring up all calls with that specific tag text assigned to a particular tag.
- By entering segment ID this is the ID of the call recording session. This would be specific call recording number to be able to pull up that particular call.
- By entering the minimum duration, this will give you all calls with a minimum duration in seconds of your choosing.
- By entering the maximum duration, this will give you all calls with a maximum duration in seconds of your choosing.
- By entering the local party, this is the agent’s user ID associated to them in the system. Normally this would be the phone number (and/or .extension) @voip.evolveip.net, @eip.local, or @<company’s name>.com. If you’re unsure of the agent’s user ID, you can enter their phone number and add an * to the end to do a blanket search for the ID.
- By entering the remote party, this is the caller ID of the person that called or the person that the local party dialed.
- By selecting a start date, this will filter the data based on all calls starting on that selected date.
- By selecting an end date, this will filter the data based on all calls ending on that selected date.
- The system also gives you the option to select all calls for an agent, or all incoming, or all outgoing calls.
- By selecting outgoing, this will give you all the calls that the agent dialed.
- By selecting incoming, this will give you all the calls that were presented and answered by the agent.
- By selecting both, this will give you all calls that the agent dialed out and all calls that were presented and answered by the agent.
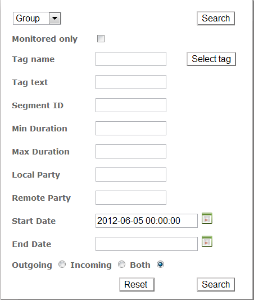
Filtering by Group:
- If you select Group another screen will pop up allowing you to search on a particular Group and its members that’s being recorded.
- Select the Group by clicking on the circle next to the user’s information and click select user.
- This will bring you back to the filtering screen showing you that you’re filtering by group: Group Name and Group ID number
- By checking Monitored only this will bring you all the calls that were already reviewed/listened to in the system.
- By entering the tag name or selecting a tag in the drop down menu this will pull all calls with that specific tag.
- By entering tag text this will bring up all calls with that specific tag text assigned to a particular tag.
- By entering segment ID this is the ID of the call recording session. This would be specific call recording number to be able to pull up that particular call.
- By entering the minimum duration, this will give you all calls with a minimum duration in seconds of your choosing.
- By entering the maximum duration, this will give you all calls with a maximum duration in seconds of your choosing.
- By entering the local party, this is the agent’s phone number or extension associated to them in the system.
- By entering the remote party, this is the caller ID of the person that called or the person that the local party dialed.
- By selecting a start date, this will filter the data based on all calls starting on that selected date.
- By selecting an end date, this will filter the data based on all calls ending on that selected date.
- The system also gives you the option to select all calls for an agent, or all incoming, or all outgoing calls.
- By selecting outgoing, this will give you all the calls that the agent dialed.
- By selecting incoming, this will give you all the calls that were presented and answered by the agent.
- By selecting both, this will give you all calls that the agent dialed out and all calls that were presented and answered by the agent.
How to Tag a Recording:
- While listening to a recording you can press the icon next to the recording under Tags
- This will bring up another screen with the recording information.
- You can select the predefined tag type in the dropdown menu
- In the Tag Text you can apply a particular searchable text associated with that tag type.
- For example if you have a tag type called sales, but you wanted to associated it with a particular customer named Customer 1, you would select the sales tag type in the dropdown menu, then enter Customer1 in the tag text. Tag text is a freehand option that is a maximum of 20 characters long.
- Offset is to notify someone when to start listening to a call. For example if you want someone to listen to the call 2 minutes into the recording, you’d enter 120 in this field. This is in seconds format. This as well is a freehand option with a maximum of 8 numbers.
- Duration is to notify someone how long to listen to that particular call. For example if you want someone to listen particularly to only 2 minutes of a call you would enter the duration here by typing in 120. This is in seconds format. This as well is a freehand option with a maximum of 8 numbers.
- You can add multiple tags to one call.
- To do so when complete adding the first tag, click add at the bottom of the tag screen.
- Enter additional tags to that particular recording and click add.
- Once complete with the last tag click Submit
- Submit will submit all the tags that were added for that particular recording.
How to Export Recordings:
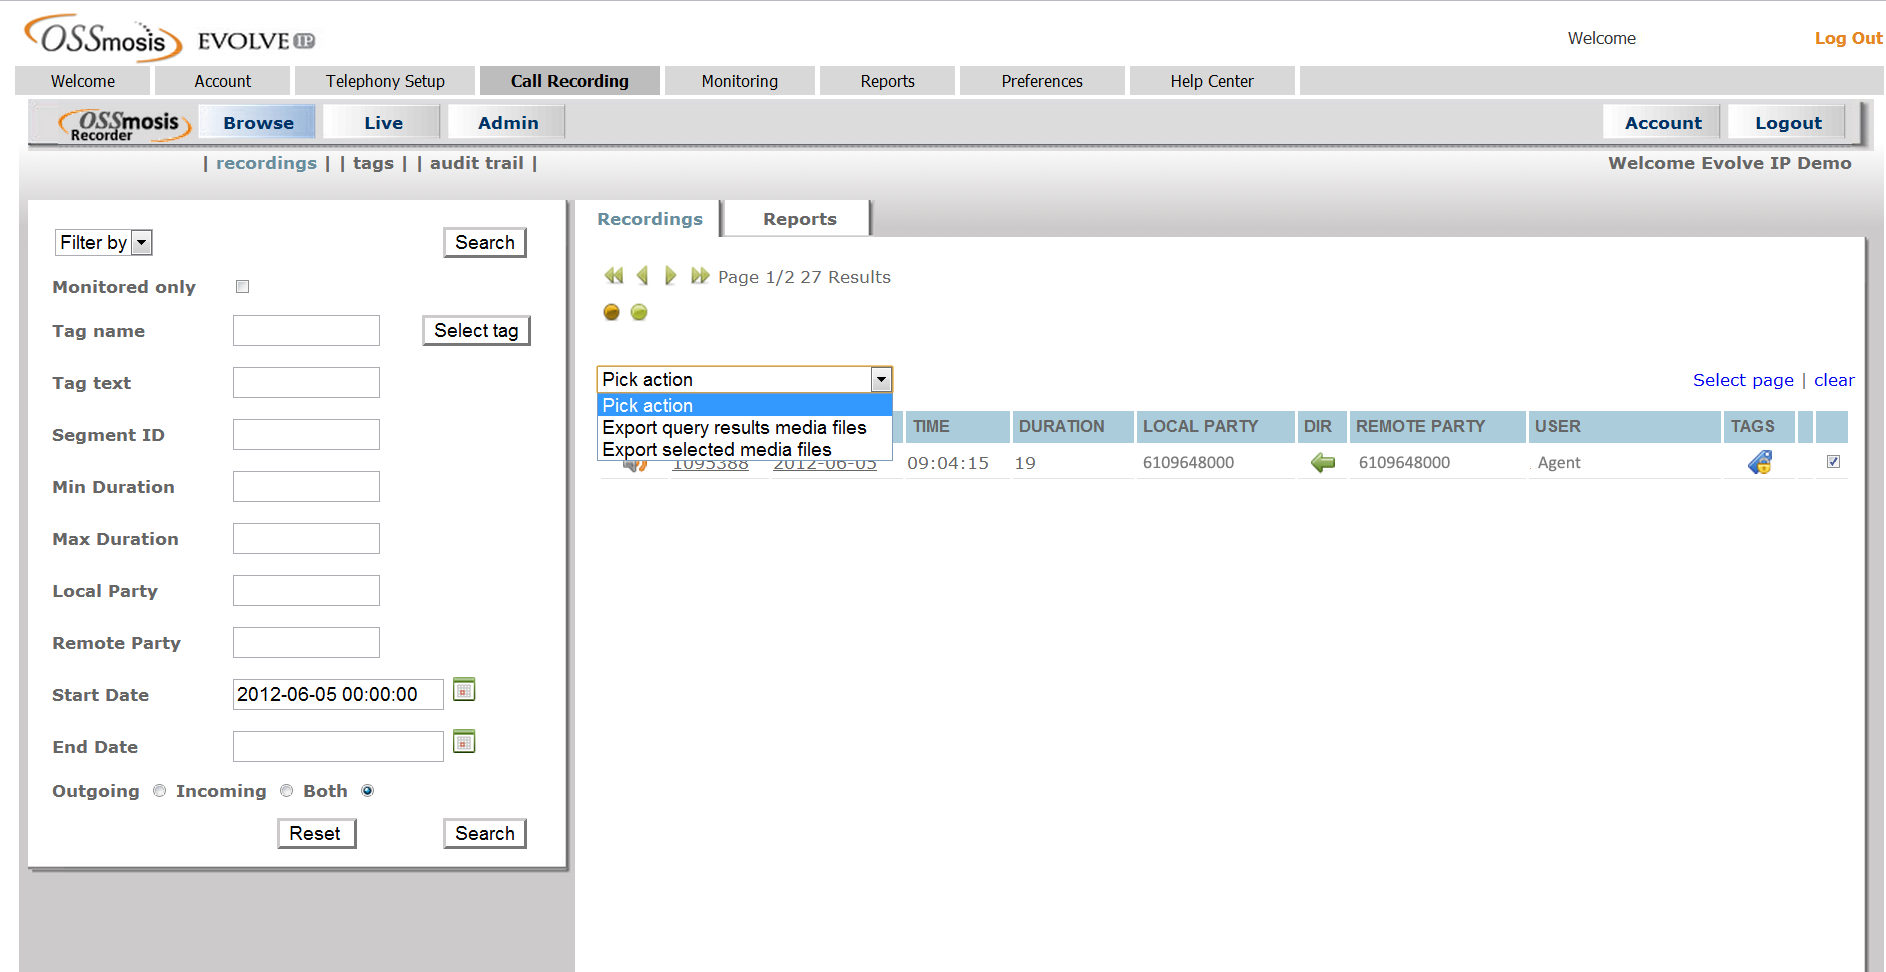
In the browse recordings portion of the call recording portal you can select particular recordings to export or select to export all queries.
To export specific recordings:
- In the recordings tab check the box at the far right of the recording you would like to export. You can select multiple records to export at one time.
- Once all recordings are checked in the drop down menu under Pick Action select Export Selected Media Files.
- These will come up as a zip file where you can save locally.
- All recordings are in a .wav format
To export all media files:
- In the drop down menu under Pick Action select Export Query Results Media Files.
- These will come up as a zip file where you can save locally.
- All recordings are in a .wav format
How to Delete Recordings:
Through the call recording portal, you have the ability to delete select recordings from the system. This will delete it completely out of the database and make the recording unsearchable in the portal. Please note that once you delete the recording there is no way to retrieve the recording from the database. All deleted recordings are permanent. This function is not available by default, it must be requested by a group administrator.
To delete specific recordings:
- In the recordings tab check the box at the far right of the recording you would like to delete. You can select multiple records to delete at one time.
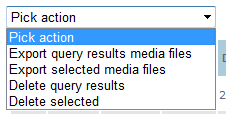
- Once all recordings are checked in the drop down menu under “Pick Action” select “Delete Selected”.
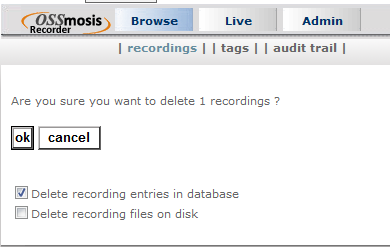
- This will bring up another menu. Check both boxes for Delete recording entries in database and Delete recording files on disk.
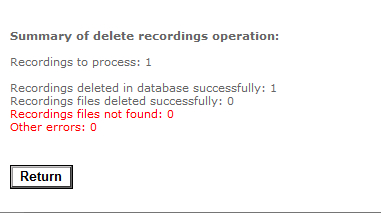
- Click on ok. Once deleted you’ll get a confirmation that the selected call recording has been deleted successfully.
To delete query results:
- In the drop down menu under Pick Action select Delete Query Results.
- This will bring up another menu. Check both boxes for Delete recording entries in database and Delete recording files on disk.
- Click on ok. Once deleted you’ll get a confirmation that the selected call recording has been deleted successfully.
Browse – Reports:
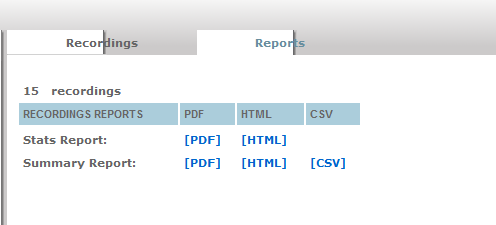
Under the browse tab you can select 2 reports to give you stats or summary. To access reports click on the Reports Tab in the Browse Menu.
Stats Report
- To view the Stats Report you can enter the filtering criteria or leave blank to pull all queries for the present day.
- Select the format either PDF or HTML
- This will automatically bring up the report in that format.
- The report will show Total Calls, Inbound Calls, and Outbound Calls
- The duration Total in Seconds, minutes, average, and the maximum duration in seconds.
- The duration will also break it down in hh:mm:ss format as well
- The number of distinct users is the number or agents being recorded
- The number of distinct local parties is the number of local agents being recorded
- Number of distinct remote parties is the number of unique callers or outbound dials
Summary Report
- To view the Summary Report select the format from PDF, HTML, or CSV
- Information available on the Summary Report
- Start Date and Time
- End Date and Time
- Duration in seconds
- Call ID
- Direction
- Local Party
- Remote Party
- Last Name
- First Name
Browse – Tags:
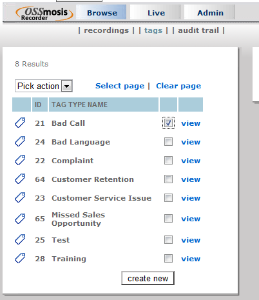
Under Browse you can select Tags and view all the tags within your system. You can create a new tag, view existing tags, edit, and delete tags from the system.
Create New Tags
- Select the option at the bottom labeled create new
- Another screen to the right will pop up
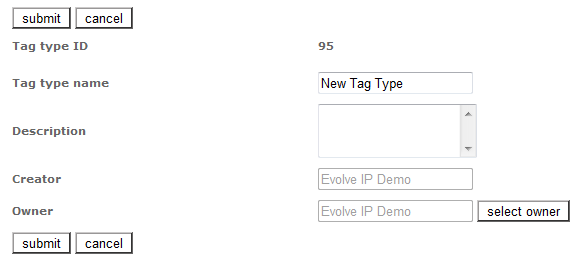
- The system will automatically generate the Tag Type ID
- Click Edit
- Enter the Tag Type Name – this is what will appear in the drop down options
- Enter the description of the tag if you’d like one
- The creator will remain with your user ID
- You can select an owner of the tag if you’d like or keep it at the default with your user ID
- Click submit once completed.
Edit Existing Tags
- To edit an existing tag in the Browse Tag screen check off the box next to the tag you’d like to edit
- Click on View
- Another screen to the right will pop up
- Click on Edit
- Make the necessary edits
- Click submit once completed.
Delete Existing Tags
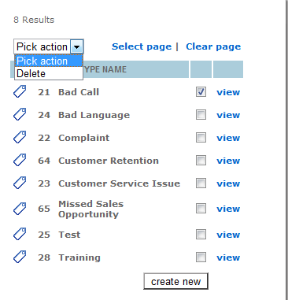
- To delete an existing tag in the Browse Tag screen check off the box next to the tag you’d like to delete.
- In the drop down menu for Pick Action select delete
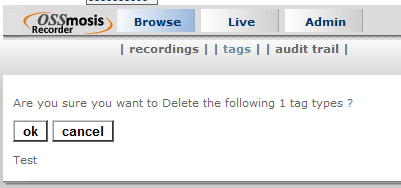
- Click on OK if you’d like to truly delete the tag
Browse – Audit Trail:
You can view an audit trail of recent monitored activity in the portal by selecting the Audit Trail option under Browse. By selecting audit trail you’ll be defaulted into all the most recent activity in the system with recent monitored calls.
To search by specific user
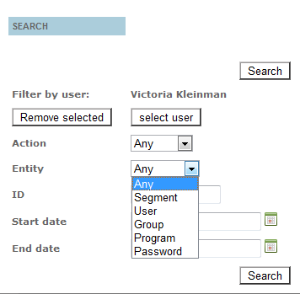
- In the search filter by user click the button for select user.
- In the new pop up window select the user you’d like to run an audit trail for by clicking on the radio button
- Click select user at the bottom left.
- In your audit trail search screen click on Search.
- All recordings that have been listened to for this user will appear on the right.
To search by specific action
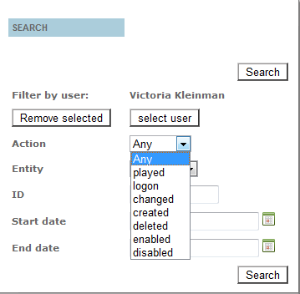
- Select from the drop down menu.
- Any will give you all recent monitored calls.
- Played will give you all the monitored or listened recordings for this agent.
- Logon will give you all the recent times the agent logged onto the portal (if they have portal access to view recordings)
- Changed will give you all the changes made to the agent.
- Created will give you the date the agent was added to the system.
- Deleted will give you the date the agent was deleted from the system or any deleted recordings.
- Enabled will give you when the agent was being monitored for recordings.
- Disabled will give you when the agent was not being monitored for recordings.
- Click on Search
- All recordings that have been listened to for this user will appear on the right.
To search by specific entity
- Select from the drop down menu.Any will give you all recent monitored calls.
- Segment will give you all the call segments that were listened to.
- User will give you a list of all the users that listened to the calls.
- Group will give you all the groups (users associated to groups) that listened to the calls.
- Password will give you the date and time the password was changed.
- Click on Search
- All recordings that have been listened to for this user will appear on the right.
To search by ID
- Enter the ID of the user or the call segment ID that you would like to search for
- Click on Search
- All recordings that have been listened to for this user will appear on the right.
To Search by Start Date
- Select the calendar to the right of Start Date or enter your start date in YYYY-MM-DD HH:MM:SS format.
- Click on Search
- All recordings that have been listened to for this user will appear on the right.
To Search by End Date
- Select the calendar to the right of End Date or enter your end date in YYYY-MM-DD HH:MM:SS format
- Click on Search
- All recordings that have been listened to for this user will appear on the right.
Live – Recordings:
You can listen to live recordings within the system. By selecting Live this will bring you all current calls being recorded.
- Select the tab for Live next to Browse
- Select the group name that you’d like to hear live recordings for
- Click submit
- The live monitoring screen for that group will come up
- Any calls currently being recorded live will appear in red with a play button under the monitor column
- Press on the play button to begin listening to the call
- The play button will go from yellow to red once it’s being reviewed
- Under status you’ll see this conversation will be recorded. This is just letting you know that the call is still being recorded and will be saved to the system once complete.
- You can tag the call as well by clicking the tag ticket under tag.
- Once you add the tag the tag will appear in the Live Tag column to the right.
- To stop listening to a live recording simply press the play button again and the play button should go back to yellow
Admin – Users:
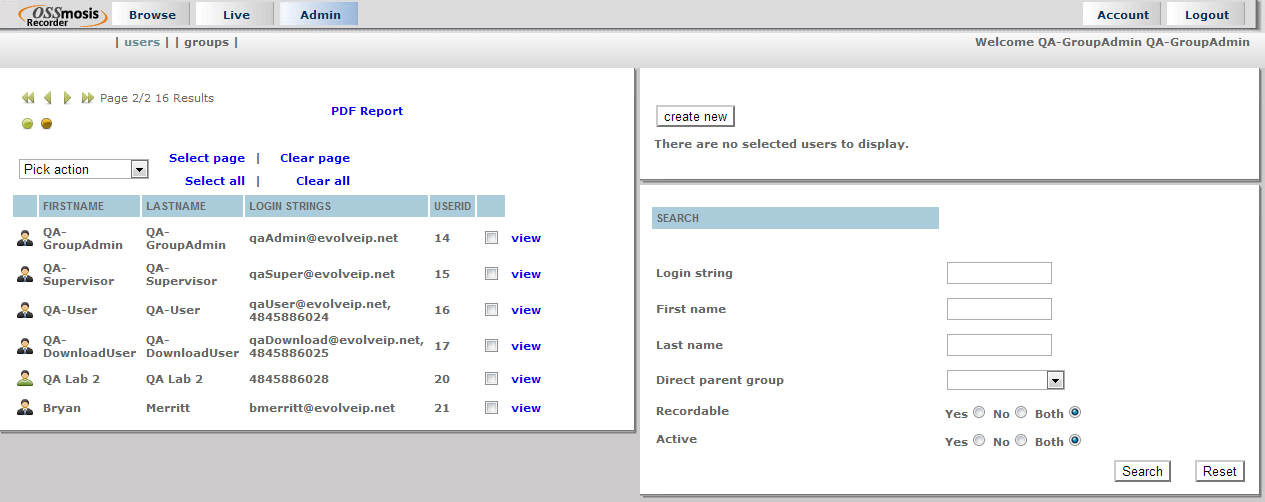
If you have administrative permissions you’ll be able to select the Admin option on the top next to Browse & Live. Administrators can add, delete or modify users, disable and enable recordings for users, and create and edit tags for system use.
- Click on the admin option
- Users screen is the default screen
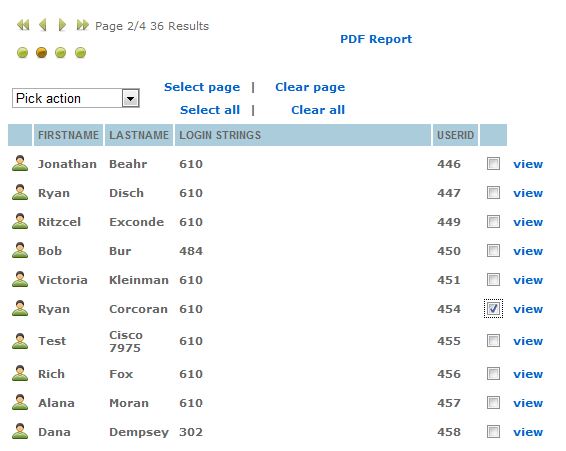
- Scroll through the pages by clicking the arrows at the top
- Select all will check all boxes
- Clear all will clear all boxes
- Select page will check all boxes on that page
- Clear page will clear all boxes on that page
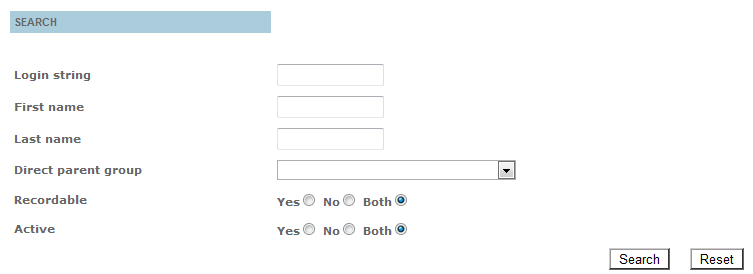
- Click on the box next to the user you’d like to edit or in the search field enter the login string (usually 10 digit phone number. You can use the asterisk (*) symbol) or first name, or last name, or select direct parent group, or select recordable or select active, then press search.
- If you use the search option you must click reset in order to use the select agent view.
To Add a user to the Call Recorder Portal:
Call Recorder requires Recording to be enabled in OSSmosis before the user can be recorded. When creating a new user, make sure the user is set to either Always or On Demand under their services in OSSmosis.
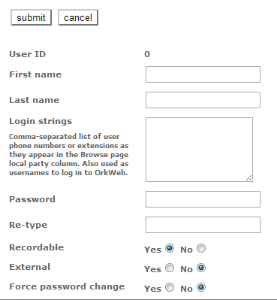
- On the top right panel select Create New
- Fill in First Name, Last Name of the user
- Add the login strings (Agent being recorded: this is their User ID or Supervisor listening to recordings: their telephone number followed by @voip.evolveip.net)
- The password can be left blank unless the user will be logging in
- If password is used it has to contain the following: a capital letter, lower case letter, number, and special character with a minimum of 6 characters long (Example –Call2Rec!)
- Set recording to “Yes” for recorded users
- Set recording to “No” for admin only users
- External should be set to “No”
- Force password change should be set to “No”
- Once complete click on Submit at the top
To Disable a user from being recorded (monitored):
- Select the user that you’d like to disable by checking the box next to the user’s name.
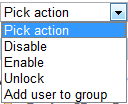
- Go to pick action dropdown menu and select disable
- In pop up select OK
- You should see the user grayed out
To Enable a user to be recorded (monitored):
- Select the user that you’d like to enable by checking the box next to the user’s name.
- Go to pick action dropdown menu and select enable
- In pop up select OK
- You should see the user is available to be recorded.
To Unlock a user:
- Select the user that you’d like to unlock by checking the box next to the user’s name.
- Go to pick action dropdown menu and select Unlock
- In pop up select OK
- The agent will now be unlocked
Add a user to a group:
- Select the user that you’d like to add to a specific group by checking the box next to the user’s name.
- Go to pick action dropdown menu and select Add To Group
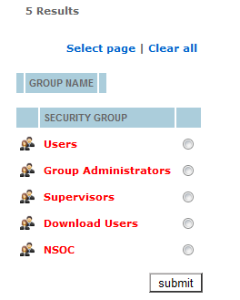
- Select group in new screen by selecting the radio button next to the group name.
- Click Submit
- Click View on User
- The new group will be located in the direct group section.
To Edit a user:
- Select the user that you’d like to edit by checking the box next to the user’s name.
- Click on View
- On the screen to the right click on Edit
- You can edit the following fields:
- First Name
- Last Name
- Login Strings (Phone numbers=users & Email address=admins)
- Password
- Recordable (Yes or No)
- Force password change (Yes or No)
- Click on Submit
Admin – Groups:
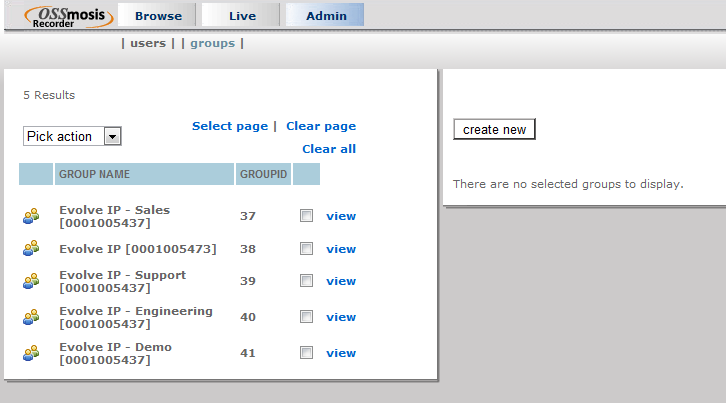
Within the administrative permissions you have the ability to create groups to add agents to. You can create, delete, edit, and create a parent group with direct groups below (group tree).
- Click on Admin option
- Click on Groups next to user
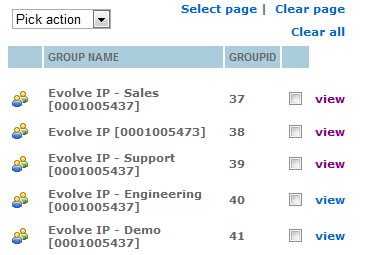
- Select page will check all boxes
- Clear page will clear all boxes on the page
- Select a group by checking the box next to the group name
- Clear all will clear any selected group
Create New Group
- Click on Create New on the right screen.
- On the right enter the Group Name
- If there is a maximum for the number of logins being recorded for this group you can check the box to the left of Recordable login string quota and then enter the number of logins for the group in the box to the right.
- Click on Submit
Delete Group
- In the group selection check off the group you’d like to delete
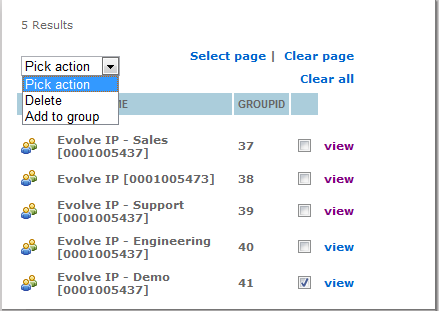
- In the pick action dropdown menu select delete
Edit Group
- In the group select check off the group you’d like to edit
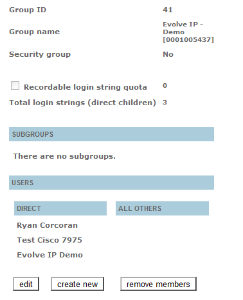
- Click on view next to selection
- To Edit Group Name or recordable login string quota select edit in the new window to the right
- You can edit the Group name or Login string quota
- Click on Submit
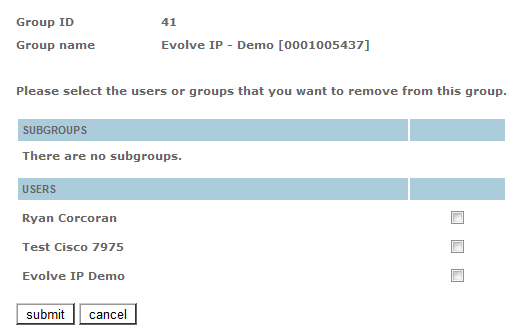
- To remove members from the group
- Click on Remove Members
- Put a check next to the members you’d like to remove
- Click on submit
- Create a subgroup under the existing group
- Through view screen
- Select group that you’d like to create a subgroup for
- Click on View
- Select create new
- Enter group name
- Click on submit
To add a group to an existing group
- Select group you’d like to add to a parent group
- From the pick action dropdown menu select add to group
- Select parent group to add group to
- Click on submit

