...
- Click on the Add New icon to add a new Load Allowance profile
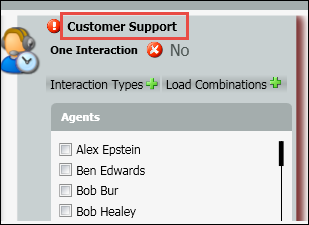
- Enter in a name for the new profile. For this example I have named it Customer Service because I will assign this profile to all of my customer service agents.
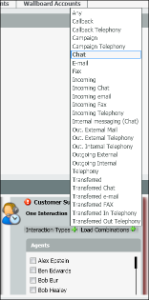
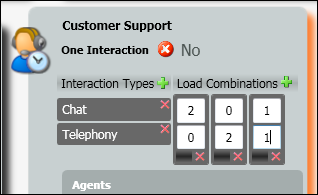
- Click on the Green Plus sign next to Interaction Types to add all the interaction types you wish to add to this profile.

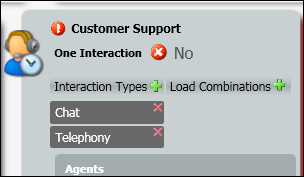
4. Click on the Green Plus sign next to Load Combinations to add all the combination columns you will need to add to the profile.
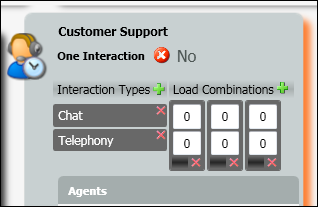
5. Enter in all the combinations of interactions the agents can handle. In this profile an agent can handle 2 chats simultaneously or 2 telephony (voice) calls simultaneously or 1 chat and 1 telephony simultaneously.
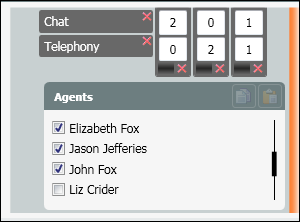
6. Under the Agents column, select the agents that should be assigned to the new profile.
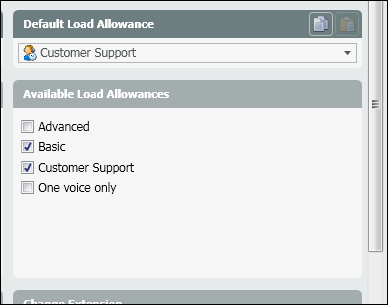
Setting the Default Load Allowance for an Agent
...
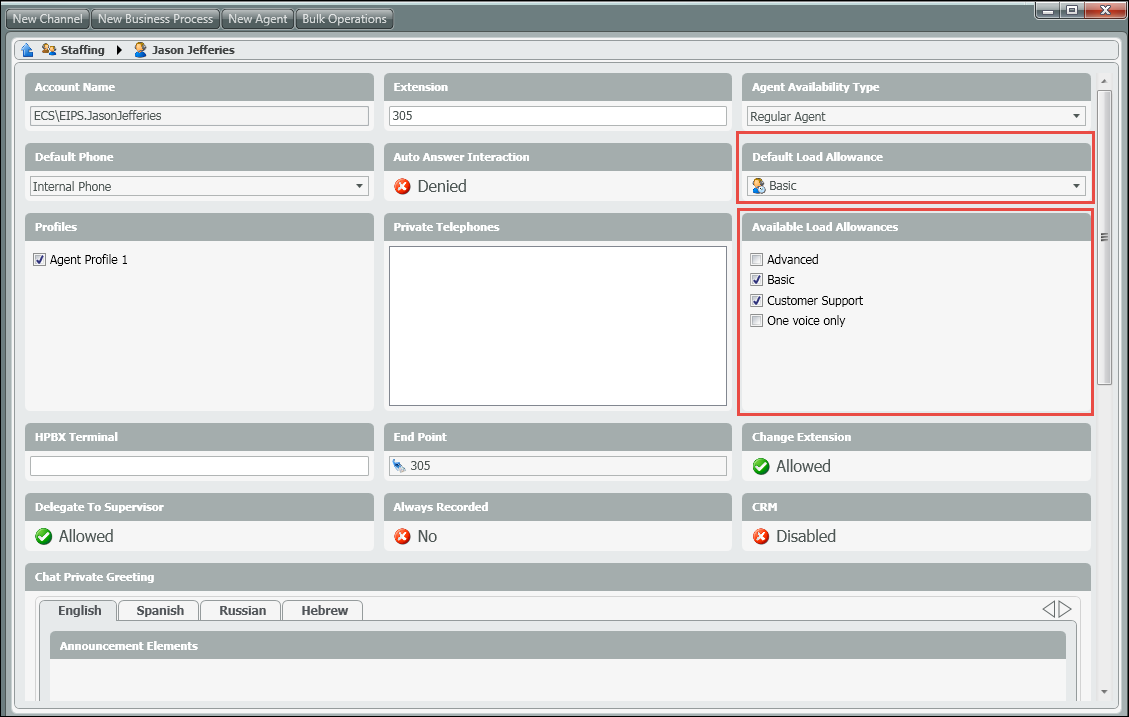
- Within the staffing page, drill down into an agent to see their current setup.
- Under Available Load Allowances, you will see all the Load Allowance profiles assigned to the agent.
- Under the Default Load Allowance you will see the current profile that is active for that agent.
- To change the Default Load Allowance, select the new profile from the drop down.
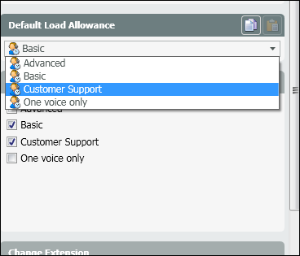
5. Save and light deploy the changes.