...
- Filter Agents by Criteria – Name, Extension, End Point, Default Load Allowance, Available Load Allowances, Private Telephones, HPBX User, Email Address, or Skills
- Search Filter – Enter in search based on filter drop down
- Reset Agents Password – Reset agents password back to the default password or send an email to the agent to reset themselves.
- Bulk Import/Export of Agents – For more information on this feature click here
- New/Delete – Add or delete an agent profile
- Agent Name
- Agent extension – By default, every agent will get an extension that is specific to ECS regardless of whether or not you have purchased an Overlay or Unified ECS solution. If utilizing the ECS Unified solution, the agent will use their HPBX extension provided to them by their project manager to extension dial between agents, supervisor and non-contact center users. The extension is only used by the “Assign Agent” Activity in an Interaction Handling Flow which sends an interaction to the agent by translating that extension to the physical End Point of that user. Agent extensions default to 3 digits and be modified to any number of digits desired. Note: extensions cannot be dialed by other ECS users.
- Agent Skill Profile – Agent Skill Profiles are created and assigned to agents in the Agent Characteristics tab. Each profile is made up of a set of skills and level of proficiency that is is assigned to each agent. By default every agent is assigned a profile with language skills of Spanish and/or English. These profiles will only be utilized if using skill based routing.
- For example, a customer needs a skilling profile in in Billing and Product. A profile called Product will be created and the product skill assigned to that profile. The skill level will be marked high and then assigned to the appropriate agents. Then in the main agents tab view, Product would appear as the agents skill profile. This shows that any calls coming into a Business Process tagged with a Product demand, the system will look for an agent skilled in that demand, in this case Product.
- Load Allowance Profile – Load Allowance profiles are created and assigned to agents in the Agent Characteristics tab. This profile indicates the type of Load Allowance currently assigned and active for each agent. The load allowance is what dictates the total number and type of interactions an agent can handle at one time.
...
When adding a new agent or supervisor it is not adding an additional concourrent license to the enterprise. It is creating an agent/supervisor profile that will provide login credentials to utilize the current concurrent license count within the enterprise. To learn more about adding or editing agent profiles using the bulk import/export feature, click here.
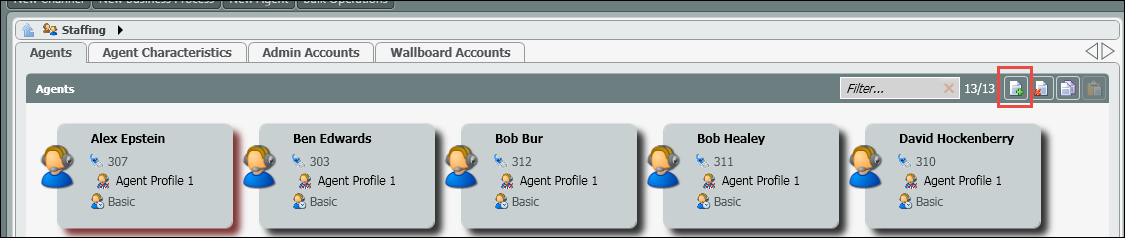
- Within the staffing tab select the add new icon.
- A new agent pop will open to fill in the new Agents information. The following information is needed to create the agents profile:
- Name of the agent
- Load Allowance Profile – select the appropriate load allowance from the drop down. The load allowance profiles are created in the Agent Characteristics tab. The load allowance dictates the number and type of interactions an agent can handle at one time.
- Agent Availability Type – this should default to Regular Agent and should not be changed.
- Profiles – select the appropriate skill profile for the agent. The (skill) profiles are created in the Agent Characteristics tab. This dictates the type of calls/skills the agent are able to handle.
- Can change extension – by default this is enabled. If you do not want the agent to be able to change their extension you will disable this.
- Can Delegate to Supervisor – by default this is enabled. This allows agents to delegate interactions to their supervisors.
- Always Recorded – by default this is disabled. This needs to remain disabled if implementing a ECS Unified solution.
- CRM – by default this is disabled. Enabling this feature allows the agent to have access to the contact management system and view the detailed contact history of all the touches the customer has had with the organization.
- Default Phone – by default this is set to Internal phone. If utilizing the ECS Overlay solution, the Internal phone should remain. If utilizing the ECS Unified solution, the default phone should be changed to HPBX.
- Private Telephone – this will only need to be filled in, if the default phone is set to private phone.
- Business Processes – select and assign the Business Process the agent should be joined to
- Supervised Business Processes – if creating a supervisor profile, select and assign the Business Processes the supervisor should be managing. This box should only be utilized when creating a supervisor profile.
- Select OK when complete
...
- Select the agent(s) you wish to reset their password.
- Click on the Reset Agents Password icon
- A pop-up window will open, providing the number of agents you've selected as well as any agents that have a valid email address stored to send the reset password link.

- If the list has a mixture of agents with and without valid email addresses two reset options are available:
- OK (Send Emails) - this will send the reset password email to all users with valid email addresses. The agent must click on the reset link in the email within 10 minutes of being sent or it will expire and need to be resent again. Users without valid email addresses will have their password reset to the default password and will be forced to change it via the App Portal on their next login. Email Example:

- Reset All - this will reset all selected agents (regardless of valid email address) to the default password and they will be forced to change it via the App Portal on their next login.
- OK (Send Emails) - this will send the reset password email to all users with valid email addresses. The agent must click on the reset link in the email within 10 minutes of being sent or it will expire and need to be resent again. Users without valid email addresses will have their password reset to the default password and will be forced to change it via the App Portal on their next login. Email Example:
- A confirmation window will open, select OK
- To add an email address to an agent for the password reset, two options are available:
- Drill down into an individual agents profile and add the email address
- Utilizing the export/import agents function to edit multiple agents email addresses
- Click here for information about the ECS Password Policy
...