In This Article
Overview
This article outlines all of the prerequisites and requirements, which will help you plan your Teams Direct Routing deployment in your Office 365 tenant. For a smooth implementation of direct routing, we strongly suggest you review everything on this page before moving forward.
Microsoft's Licensing Requirements
The licenses listed here are for each user that will be enabled for Teams Direct Routing:
A Microsoft Online Plan/Bundle that includes Microsoft Teams:
Office 365 F1, E1, E3, or E5
Microsoft 365 F1, E3, or E5
Office 365 Nonprofit E1, E3, or E5
Office 365 Education A1, A3, or A5
A Microsoft Phone System add-on license (already included with the A5 & E5 plans).
Optionally, a Microsoft Audio Conferencing add-on license:
Normally included with A5 & E5 plans, but these plans can be purchased without Audio Conferencing.
The Audio Conferencing add-on license cannot be added to the A1 & F1 plans.
The Audio Conferencing license is required to:
Escalate from 1:1 call to a group call.
Add external participants to scheduled meetings, by either dialing out or providing the dial-in number.
The Office 365 small business plans are not supported. This includes Office 365 Business Essentials, Office 365 Business Premium, and Microsoft 365 Business.
- License assignments should be completed prior to configuring the user accounts for direct routing.
- For the direct routing back-end configuration, Microsoft requires a license that includes MS Teams to be used for each connection to an Evolve IP voice gateway (PSTN Gateway). This is a Microsoft requirement to enable & configure Microsoft's back-end voice environment, and it is a temporary license assignment for the configuration. After the configuration has been completed, the licenses can be removed from the user accounts and repurposed to other users in the organization.
Teams Direct Routing Domains
Evolve IP will provide you with 2 domains that will need to be added & verified in your Office 365 tenant. The domains are used for routing your voice traffic to Evolve IP's voice gateways, and is a Microsoft requirement for Teams Direct Routing to work. Additionally, Evolve IP is responsible for managing the DNS zones & records associated with the domains. Therefore, we will need to work together to get your domains added and verified.
Microsoft requires that a user account be created and permanently assigned to each of the domains added to your Office 365 tenant. These user accounts do not need any special permissions. Here's an example using our naming conventions:
- eip-tdr@c123456.phl01.us.teams.evolveip.net
- eip-tdr@c123456.las01.us.teams.evolveip.net
Additionally, during the back-end direct routing configuration, an Office 365 license that includes MS Teams (e.g. Office 365 E1) will need to be temporarily assigned to each of the user accounts.
Here's an example:
| Location | Domain | User Account UPN |
|---|---|---|
| Evolve IP East (PHL) | c1005437.phl01.us.teams.evolveip.net | eip-tdr@c1005437.phl01.us.teams.evolveip.net |
| Evolve IP West (LAS) | c1005437.las01.us.teams.evolveip.net | eip-tdr@c1005437.las01.us.teams.evolveip.net |
Voice Routing from Office 365 to Evolve IP
In the US, Evolve IP has two primary datacenters for its voice infrastructure. One in Las Vegas for users located in the west, and one in Philadelphia for users located in the east. When configuring your voice routes in Office 365, you will want to make one of the two locations a primary route and the other a secondary route. For example:
- Users located on the east coast would use the Philadelphia (east) voice infrastructure for their primary route, and the Las Vegas (west) voice infrastructure for their secondary route.
- Users located on the west coast would use the Las Vegas (west) voice infrastructure for their primary route, and the Philadelphia (east) voice infrastructure for their secondary route.
- For users located in the middle of the US, you will need to choose a primary/secondary combination that best works for their location. We recommend using the Mississippi River as a dividing line.
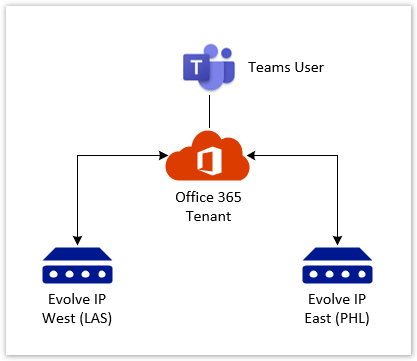
When you configure your Office 365 tenant for Teams Direct Routing, you will create a route for each location, and then create two routing policies that makes one of the routes primary and the other secondary. All of this gives you redundancy regardless of where your users are physically located.
Additionally, when you start bulk-provisioning users for direct routing, you will want to identify which users should be provisioned in the east, and which should be provisioned in the west. Later in this article we show you how you can create a CSV report of your user accounts that can be used for bulk-provisioning. Once you have this, you can add a location column to the CSV and assign each user a primary location.
Naming Conventions
Every organization has its own naming conventions, and Evolve IP is no different. The steps in this getting started guide use our naming conventions, and we strongly suggest you use them for two important reasons:
- If you need to get support from Evolve IP, our support teams will have no problem identifying, verifying, and if needed, troubleshooting your direct routing configuration.
- If sometime in the future you decide to use Evolve IP for managing your direct routing configuration and user provisioning, we can easily accommodate that role.
If you choose to use your own naming conventions, that's totally fine. We understand.
Office 365 User Accounts & Roles
Teams Direct Routing User Accounts
- As stated above, Microsoft requires a user account be permanently assigned to each domain added to your Office 365 tenant. These user accounts do not need any special permissions or assigned any roles.
- During the back-end direct routing configuration, these user accounts have to be assigned an Office 365 license that includes MS Teams (e.g. Office 365 E1). This turns on the Microsoft Phone System voice services for the domains added to your Office 365 tenant.
- After the configuration has been completed, the licenses can be removed and repurposed to other user accounts.
- The user accounts can also be disabled (sign-in blocked), but they can never be deleted – this will break the direct routing back-end configuration.
User Accounts for Managing Teams Direct Routing
If you require tight control over over the permissions assigned to users managing your Office 365 environment, or you would like to assign permissions to users in your support/helpdesk staff, you can use the below list of roles for guidance. Detailed information about all roles and their associated permissions can be found in Microsoft's Admin Role article.
Global Administrator: Required role to add the Evolve IP domains to your Office 365 tenant for Teams Direct Routing.
Teams Communications Administrator: Required role to make changes to the voice settings in your Teams Admin portal.
Skype for Business Administrator: Required role to configure the Microsoft Phone System voice services and provision users for Teams Direct Routing. This role was once known as the Lync Service Administrator.
User Administrator: Required role for creating users and assigning licenses.
For step-by-step instructions to manage role assignments, check Microsoft's Assign Directory Roles to Users article.
PowerShell Requirements
Until Microsoft adds all of the necessary UI elements to the Teams Admin Center (TAC), PowerShell will be required to perform the direct routing back-end configuration and user provisioning. Anyone performing the back-end configuration and user provisioning will need to meet the following requirements on their computers:
- PowerShell version 5.1 or newer (included in Windows 10 & Server 2016/2019).
- Depending on your environment, you may need to be a local administrator on your computer.
- Always run your PowerShell sessions as an Administrator.
If you plan to run any custom PowerShell scripts, set the PowerShell Execution Policy to Unrestricted: Set-ExecutionPolicy Unrestricted
Download and install the latest version of the Skype for Business PowerShell Module. If already installed, uninstall the old version before installing a new version.
Optionally, you can install the Microsoft Teams PowerShell Module & the Microsoft Azure AD PowerShell Module, but currently these modules are not required for a direct routing deployment. Here are the PowerShell commands to install those modules:
Run this command to install the Teams module: Install-Module MicrosoftTeams
- Run this command to install the Azure AD module: Install-Module Az
If you are familiar with using code editors, you can use one of them to stage the PowerShell commands. The PowerShell ISE comes with Windows, and VSCode can be downloaded and installed separately. Do not use a code editor to run self-contained PowerShell scripts (.ps1 files). You should run those from a PowerShell window opened as an administrator.
The Skype for Business Online PowerShell module uses lyncdiscover.yourdomain.com to find and connect to your Skype for Business Online services. If you are connecting to the service with a user account that is not a .onmicrosoft.com cloud-only account, you need to make sure you have a DNS CNAME entry in your domain's DNS zone pointing to webdir.online.lync.com. For example, if the user account you use to sign in is "jsmith@contoso.com", you will add the following DNS CNAME entry for lyncdiscover in the contoso.com DNS zone.
; Hostname                TTL     Type  Target
lyncdiscover.contoso.com. 3600 IN CNAME webdir.online.lync.com.
Connect to the Skype for Business Online Services
Use the below PowerShell commands to sign into your Skype for Business Online services using a user account with the proper permissions. Microsoft's MFA service is supported when enabled against the user account.
Before running the commands, modify line 5 with your username.
# Import the Skype for Business Online module
Import-Module SkypeOnlineConnector

# Connect to Skype for Business Online
$SkypeSession = New-CsOnlineSession username@yourdomain.com
Import-PSSession -Session $SkypeSession -AllowClobber
Disconnect from the Skype for Business Online Services
Disconnecting is not a hard requirement. If you just close the PowerShell window, the connected session will eventually time out on Microsoft's side.
Remove-PSSession $SkypeSession
Teams Upgrade Policy & Coexistence Mode
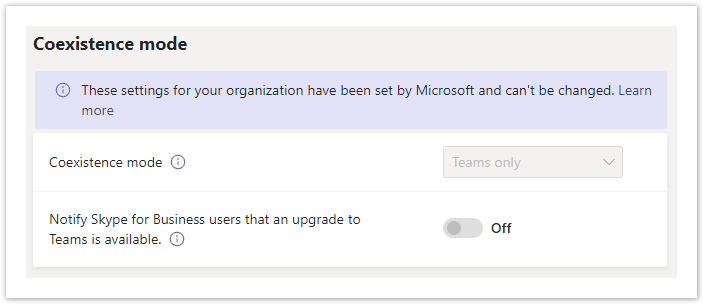
Direct Routing is only supported with Microsoft Teams, and all Teams user accounts configured for direct routing must have an upgrade policy set to the Teams Only coexistence mode. If your organization is only using Teams (no Skype for Business users), setting the coexistence mode to Teams Only in the Org-Wide Teams Upgrade settings is recommended.
Teams Admin Center: Org-Wide Settings > Teams Upgrade
Set the Coexistence Mode Per User
If you are migrating your users from Skype for Business Online to Teams, you will need to assign a Teams Only coexistence mode to each user individually. Keep in mind there are some implications when going this route, and we strongly suggest you review Microsoft's documentation for coexistence and interoperability between Teams and Skype for Business Online.
Additionally, users with an explicit coexistence mode set against their account will override the above org-wide coexistence mode. To check a user account:
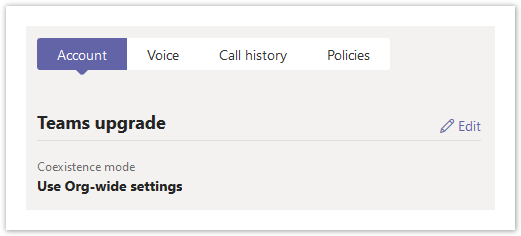
Teams Admin Center: Users > Click on a user's Display Name to view their settings.
- If you want the user to follow the above org-wide setting, edit Teams Upgrade, and set the Coexistence Mode to Use Org-Wide Settings.
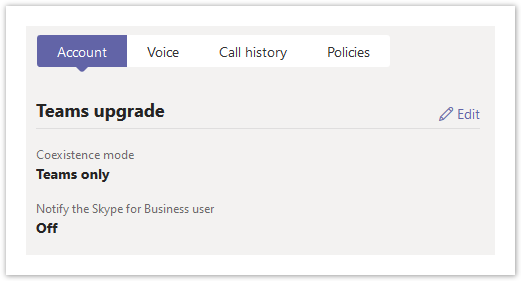
- If you want to set the user to an explicit setting, edit Teams Upgrade, and set the Coexistence Mode to the desired state. For example, Teams Only.
- When a user is provisioned for Teams Direct Routing, their Coexistence Mode should be checked first. If it's not set to Teams Only, it should be changed during the provisioning process.
PowerShell commands to check and change the org-wide settings, and to check and change individual user settings. Make sure you connect to your Skype for Business Online services before running the commands.
# Check the Org-Wide setting
Get-CsTeamsUpgradePolicy Global

# Change the Org-Wide setting to Teams Only
Grant-CsTeamsUpgradePolicy -PolicyName UpgradeToTeams -Global

# List all users along with their effective coexistence mode
Get-CsOnlineUser | FT DisplayName, TeamsUpgradePolicy, TeamsUpgradeEffectiveMode

# Export a list of all users along with their Teams upgrade settings to CSV
Get-CsOnlineUser | Select DisplayName, UserPrincipalName, TeamsUpgrade* | Export-Csv "C:\Path\to\TeamsUpgrade.csv" -nti

# Set a user to use the org-wide setting
Grant-CsTeamsUpgradePolicy -Identity user@domain.com -PolicyName $Null

# Set a user to ignore the org-wide setting and use Teams Only mode.
Grant-CsTeamsUpgradePolicy -Identity user@domain.com -PolicyName UpgradeToTeams
Teams Calling Policy
When a user is assigned a Phone System license and provisioned for direct routing, they are able to make private calls from the Teams client. This capability is provided by two Teams Calling policies, Global & AllowCalling. If a user is unable to make calls from the Teams client after being provisioned, check the user's settings, and make sure the Teams calling policies are properly configured.
Teams calling policies can be viewed in the Teams Admin Center or by using the below PowerShell.
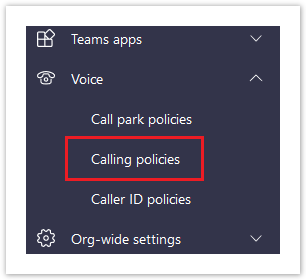
Teams Admin Center: Voice > Calling Policies
Calling Policy PowerShell Commands:
# List the Teams calling policies
Get-CsTeamsCallingPolicy

# List the Teams calling policy assignment for a user account
Get-CsOnlineUser user@domain.com | FL DisplayName, SipAddress, TeamsCallingPolicy
If the TeamsCallingPolicy property is empty, the user is configured with the Global policy.
CSV User Report - Office 365 Admin Center
If needed, you can use the following steps to generate a CSV report for every user account in your Office 365 tenant. This report can be used to determine whether a user is properly licensed for Teams Direct Routing. Additionally, if you add columns for your Evolve IP provided phone numbers and location, you can use it for provisioning direct routing to your users.
- Sign into the Office 365 Admin Center: https://admin.microsoft.com
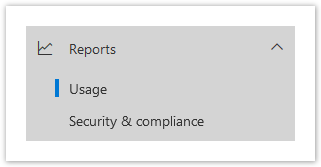
- Navigate to the Reports section and select Usage.
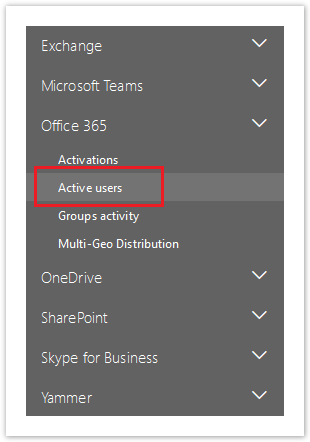
- From the Usage page, click on Select a Report, and choose Office 365 > Active Users
- Scroll down to the User Activity Table, which has information about each individual user account, and click Export on the right-hand side of the table.
- You will be prompted to save a CSV file, which should be saved to your local computer.
- At a minimum, you should keep following columns in the CSV:
- User Principal Name
- Display Name
- Is Deleted
- Has Teams License
- Assigned Products
CSV User Report - PowerShell
Optionally, you can create a CSV user report using the Skype for Business Online PowerShell module. Keep in mind this module will only return users who have been licensed for Microsoft Teams or Skype for Business Online. Make sure you connect to your Skype for Business Online services before running the commands.
# Define a local path to save your CSV file
$CsvFilePath = "C:\path\to\file.csv"

# Get all of the Teams/SfBO users
$CsOnlineUsers = Get-CsOnlineUser -ResultSize Unlimited | Select DisplayName, UserPrincipalName, Enabled, TeamsUpgradeEffectiveMode

# Display the list of users
$CsOnlineUsers | Sort DisplayName | FT

# Save the list of users to a CSV
$CsOnlineUsers | Sort DisplayName | Export-Csv $CsvFilePath -NoTypeInformation
Properties:
- DisplayName - The user's display name.
- UserPrincipalName - The user's Office 365 sign in address.
- Enabled - If enabled is true this indicates that the user is licensed for MS Teams or Skype for Business Online. If enabled is false, it indicates that the user is blocked from signing, or the user is not licensed for MS Teams or Skype for Business Online.
- TeamsUpgradeEffectiveMode - This indicates the user's current Teams Upgrade Coexistence Mode. For Teams Direct Routing to work, this will need to be set to TeamsOnly.
Next Steps
- Teams Direct Routing - 02 - Add the Domains
- Teams Direct Routing - 03 - Configure Direct Routing
- Teams Direct Routing - 04 - User Provisioning