Business Process: General Tab
The General Tab within a specific Business Process provides general settings that can be set at the Business Process level if different from the enterprise level settings.
- General Information
- How to Create and Apply Demand Filters
General Information
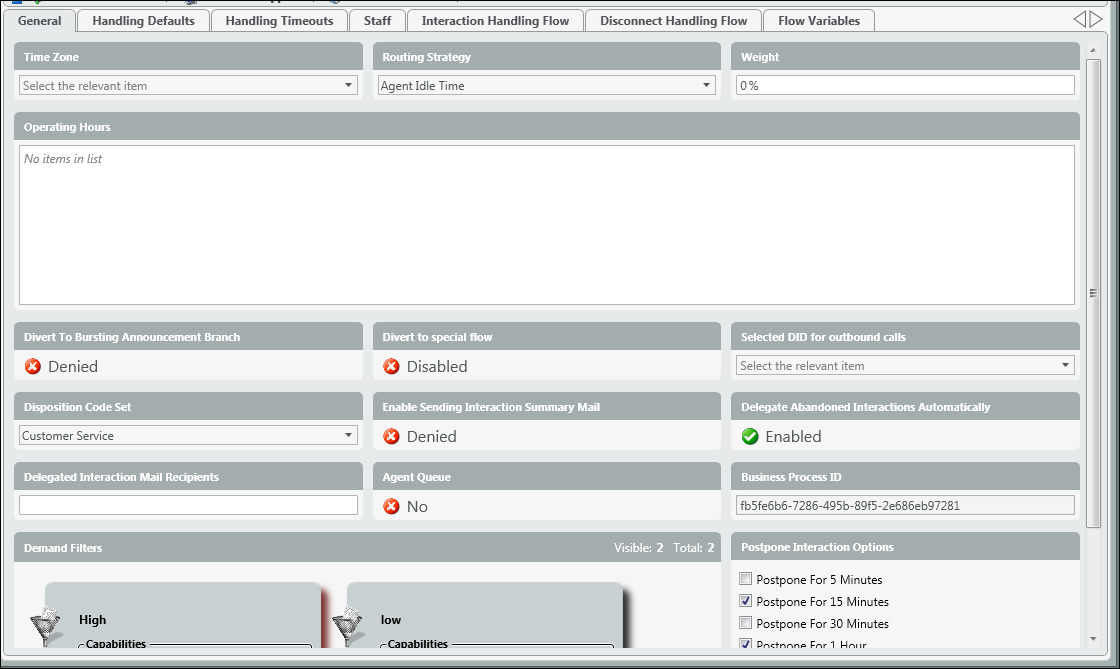
- Time Zone – by default the time zone will be set to whatever was selected in the Time Zone tab found under the Business Structure section. If the time zone for the business process is different then what is set at the enterprise level, select the correct time zone from the drop down.
- Routing Strategy – select the routing strategy for the business process
- Agent Idle Time – the most idle agent will be presented with the next interaction
- Skill Base – interactions will be presented to agents based on their skill set. To learn more about configuring skill based routing, click here.
- Weight – enter in the weight of the business process if you wish to prioritize the business process over others. For example, if one business process should carry a higher weight (you want interactions to be answered from that business process first over all others) than the business process should be given a weight of 100%. If you wish to prioritize all business processes and give them a specific weight, the total weight must equal 100%.
- Operating Hours – add operating hours if different from the enterprise level operating hours
- Divert to Bursting Announcement Branch – a special message setup on the interaction handling flow that will play only when enabled. For example, you are experiencing unusually high call volume or you are currently experiencing and outage and want to play a message to the customer calling in that you are aware of the outage before passing them through to the regular handling flow.
- Divert to Special Flow – a special flow would be setup by your project manager. For example, if calls coming into the business process should be treated differently during holiday hours/days then enabling this feature will divert calls away from regular business hours/days to the special flow to be treated according to the special flow.
- Selected DID for outbound calls – if agents are able to make outbound calls from the business process, select the DID from the drop down you wish to out pulse when making an outbound call. How to add a DID can be found here.
- Disposition Code Set – select the disposition code set you wish to make available to agents when the handle an interaction from the business process. Each business process can be assigned a different disposition code set. Click here for Disposition Code Sets help content.
- Enable Sending Interaction Summary Mail – if enabled an email will be sent to a designated list of recipients after every handled interaction.
- Delegate Abandoned Interactions Automatically – enabling this will automatically delegate all abandoned calls to the supervisors of the business process. The abandoned interactions will show up in the Delegated and Abandoned tab within the Supervisor Client. Delegating the abandoned interaction does not automatically set an action (callback, dial etc) to the supervisor, but presents all abandoned interactions in a list for the supervisor to view and then choose to take an action on the interaction if they wish.
- Delegated Interaction Mail Recipients – email address list to send interactions if the Sending Interaction Summary Email is enabled
- Agent Queue – if enabled it can be used as a system level Business Process to blind transfer to agents and implement voicemail and queue for individual agents. Not a frequently used feature and should not be activated unless done so by your Project Manager.
- Business Process ID – every business process is given an ID. This ID would only be used by your project manager when setting up specific call flow features.
- Demand Filters – demand filters are used if the business process is setup with skill based routing. A demand filter is made up of the skills that were created in the Skills tab found in the Implementation subsystem. These demand filters are how calls will be distributed to agents based on their skill and proficiency level. For more details on Demand Filters and how to apply them, scroll to How to Create and Apply Demand Filters below.
- Postpone Interaction Options – When agents are presented with a callback they can have the ability to postpone the callback. The options selected in this box are the times in which agents can choose to postpone the interaction. If nothing is selected the agent will be unable to postpone the callback when it is presented to them.
How to Create and Apply Demand Filters
Demand filters are used if the business process is setup with skill based routing and are made up of all the skills created in the Skills tab found in the Implementation subsystem. When a call enters the contact center it will be tagged with a demand depending on the option selected in the Channel (Auto Attendant) or Business Process call flow. That demand translates into a specific skill. The system will look for an agent skilled in that specific demand and deliver it to the agent that is most proficient (High, Medium, and Low) in that demand. Agents are skilled based on the Agent Profile assigned to them found in the Agent Characteristics tab under the Agent subsytems. Click here for Agent Profile help content.
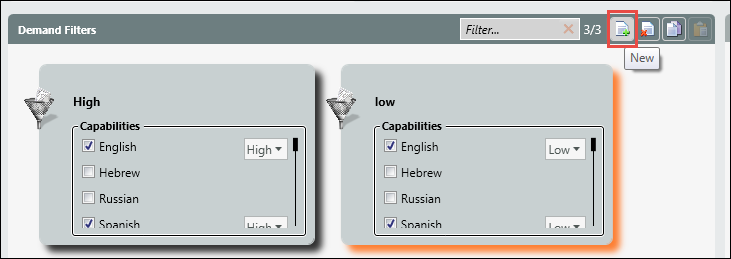
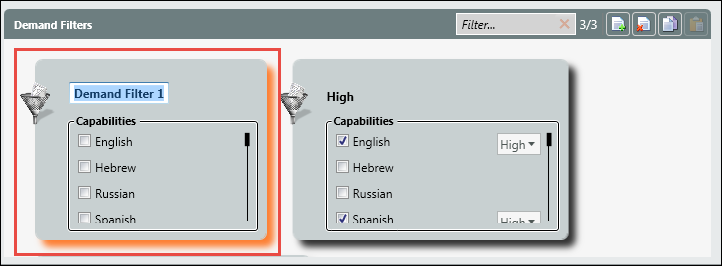
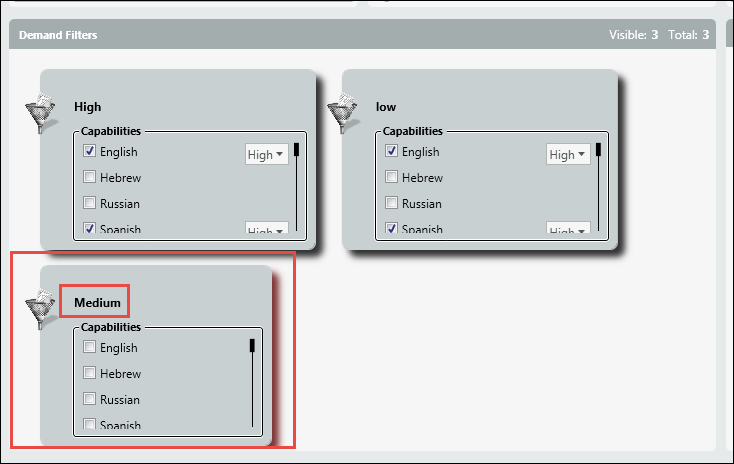
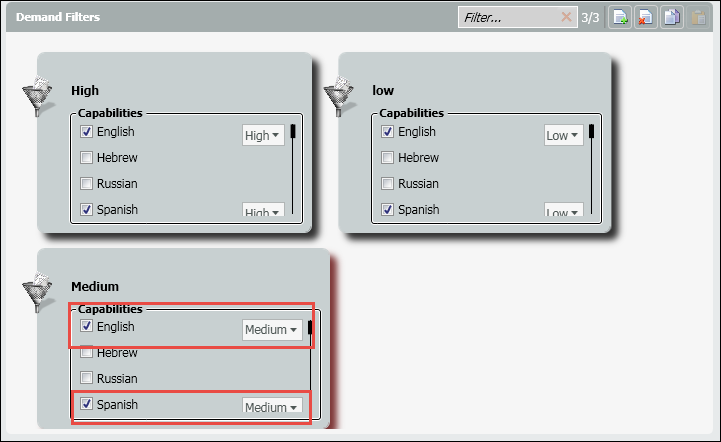
- Select add to create a new demand filter. Title the filter. Give a title that will be easy to identify when apply the demand filter to the interaction handling flow. In this example, two filters already exist – High and Low. The High demand filter has all demands/skills needed for that business process with a high proficiency selected for each demand. The Low demand filter has the same demands/skills as the High demand filter, but with a low proficiency selected for each demand. The new filter being created is the Medium demand filter. We will select the same demands/skills as the Low and High demand filter, but the proficiency will be set to medium.
- Select the demands/skills and select Medium from the proficiency drop down
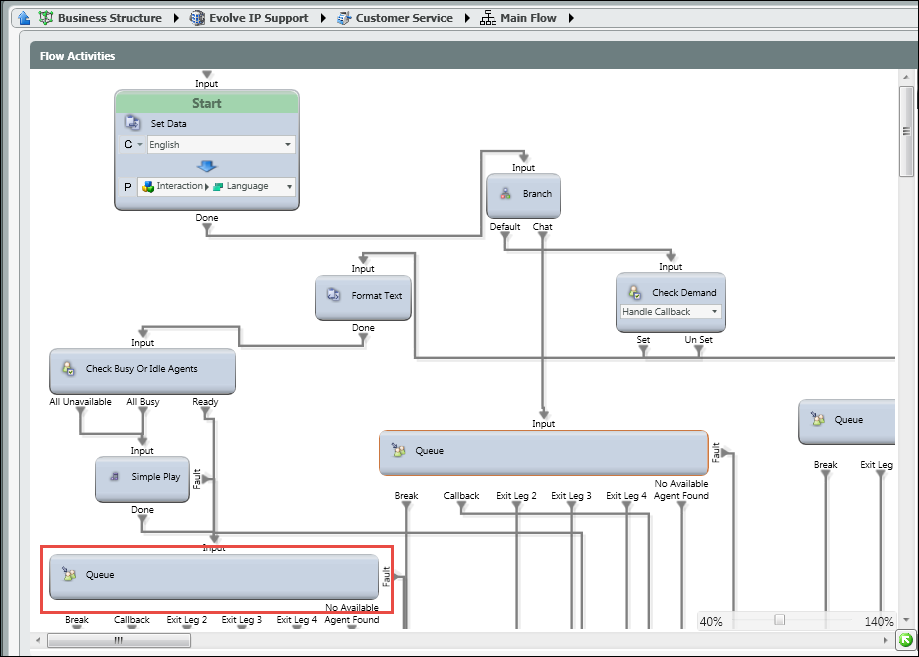
- To apply the demand filters, click on the Interaction Handling Flow tab, followed by drilling into the Live Flow Icon within the Business Process.
- Drill into the Queue Node to apply the filters.
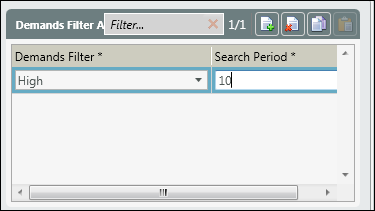
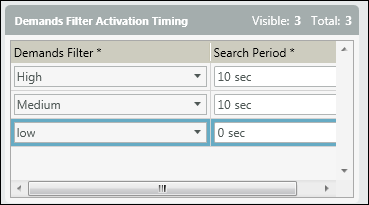
- Select Add New, to select the first demand filter for the business process. Select a demand filter from the drop down. In this example, because we want to search for agents with the highest proficiency first, we will select the High demand filter first. Once the filter has been selected, a search period must be entered. Here, we have entered 10 seconds, indicating that the system will search for an agent skilled in that demand with a high proficiency for 10 seconds before moving onto another agent with a lower proficiency in that skill.
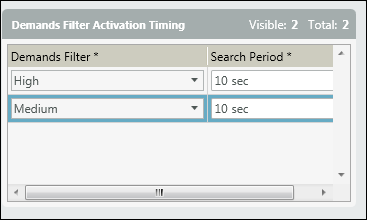
- Add another demand filter and search period. In this example we selected the Medium filter and entered in another 10 seconds for the search period. If no agent is available with a high proficiency after 10 seconds, the system will expand it’s search to now include agents with either a high or medium proficiency in the demand/skill it is searching for.
7. Add another demand filter and search period. In this example the last demand filter we added was Low with a search period of 0 seconds. If the system is unsuccessful at finding an agent with a high or medium proficiency within the designated search periods, it will then begin to look for all agents with either a high, medium or low proficiency until the interaction has been delivered to an available agent.
