Overview
Agents have the ability to assign a callback (if the feature is enabled for the agent profile) through the callback pop up on an active interaction or within the Call History Panel after wrapping up a telephony interaction. Agents will also have the ability to generate a brand new callback, not tied to a specific telephony interaction within the Callback Panel itself. This allows the agent flexibility and time to schedule a customer callback that isn't tied to a specific wrap up time frame or additional work needed to be completed in between interactions.
Interacting with the Callback Panel
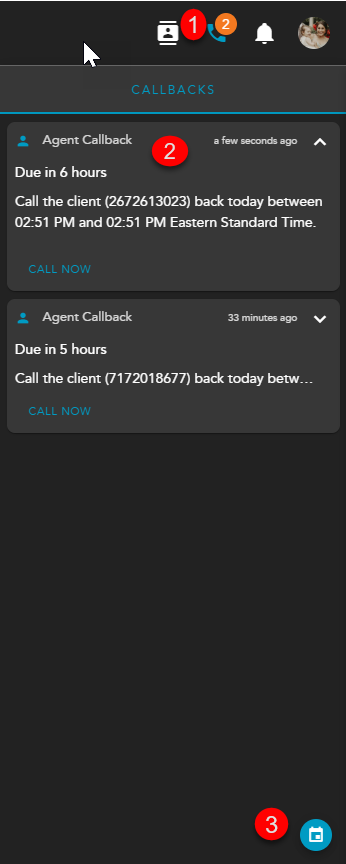
- Callback Panel Icon - Indicates how many callbacks you have pending. Click on the icon to expand the Callback Panel for more details on your pending callbacks. Click on the icon to close the Callback Panel.
- Pending Callback Panel - Shows all Pending Callbacks. Will display the following information:
- Due Date/Time of the Pending Callback
- Client DID
- Time period the callback should be completed
- Call Now - Provides the ability to manually call the contact without needing to wait for the interaction to be presented to you
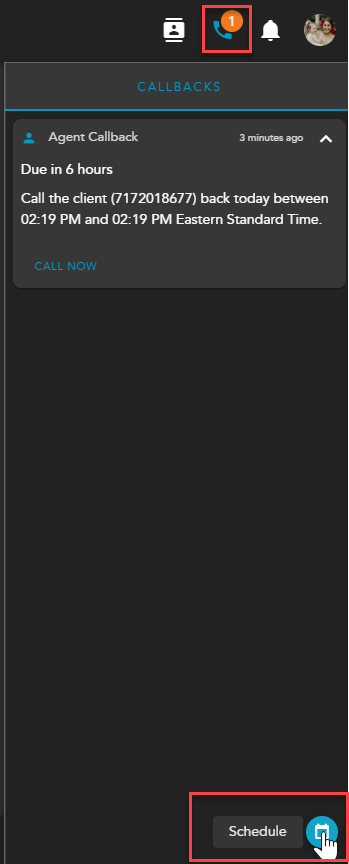
- Schedule - Click on the Schedule icon to schedule a new callback that is not associated with an active or historical call interaction
Assigning Callbacks
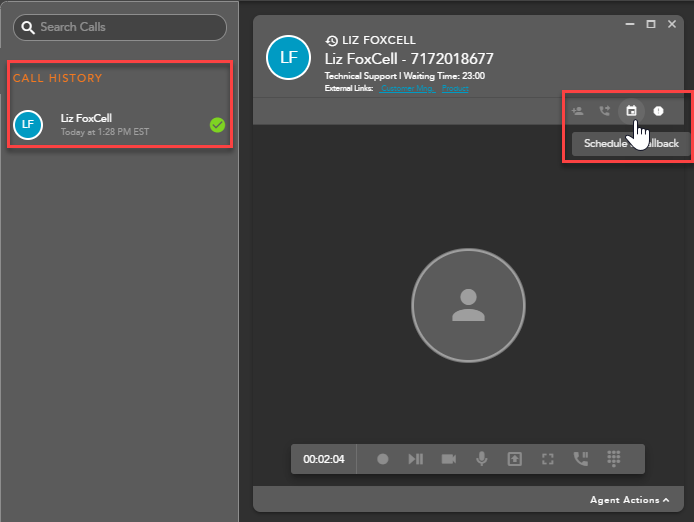
Active Interaction
- When on an active call interaction, select the Schedule Callback Icon within the interaction toolbar.
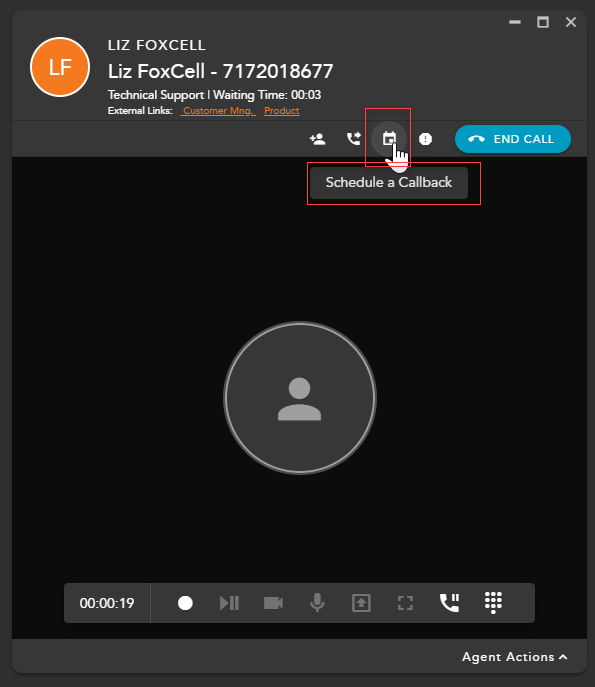
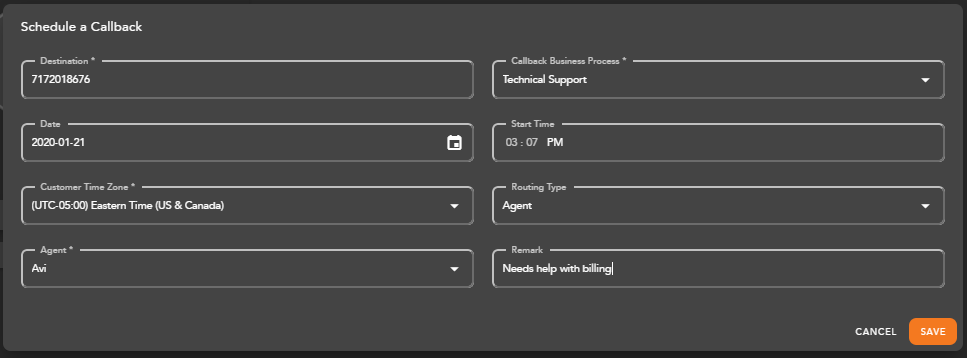
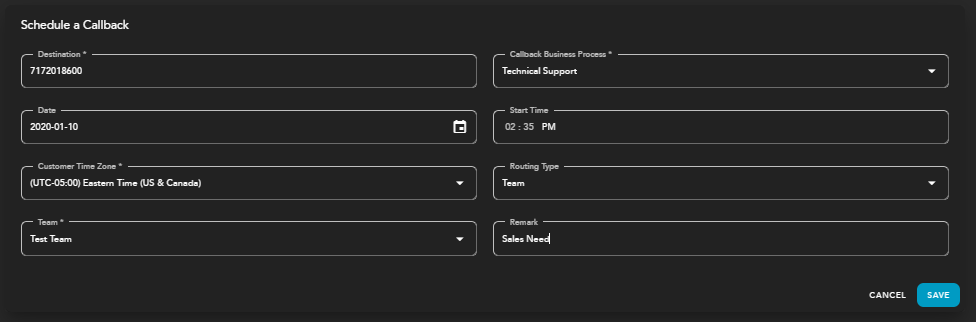
- The Schedule a Callback window will open. Edit or update the information that is pre-populated to process the callback:
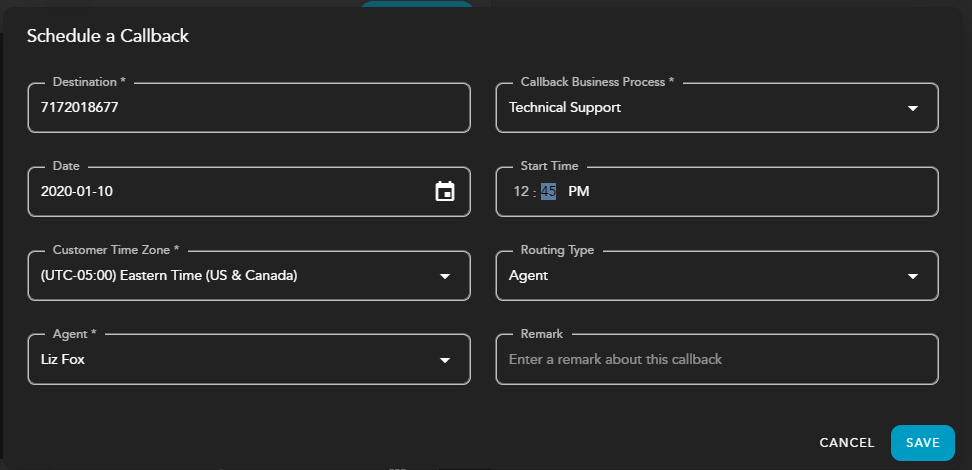
- Destination - pre-populated DID of the contacts telephone number
- Callback Business Process - pre-populated based on originating BP. This field can be changed if the callback should be sent to a different Business Process than the interaction originated from.
- Date - pre-populated to current date of interaction but can be adjusted if different callback date is desired
- Start Time - pre-populated but can be adjusted if different callback time is desired
- Customer Time Zone - not pre-populated and is typically the time zone of the contact the callback is intended for
- Routing Type - Routing Type will depend on preconfigured options based on the Callback Business Process. The callback can go to either a specific agent or team of agents.
- Agent/Team - this will auto-update based on the routing type selected. From here, select the team or agent the callback should sent to.
- Remark - optional. The remark will be presented to the agent handling the callback.
- Click Save
- If you assigned the callback to yourself, you will see the Callback Panel Icon
 update to show you now have one waiting callback interaction. Open up the Callback Panel to view the callback details. If the callback was assigned to a team of agents, you will not see the Callback Panel icon update as the callback was not specifically assigned to you.
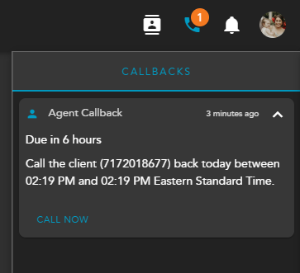
Historical Interactions
- To schedule a callback for a historical interaction, double click on the historical interaction under Call History within the interaction sidebar to open the interaction in the main window.
- Click on the Schedule Callback icon.
- The Schedule a Callback window will open. Edit or update the information that is pre-populated based on the contacts information to process the callback:
- Destination - pre-populated DID of the contacts telephone number
- Callback Business Process - pre-populated based on originating BP. This field can be changed if the callback should be sent to a different Business Process than the interaction originated from.
- Date - pre-populated to current date of interaction but can be adjusted if different callback date is desired
- Start Time - pre-populated but can be adjusted if different callback time is desired
- Customer Time Zone - not pre-populated and is typically the time zone of the contact the callback is intended for
- Routing Type - Routing Type will depend on preconfigured options based on the Callback Business Process. The callback can go to either a specific agent or team of agents.
- Agent/Team - this will auto-update based on the routing type selected. From here, select the team or agent the callback should sent to.
- Remark - optional. The remark will be presented to the agent handling the callback.
- Click Save
Callback Panel
- To schedule a new Callback that is not associated with an active or historical telephony interaction, open the Callback Panel and select the schedule icon.
- The Schedule a Callback window will open. Enter in the following information to schedule a callback (nothing is pre-populated, except for the date and time when scheduling a callback from the callback panel):
- Destination - DID of contact
- Callback Business Process - BP the callback should be sent
- Date - pre-populated but can be adjusted if different callback date is desired
- Start Time - pre-populated but can be adjusted if different callback time is desired
- Customer Time Zone - time zone of the contact the callback is intended for
- Routing Type - Routing Type will depend on preconfigured options based on the Callback Business Process. The callback can go to either a specific agent or team of agents.
- Agent/Team - this will auto-update based on the routing type selected. From here, select the team or agent the callback should sent to.
- Remark - optional. The remark will be presented to the agent handling the callback.
- Click Save
- If you assigned the callback to yourself. You will see the Callback Panel Icon update to show you now have a waiting callback interaction. Open up the Callback Panel to view the callback details. If the callback was assigned to a team of agents, you will not see the Callback Panel icon update as the callback was not specifically assigned to you.
Handling Callbacks
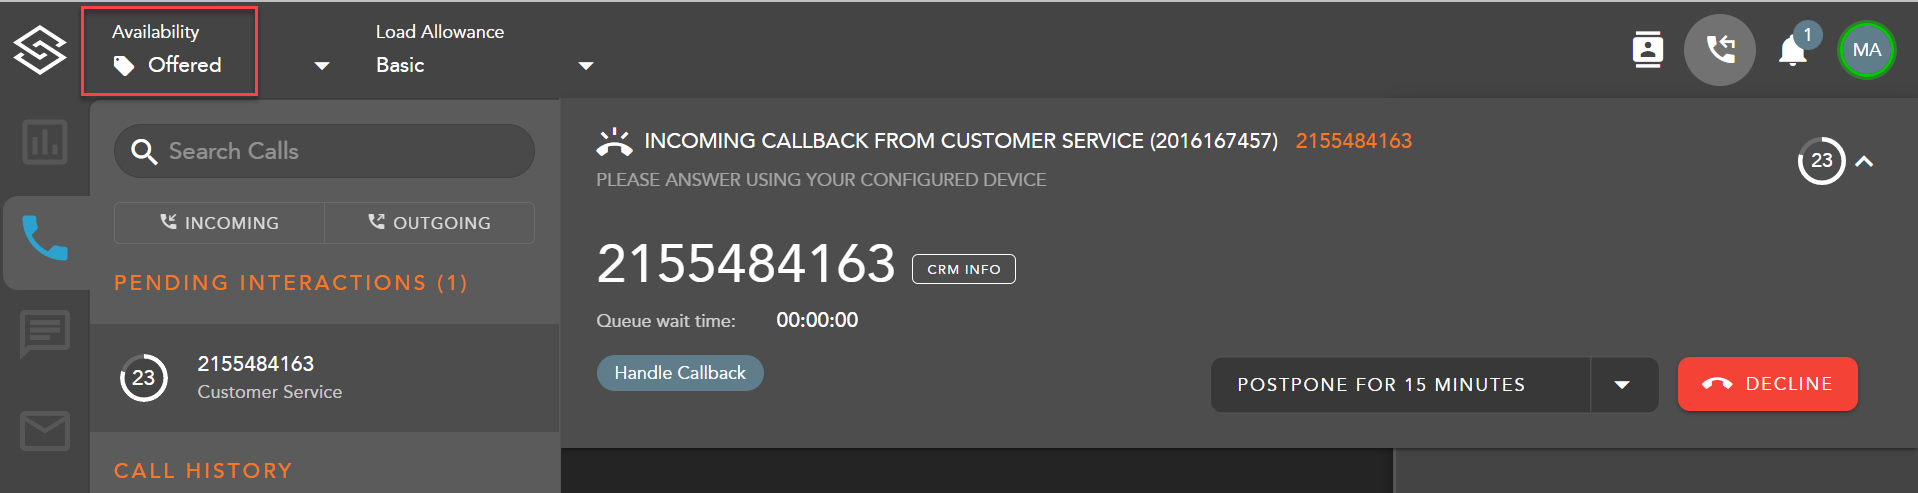
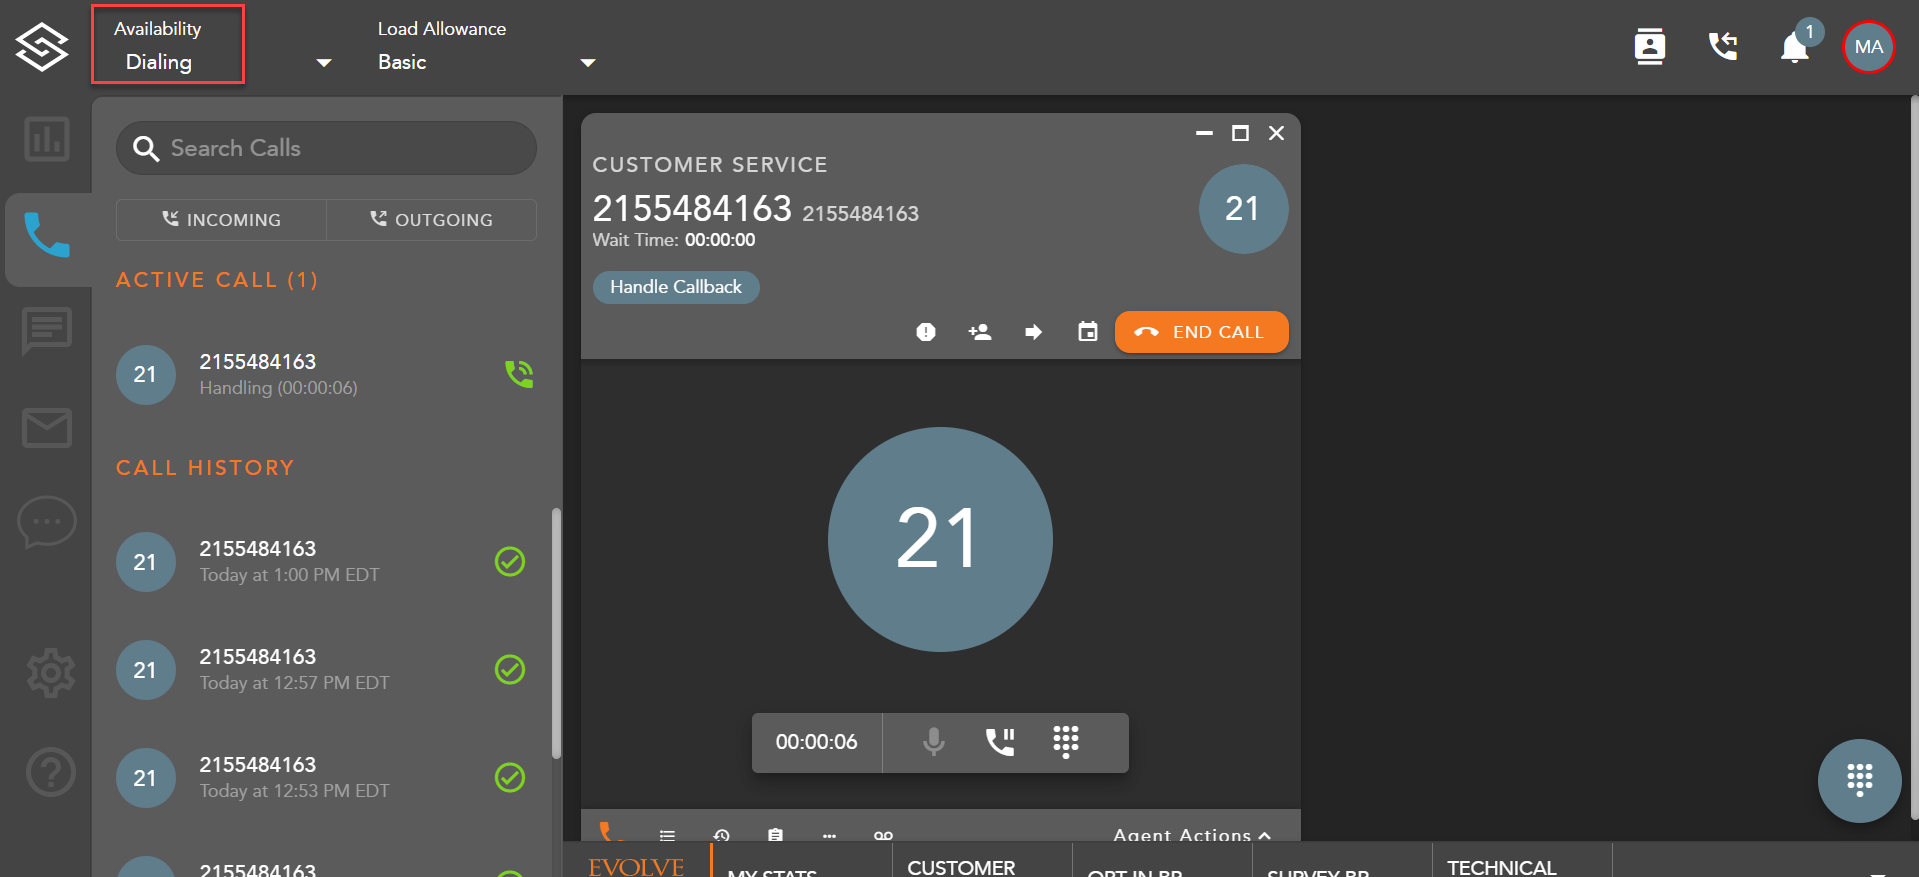
When the callback first presents to an agent, it will be in an Offered interaction state.
If usage of Preview state is configured in Supervisor under the Callback Timing tab, the interaction will update to Preview. During this time, the Agent can listen to a callback recording and/ or view a callback transcription. By clicking in the audio progress bar, the Agent can rewind or go fast forward.
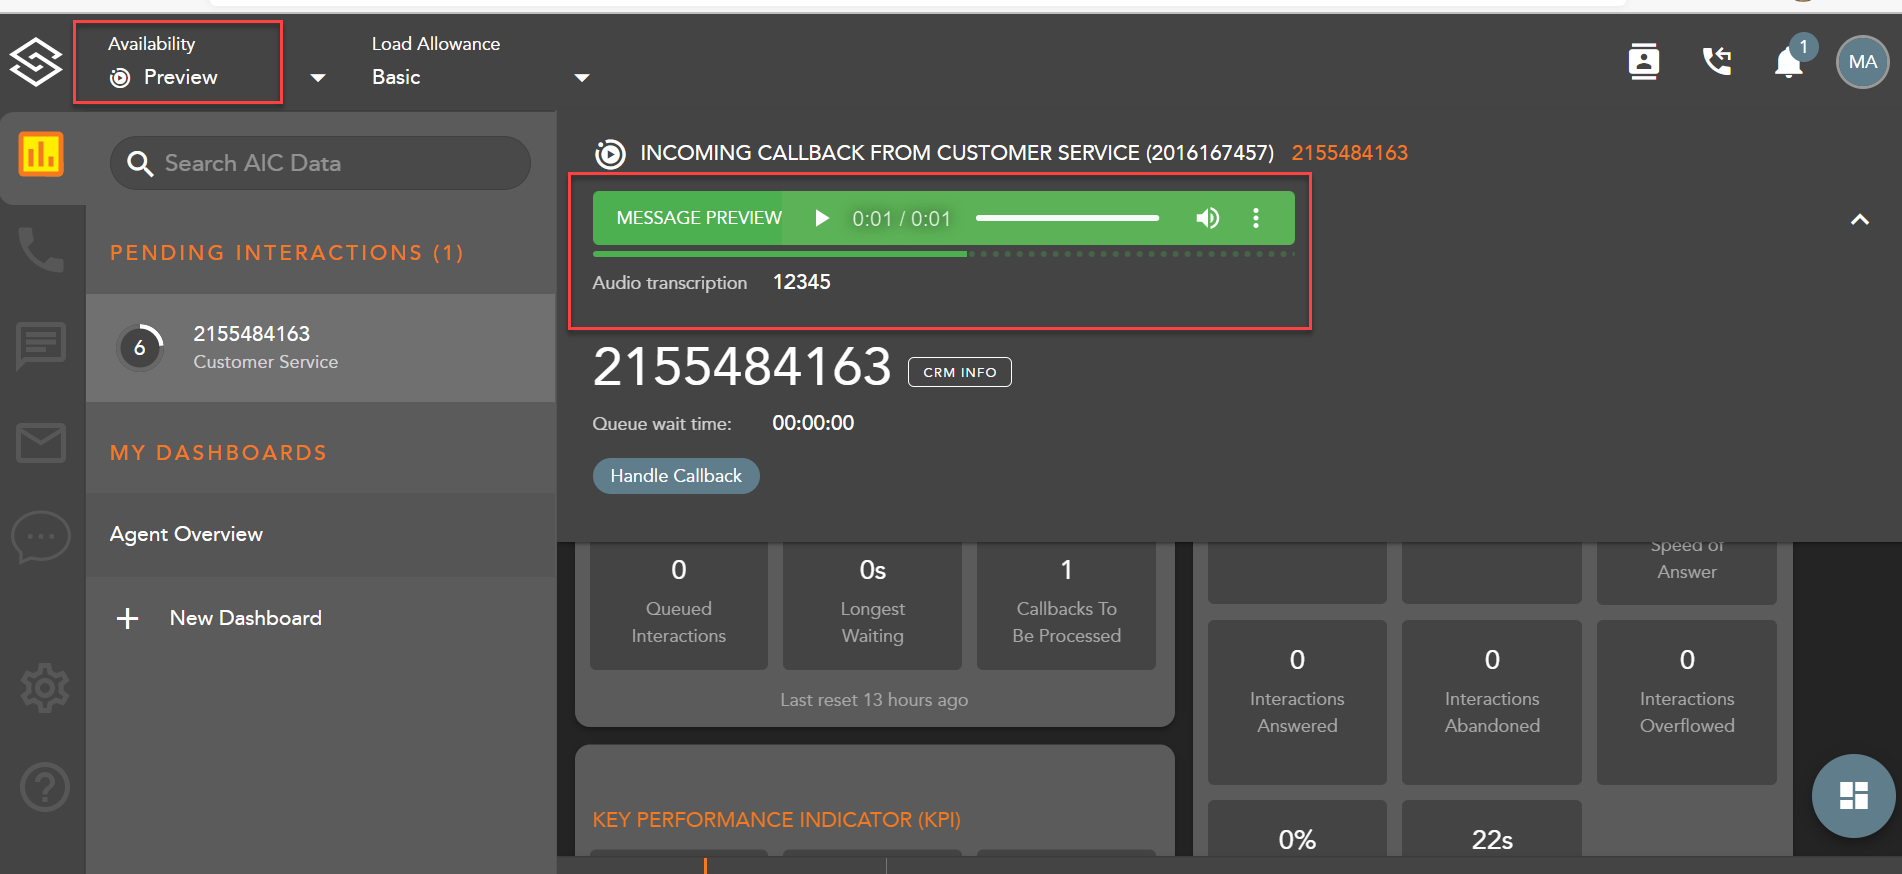
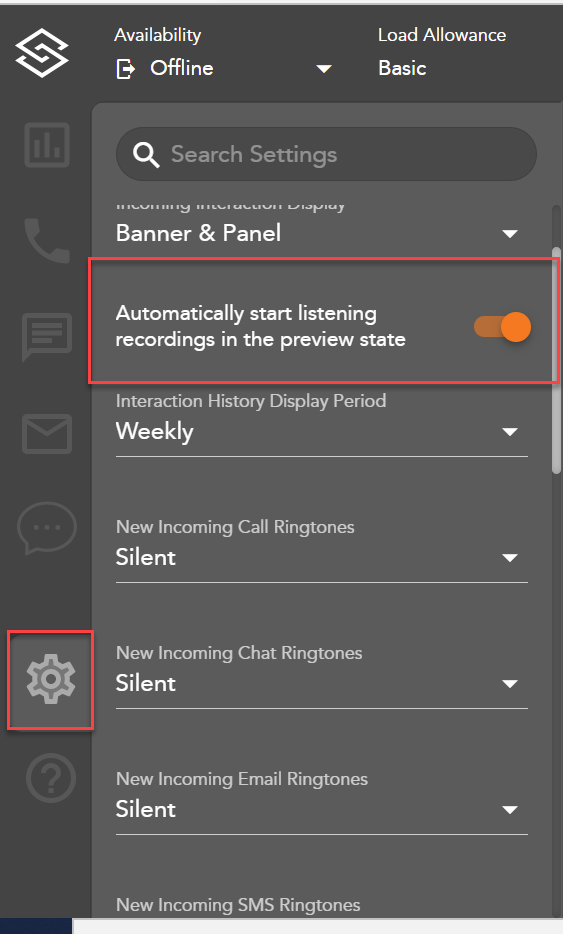
Agents have the option to configure settings so that callback recordings automatically start to play when the callback offer is accepted:
After the callback recording time has expired or the callback is accepted, the interaction state will update to Dialing. ECS will now begin dialing out to the requested callback number.
- The callback will dial for 60 seconds (this is configurable within supervisor: Item A Duration For No Answer)
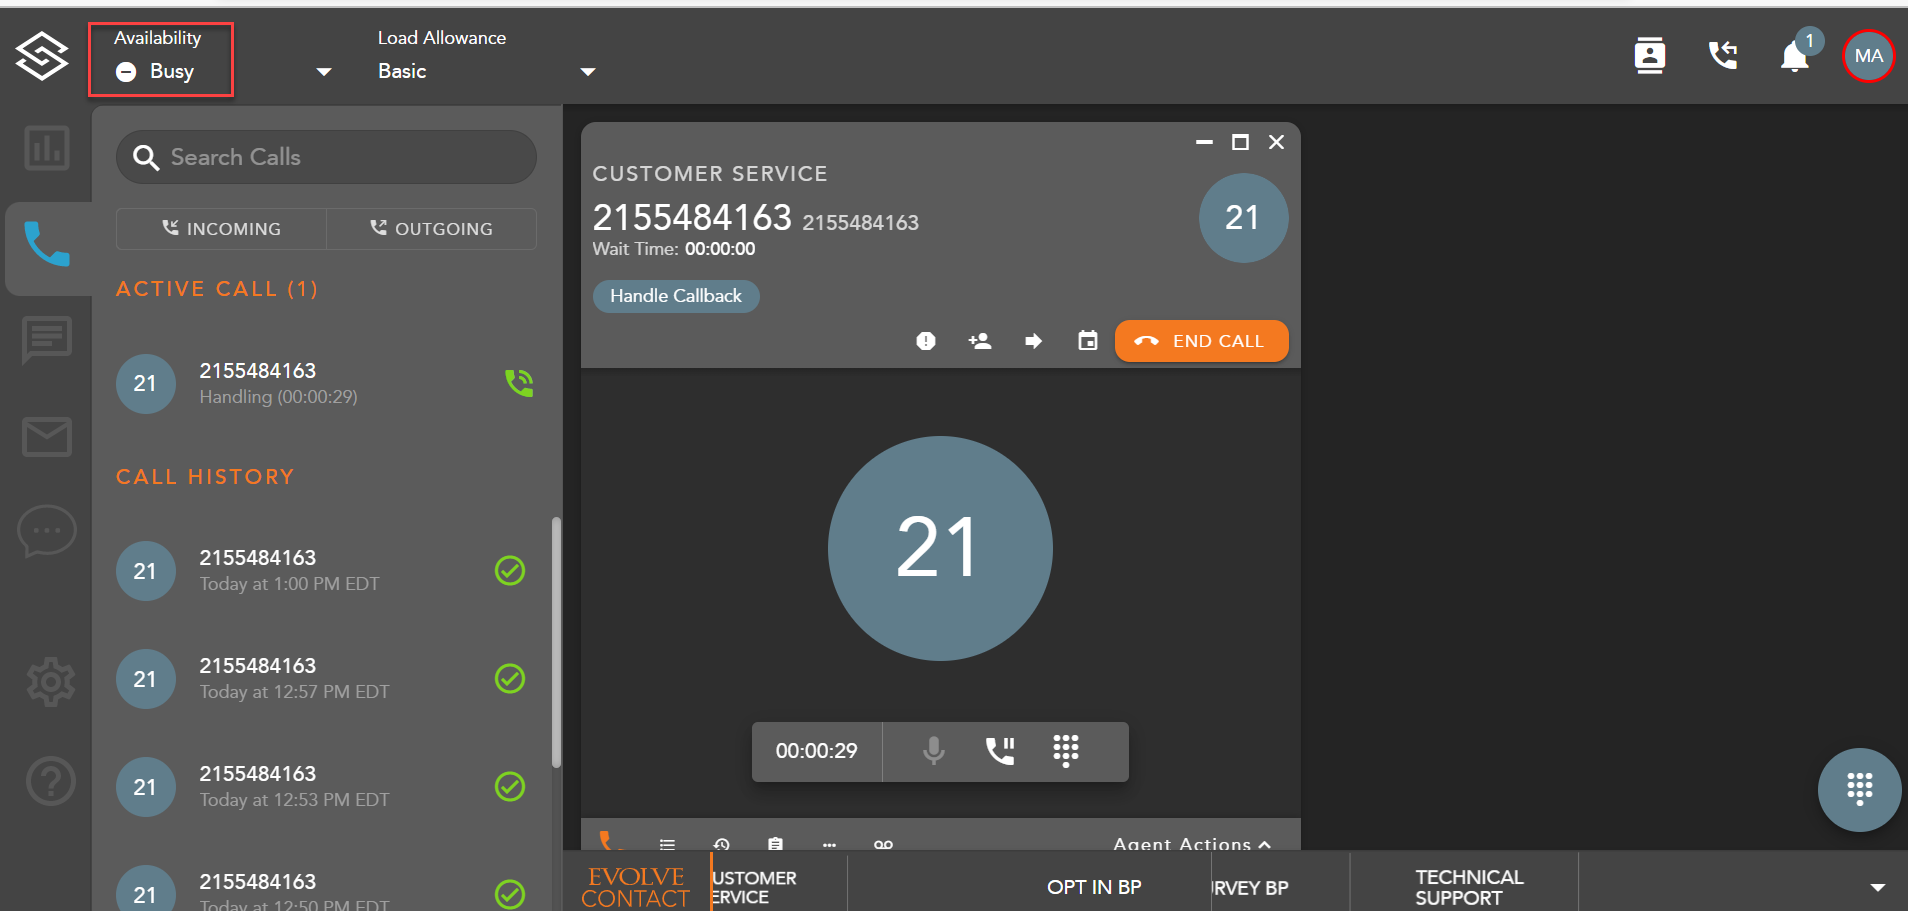
Note: If the Agent has other active interactions before the callback offer, the Agent state is displayed as "Busy".