Email Interaction Interface
|
|
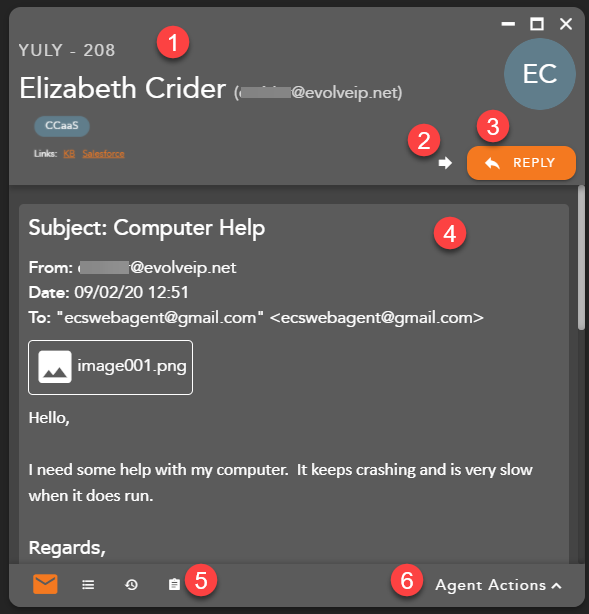
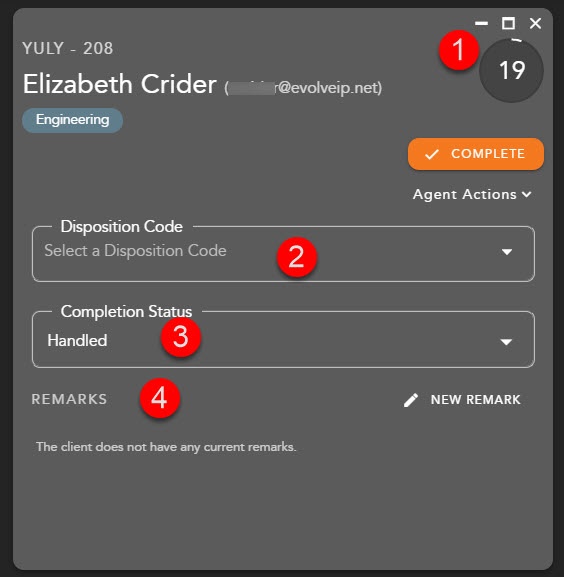
- Email Interaction Header - displays the following information:
- Originating Business Process
- Name and Email Address
- Demands
- External Links - hyperlink to open to a URL configured in the Setup client. The links can integrate with a CRM or internal knowledge base, which contains specific information about a customer or help documents. By clicking on a link, you will be redirected to the predefined URL, providing more detailed information on the person they are working with or help documentation.
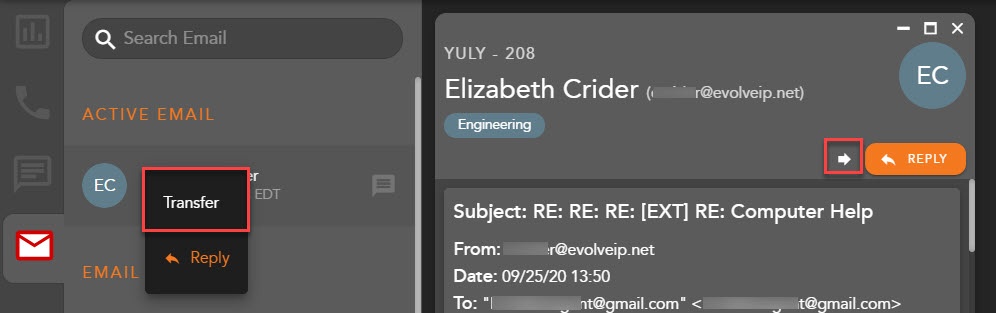
- Transfer - initiates a blind transfer to another Agent, Supervisor or BP.
- Reply - opens the email interaction to allow the agent to provide a response. Once an agent has opted to reply to an email interaction, they no longer have the ability to transfer the email to another agent, supervisor or business process. They must either cancel out the interaction without providing a response or reply to the email interaction.
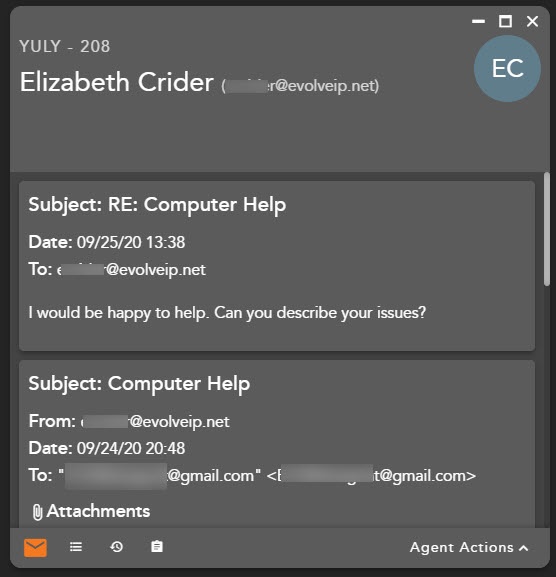
- Email Body - Will contain the Subject, From: Sender, Date, To: Email Destination, and body of the email
- Interaction Footer - contains the CRM information for the contact - Contacts, History and Notes/Remarks.
- Agent Actions - selecting agent actions will change the chat screen to show the following options:
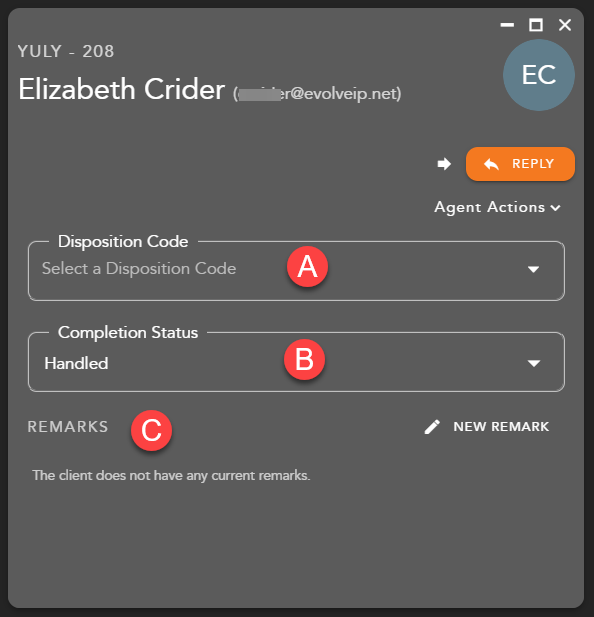
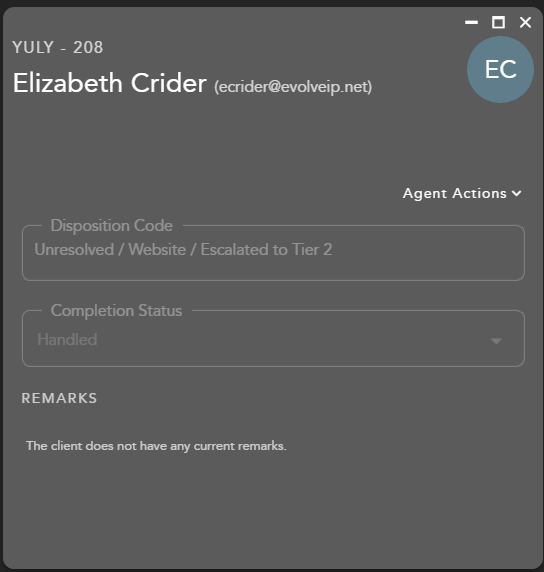
- Disposition Code - pre-defined code to indicate the outcome of the interaction. These codes are specific to the Business Process and can be customized for each Business Process.
- Completion Status - explanation as to why the interaction ended. A status may be selected during or after an interaction. The completion statuses available will depend on the type of interaction handled
- Remarks - custom remarks relevant to the interaction and customer. Remarks are saved and available for review on the next interaction the customer has with the contact center and can be found in the CRM panel under Notes and Remarks
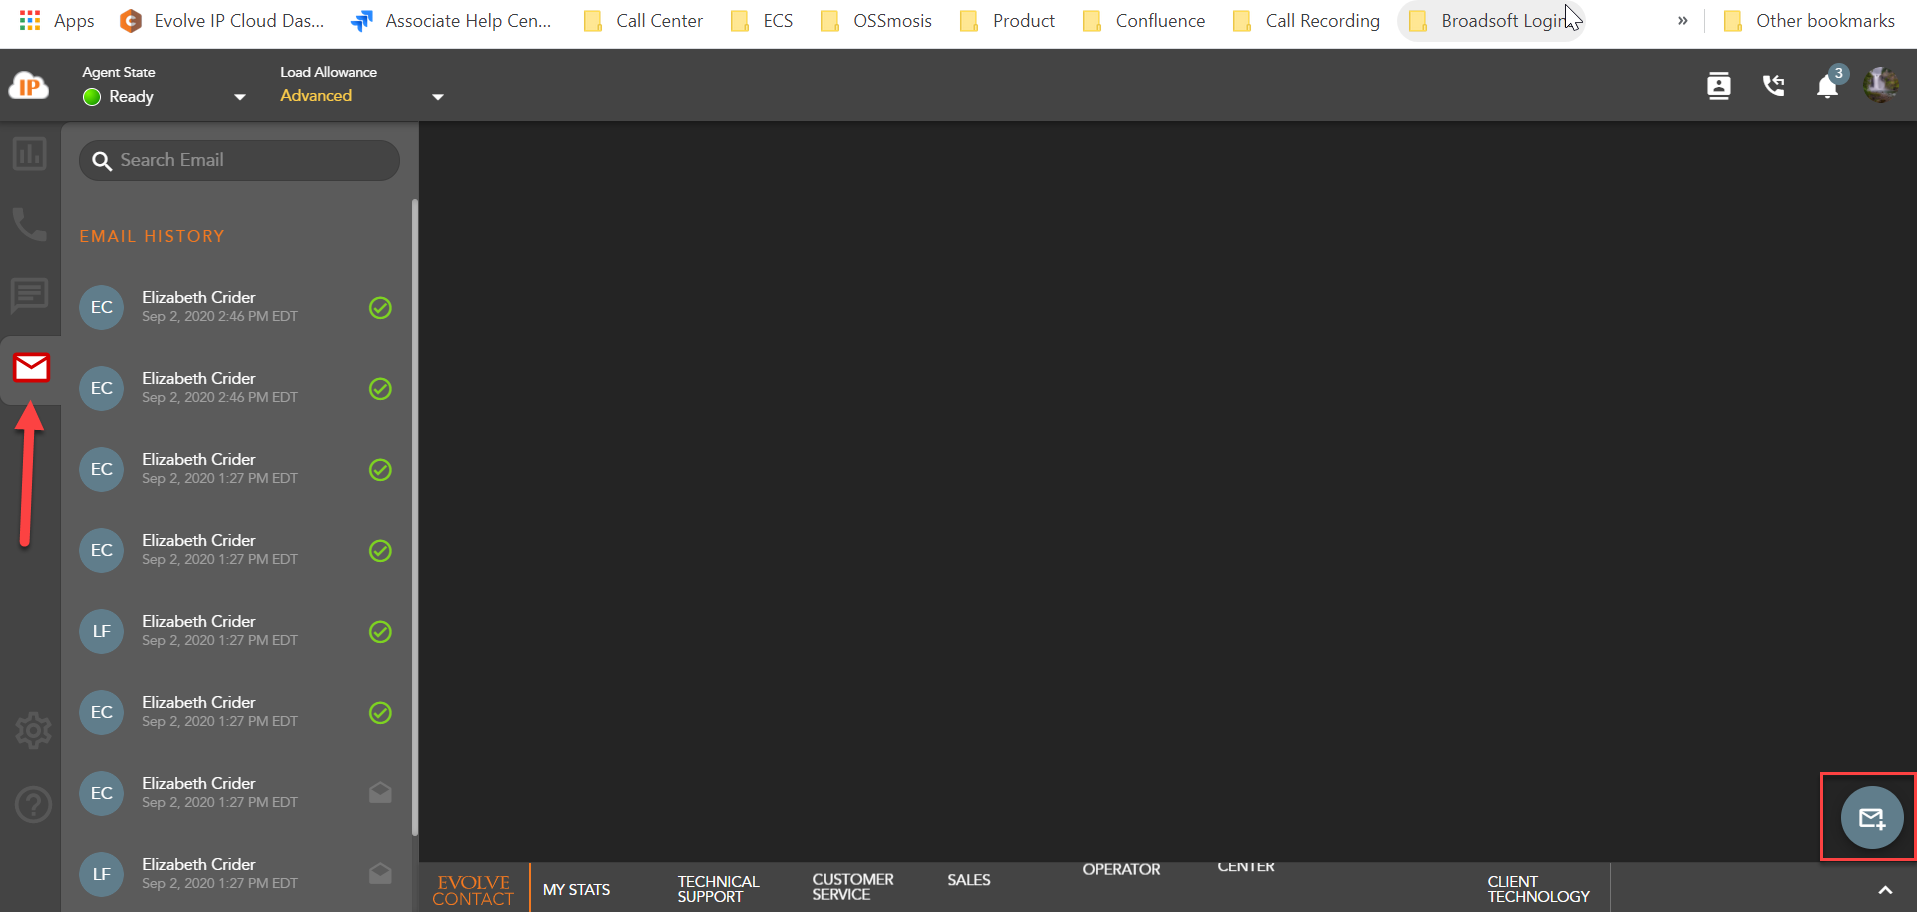
Email Panel
The email panel displays your:
- Pending Interactions
- Active Chats
- Chat History
Pending Email Interactions
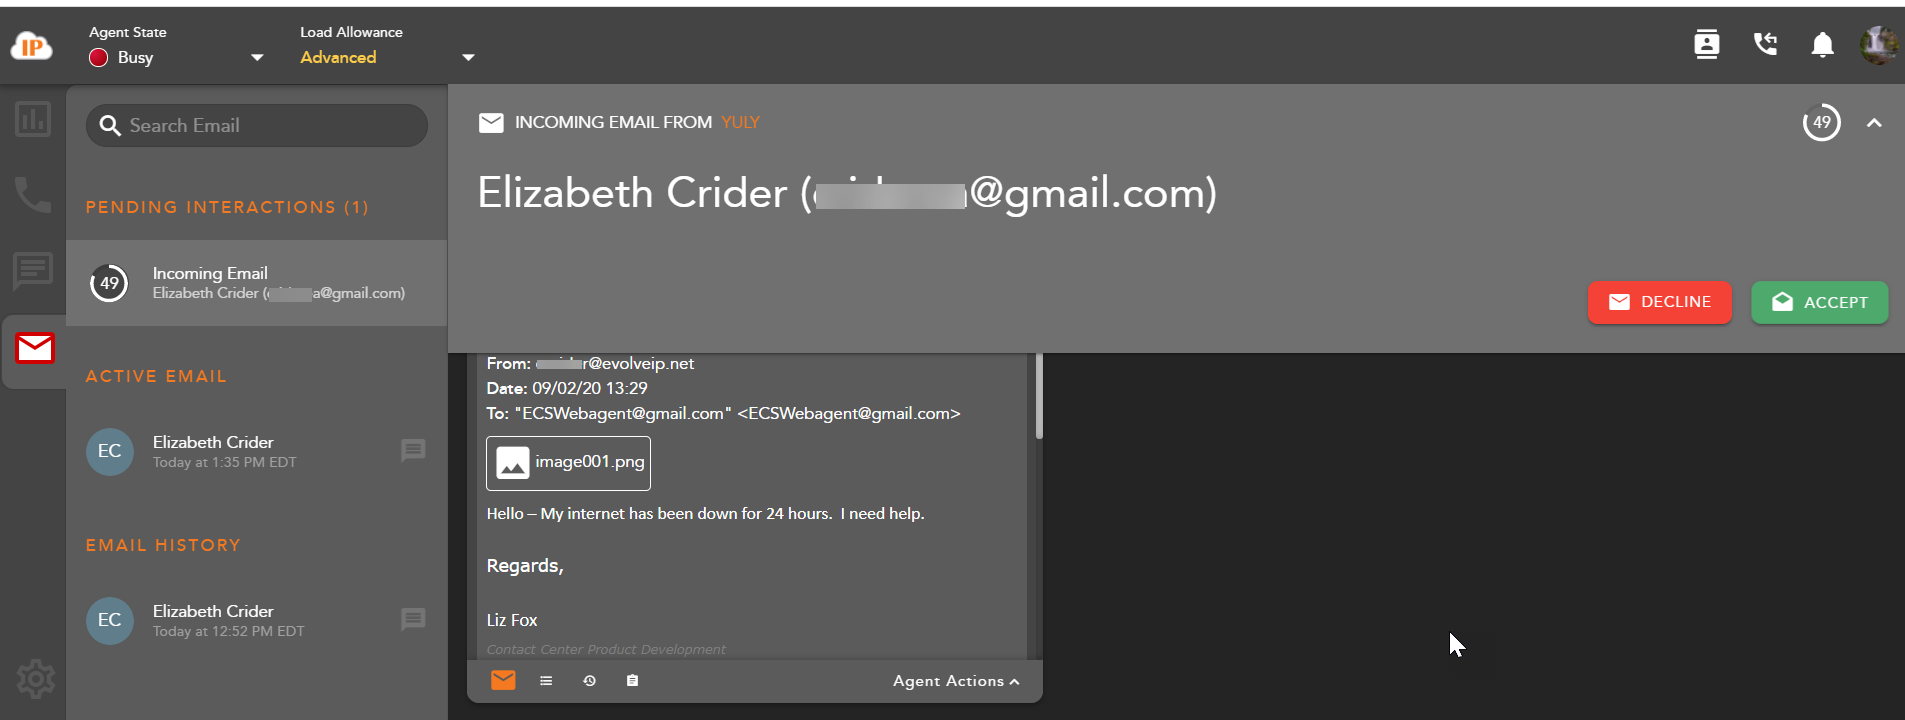
Within settings, agents can choose how they wish to display their incoming interactions: Banner & Panel, Banner only, or Panel only. If Banner & Panel or Panel is chosen, any incoming pending interaction will show up in the Email panel. It will provide the No Answer Time Out countdown, Interaction Type and Originating BP, Name and Email address. If the agent chooses to only display incoming interactions through the Banner, the interaction panel will not display pending interactions.
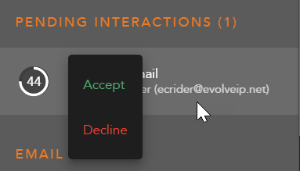
From the panel, by right clicking on the pending email interaction, the agent can accept or decline the interaction:
Active Emails
The Active Email session displays all active Email interactions. Each active Email will display the name of the contact and the date and time the interaction was received.
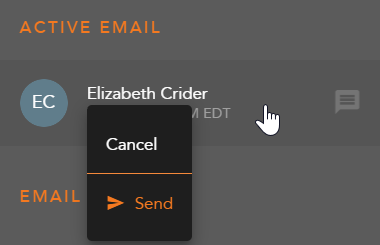
By right clicking on an active email within the panel, you will have interaction control to Transfer/Reply or Cancel/Send an email. If an agent chooses to reply to an email, the interaction controls will change to cancel or send a reply to the email interaction.
|
|
|---|

Email History
Email history will show all recent historical email interactions, including the customer name, date and time the interaction was handled.
Double clicking on an interaction will open the historical interaction and display the email history, completion status and disposition code applied to the interaction.
|
|
Interacting with an Email Interaction
Accepting a Email Interaction

When a new email interaction is being offered to an agent the following information will be present for review before accepting the interaction:
- The Interaction Type and Originating Business Process
- Name and Email Address
- Interaction Handling Remarks and Demands - prepopulated through the Interaction Handling Flow configured in the Setup client. If no remarks are present for the interaction this field will not be visible on the interaction. Specific demands assigned to the interaction via the handling flow and utilized to assign the interaction to the appropriate agent
- No Answer Time Out - preconfigured in the Setup Client. If the interaction is not answered within this timer, you will be put into a No Answer State.
- Decline or Accept - Accept or Decline the incoming interaction
To accept and reply to the incoming email, select the  icon
icon
To decline the interaction and send the interaction back to queue, select the  icon. Note, if you are the only ready agent in the BP, the interaction will continue to present itself until accepted or another agent becomes ready.
Replying to an Email
Once an email interaction has been accepted, the agent will have a chance to preview the email before deciding if they can provide a reply. If the agent wishes to reply to the email, the agent can select Reply in the email interaction of right click on the active email interaction in the App Side bar and select Reply.
Once the agent has selected Reply, the email interaction window will update to allow the agent to send a response. Within the new window the agent will have the ability to:
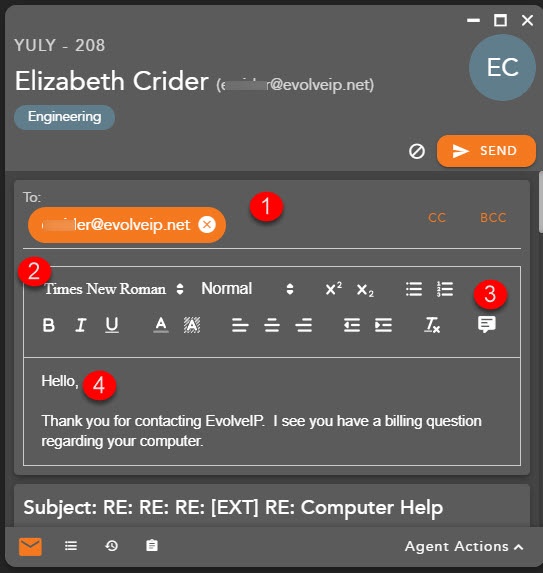
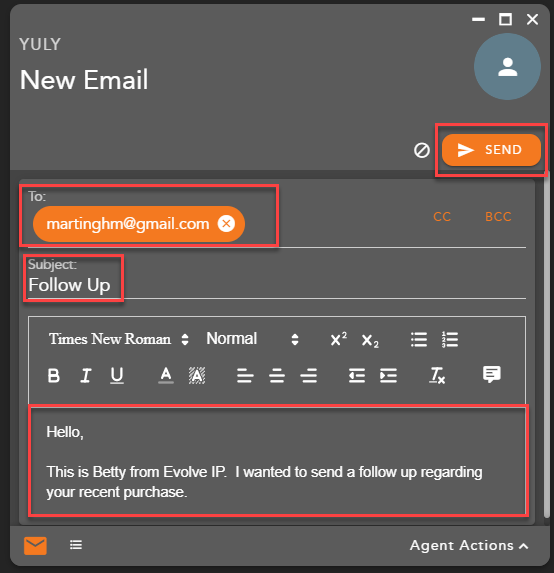
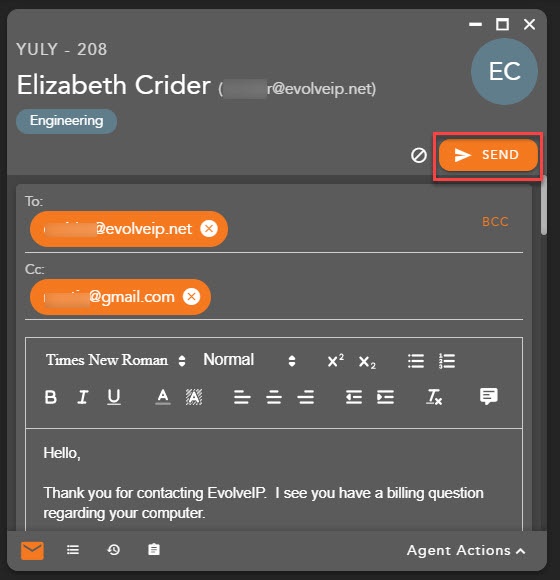
- To/CC/BCC - Add additional email addresses to be included in the agents reply. The Agent can add additional email addresses to the To field or select the CC or BCC fields.
- Stylize Options - stylize the email from the following options:
- Font
- Font Size
- Bullets/Numbers
- Bold/Italics/Underline
- Font Color
- Shading
- Font Placement
- Canned Responses - pre-configured email responses
- Email Body - email response window, where the agent will type in the response to the email interaction
Once the agent has entered in the response and is ready to send, select Send in the interaction window.
A confirmation message will appear when the email was successfully sent. To complete the interaction, select a disposition code (if mandatory), a remark for the contact if needed, followed by Complete. Completing the interaction will end the interaction, moving the email to historical interaction in the App Side bar and changing the agent state to Ready to handle another interaction.
|
|
|---|
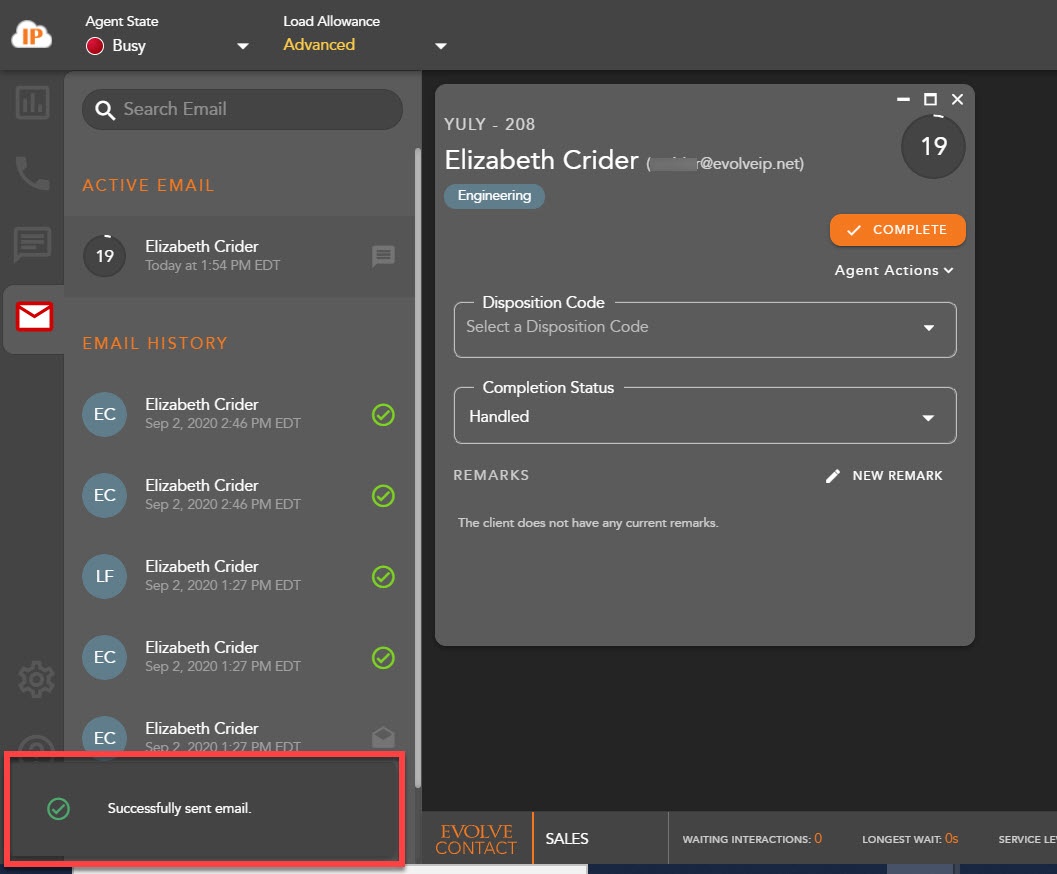

Completing an Interaction
Once an agent has sent a reply to the email interaction, the agent will automatically be put in a wrap-up state if pre-configured in the Setup Client. If no wrap-up has been configured, you will automatically be put back into a Ready state.
If Wrap-up has been configured, the following options will be available to complete the interaction:
- Wrap-up Timer - counts down the amount of time left in wrap-up
- Disposition Code - apply a disposition code to the interaction. If no disposition codes have been configured for the originating BP this option will not be available. By default, your three most used disposition codes for the originating BP will be at the top of the disposition drop down, followed by all disposition code categories and subcategories. If the disposition code is mandatory, that option will appear in red. You must select a disposition code before you can complete the interaction

- If the disposition code is mandatory, that option will appear in red. You must select a disposition code before you can complete the interaction
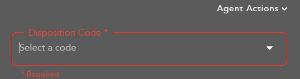
- If the disposition code is mandatory, that option will appear in red. You must select a disposition code before you can complete the interaction
- Completion Status - end result of the interaction. The completion statuses available will depend on the type of interaction handled.
- Handled - default value for completed interactions. The interaction was completed and handled.
- Delegate to Supervisor - this option is only available if enabled for agents in the Setup Client. Once a call has ended, agents can delegate a call to a Supervisor with remarks attached providing an explanation as to why the interaction has been delegated to a supervisor
- Remarks - custom remarks relevant to the interaction and customer. Remarks are saved and available for review on the next interaction the customer has with the contact center and can be found in the CRM panel under Notes and Remarks.
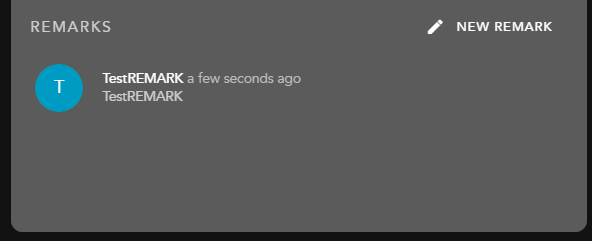
- To add a new remark to the interaction select
 . Once selected the remarks field will open to add a new remark.
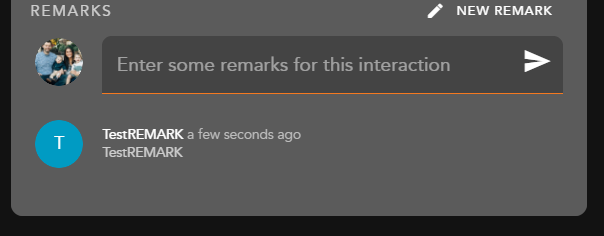
- To add a new remark to the interaction select
Transferring an Email
An email interaction can only be blind transferred (consulted transfer is not possible with email interactions) if the agent has not opted in to replying to the email. If the agent has already selected to send a response, they can no longer transfer the email interaction.
Once the email interaction has been accepted, to transfer the interaction to another Agent, BP, Supervisor or Channel, select the Transfer Icon within the email window or right click on the active interaction in the Apps Side Bar.
The Transfer window will open and by default the agents favorites will be expanded.
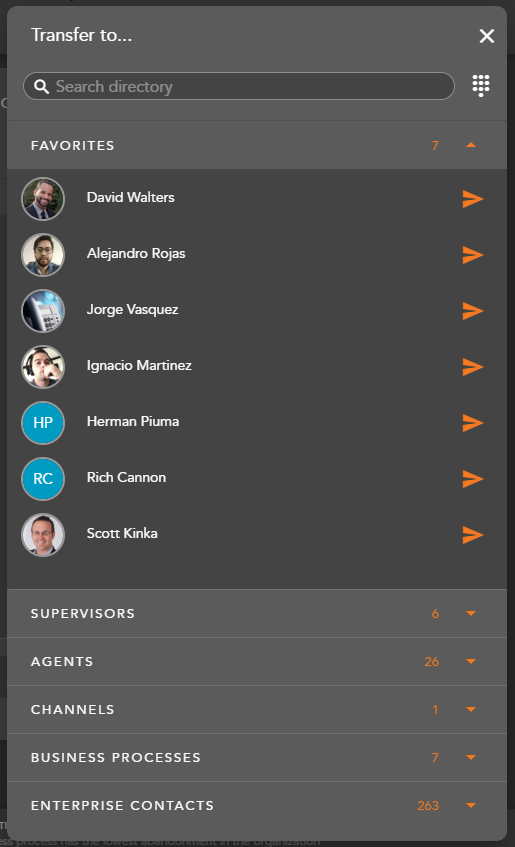
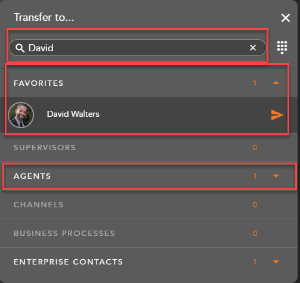
Within the search bar type the name of the Agent, BP or Channel you wish to transfer the interaction. As you begin to type, the window will filter each category and make available only the contacts that match your search criteria.
Select the transfer arrow to complete the blind transfer. 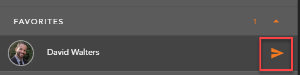
Once the transfer has been initiated, the interaction will disappear and you will receive a successful transfer message 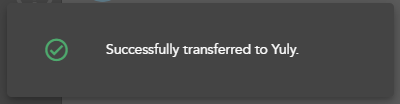
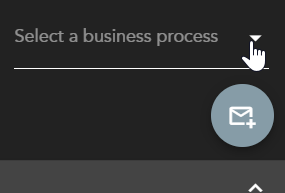
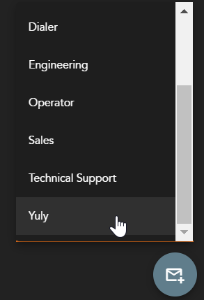
Initializing a New Email Interaction
To initialize a new outgoing email interaction, first select the email tab on the Apps Side Bar, followed by the create new email button on the bottom right hand corner of the agent screen
The agent will be prompted to select the outgoing Business Process to send the email interaction from.
|
|
|---|
Once a BP has been selected a new email interaction will open.
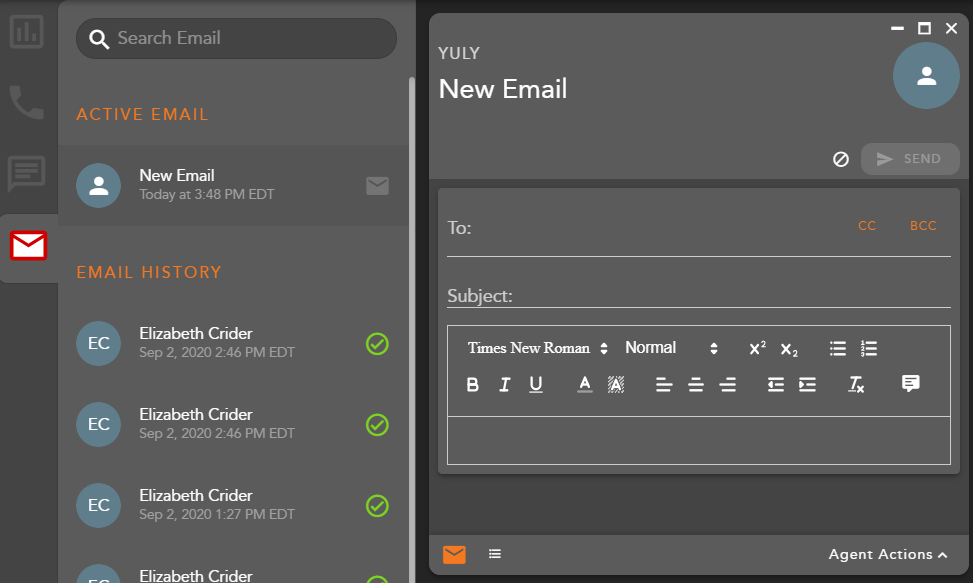
Enter in the appropriate recipient email addresses into the To/CC/BCC fields, Subject and fill in the email body. Once these three required fields have been added, the agent will be able to send the email.